So what happens when you have a white or translucent product to sell? Do you know how to photograph that product on a white background without losing detail in the image or exposing it incorrectly? White on white photography probably seems like a daunting, if not impossible, task. However, while there is a certain learning curve to the technique, shaping light and problem-solving can be fun!
Note: if your problem is reflections, read our guide on how to photograph reflective products.

1. White-on-White Camera Settings
Before you get started, don’t forget the basics. Properly set your white balance according to your light source or shooting environment. Without this important step, your white product will have a case of the blues or oranges. Likewise, without setting your ISO to 100 or 200 and utilizing a tripod, your images will likely appear grainy. Make sure that your manual camera settings suit your product. For example, shooting at f/16 will provide excellent detail with most—if not all—of a product in focus, but you might also want to use a wider aperture for a softer effect.
Properly set your white balance according to your light source or shooting environment.
2. White-on-White Photo Studio Setup
You can use foam core board to create a reflective box around the product that will light it evenly for white-on-white photography.
The first and most obvious problem to tackle is this: how does one create separation between the white product and the white background? If you light a white product as you would any other colored product, you will most likely lose important detail.
Start by finding a flat table or other elevated surface to place the product upon. Next, you will need to find a white reflective surface to place beneath and behind the subject. You have a few choices in this; you can use white seamless paper, white foam core board, or white plexiglass, depending on whether you want to see the product’s reflection or not. We recommend using white foam core board because it is inexpensive and easily maneuverable. For more information, please refer to our DIY photo studio setup guide.
At the very least, you will need two pieces: with this setup, you should set the product on top of one board and prop another board behind the product, lining up the edges of both pieces. However, it is actually better to use four or five boards so that the product is completely surrounded except for the “window” through which the camera shoots and the light shines. Sizing is not particularly important—just buy boards that will leave enough white space around the product for cropping.
Once this part is done, you will begin molding light around the product to create clear separation between the product, the white surface, and the background.
3. White-on-White Photography Lighting
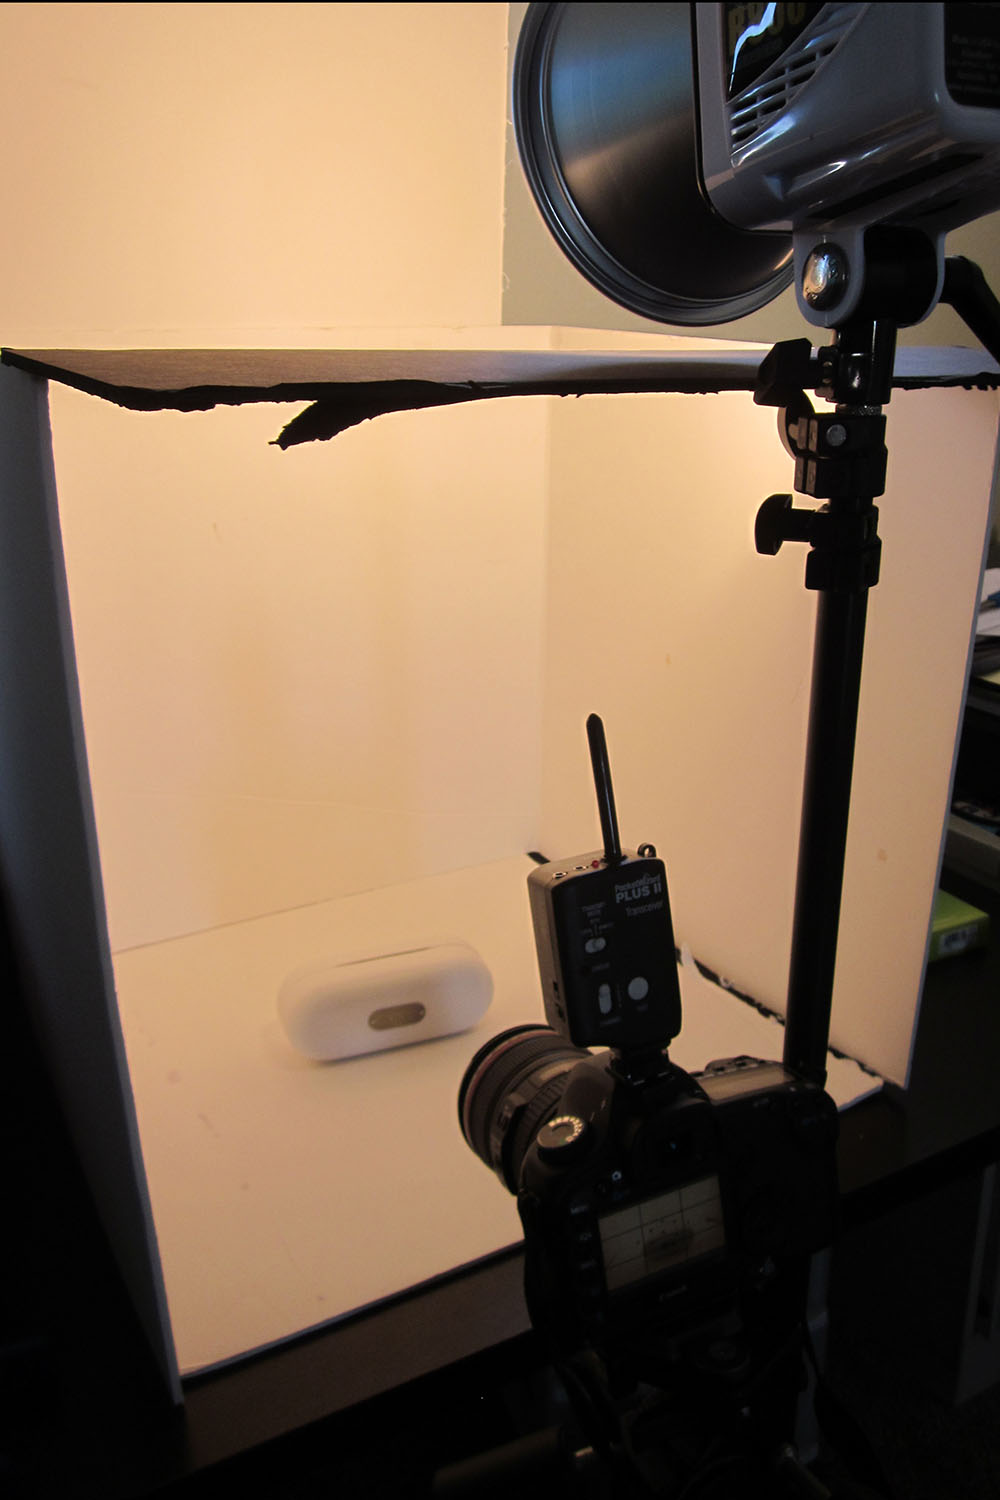
Zoom out of previously pictured white-on-white photography setup.
The skill with which you manipulate light will determine the quality of your white-on-white product photos. By shaping light, you will be able to differentiate the white product from the white foam board, as well as create depth in the image to show the unique shape and texture of the item. Whether you use continuous or strobe lights, remember that the broader the light cast is the better to avoid vignetting. You can read our shopper's guide to product photography lighting equipment and our guide to apparel photography lighting setups for more information.
Rather than lighting the product directly as you would any other product, you should utilize indirect light to create shadows—and with shadows, definition. Position your light source slightly behind and above your camera, as shown above. Next, move the product away from the background and closer to the camera until the product almost falls into shadow, and take a test shot to see where you stand.
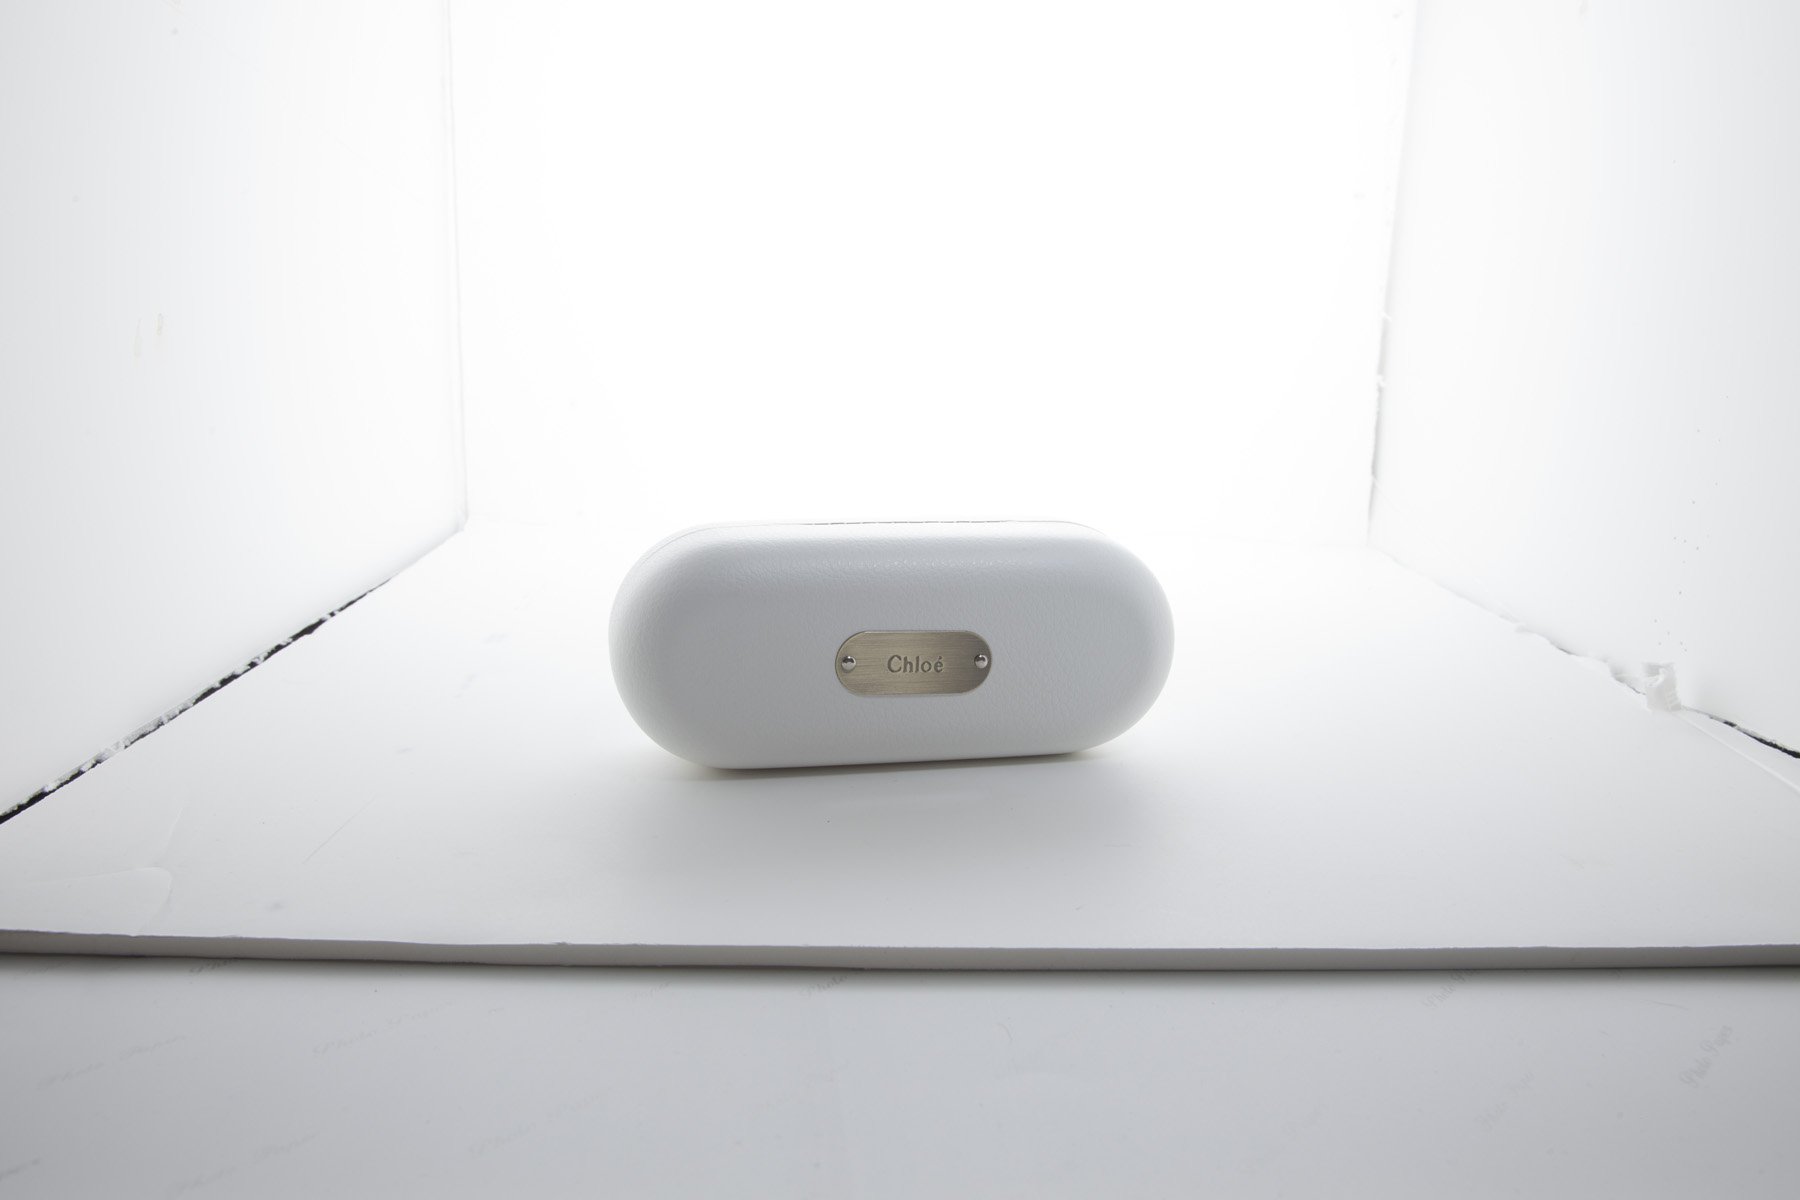
Use your test image as a reference point for further lighting adjustments. The goal is to make the background appear as white as possible while not letting in so much light that the edges of your product are lost. Most likely your test shot will look a lot like the image below, with the product just a little too dark.
This white on white photo has good separation between the background and the product, but the product is too dark.
There are a number of different ways to fix this problem, including adding additional lighting. However, if you don’t want the hassle of trying to be super technical with distance, power, and specific light source metering, then adding more foam core or white fill cards will work perfectly and provide you with more control. White fill cards and foam board are especially useful because you can easily move them around and watch the light on the object change. This will help you to decide where to place the card to create the illumination and depth that you want.
Try moving the card or board to the side of the product and taking a test shot, as shown below. You will see that this extra reflected light allows for shadowy depth while also illuminating the product better than before.
Notice that the white product’s exposure is improving and the white background is gaining more light as well.
Depending on the intensity of your light source(s), you may need to move the board or card further away from the product to create your desired light fill and exposure. However, as you can see in our photo above, our product is still underexposed and is not showing much detail. This is an easy problem to solve. We have positioned our foam board on the product’s left side. Now, all we need to do is use the same process to add light fill to the other side of the product. Add a foam board or fill card to the other side of the product, moving it closer to the product for less shadows or farther from the product to create more shadows.
Adjust the lighting to your preferences, keeping in mind these basic lighting principles: you don’t want to overexpose products and lose the texture and other details that make the product unique, and you also don’t want to underexpose products because that will also compromise detail and make the image unappealing. After you are finished with your adjustments, take another test shot.
Use indirect light to create shadows and definition.

The product is being filled on both the left and right sides—but the front is too dark.
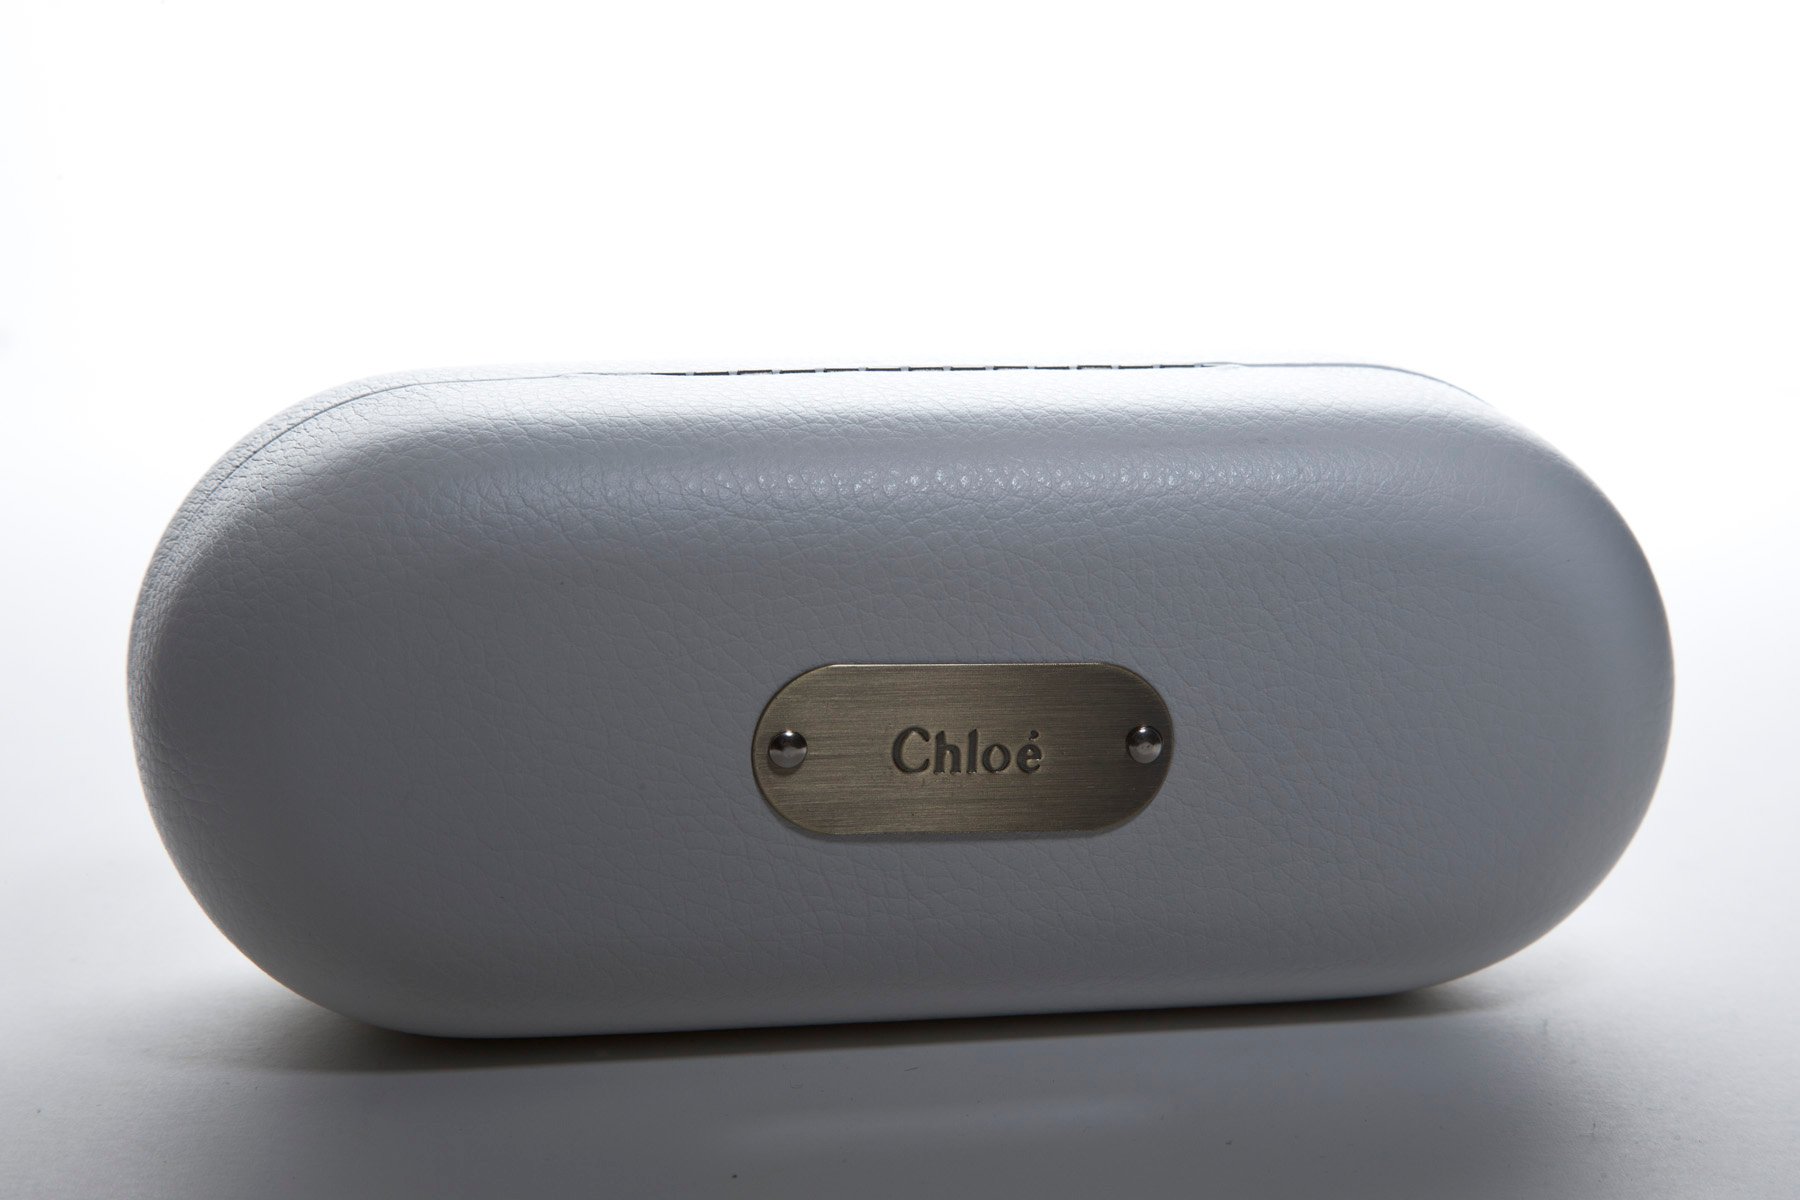
By this point, you may have a perfectly lit product image. However, if you notice that the front of the product is still a bit dark or has an unnatural color cast, then you can try adding one last step. Take a small strip of white foam core or white paper and place it below your camera lens, facing the product. When you do this, you will notice that the front of the product will lighten, as shown below.
The product is brighter, details are more noticeable, and the edges of the product are still visible. White on white success!
By this point, you have created a white box around the product. You may have seen or heard of using a “product box” or “product tent” to create similar imagery. Product photography lightboxes and tents do work, but rather than bouncing light off of foam core to illuminate the product as we have done, photographers using boxes or tents must utilize several lights in the whole setup. Then they have to spend a great deal more time adjusting the distances between lights and the product, tweaking lights’ power settings, and experimenting with light modifiers—all to achieve what we have accomplished with just one light and some foam board.
Whether you choose to use a product box or tent or prefer to use the foam core board method, either process can provide high quality white on white product images when both shooting and editing are done correctly.
It’s better to remove shadows than to flatten the image by adding more light.
4. White-on-White Photo Retouching
After you have perfected the lighting and captured your photos, it’s time to move into Photoshop or another type of editing software to remove the background of your images, if you so wish. Depending on how you chose to light your product, you will have bold or relatively soft shadows to deal with. It’s always better to remove shadows in post-production than to flatten the image in camera by adding more light. Masking the item can make this a very easy task.
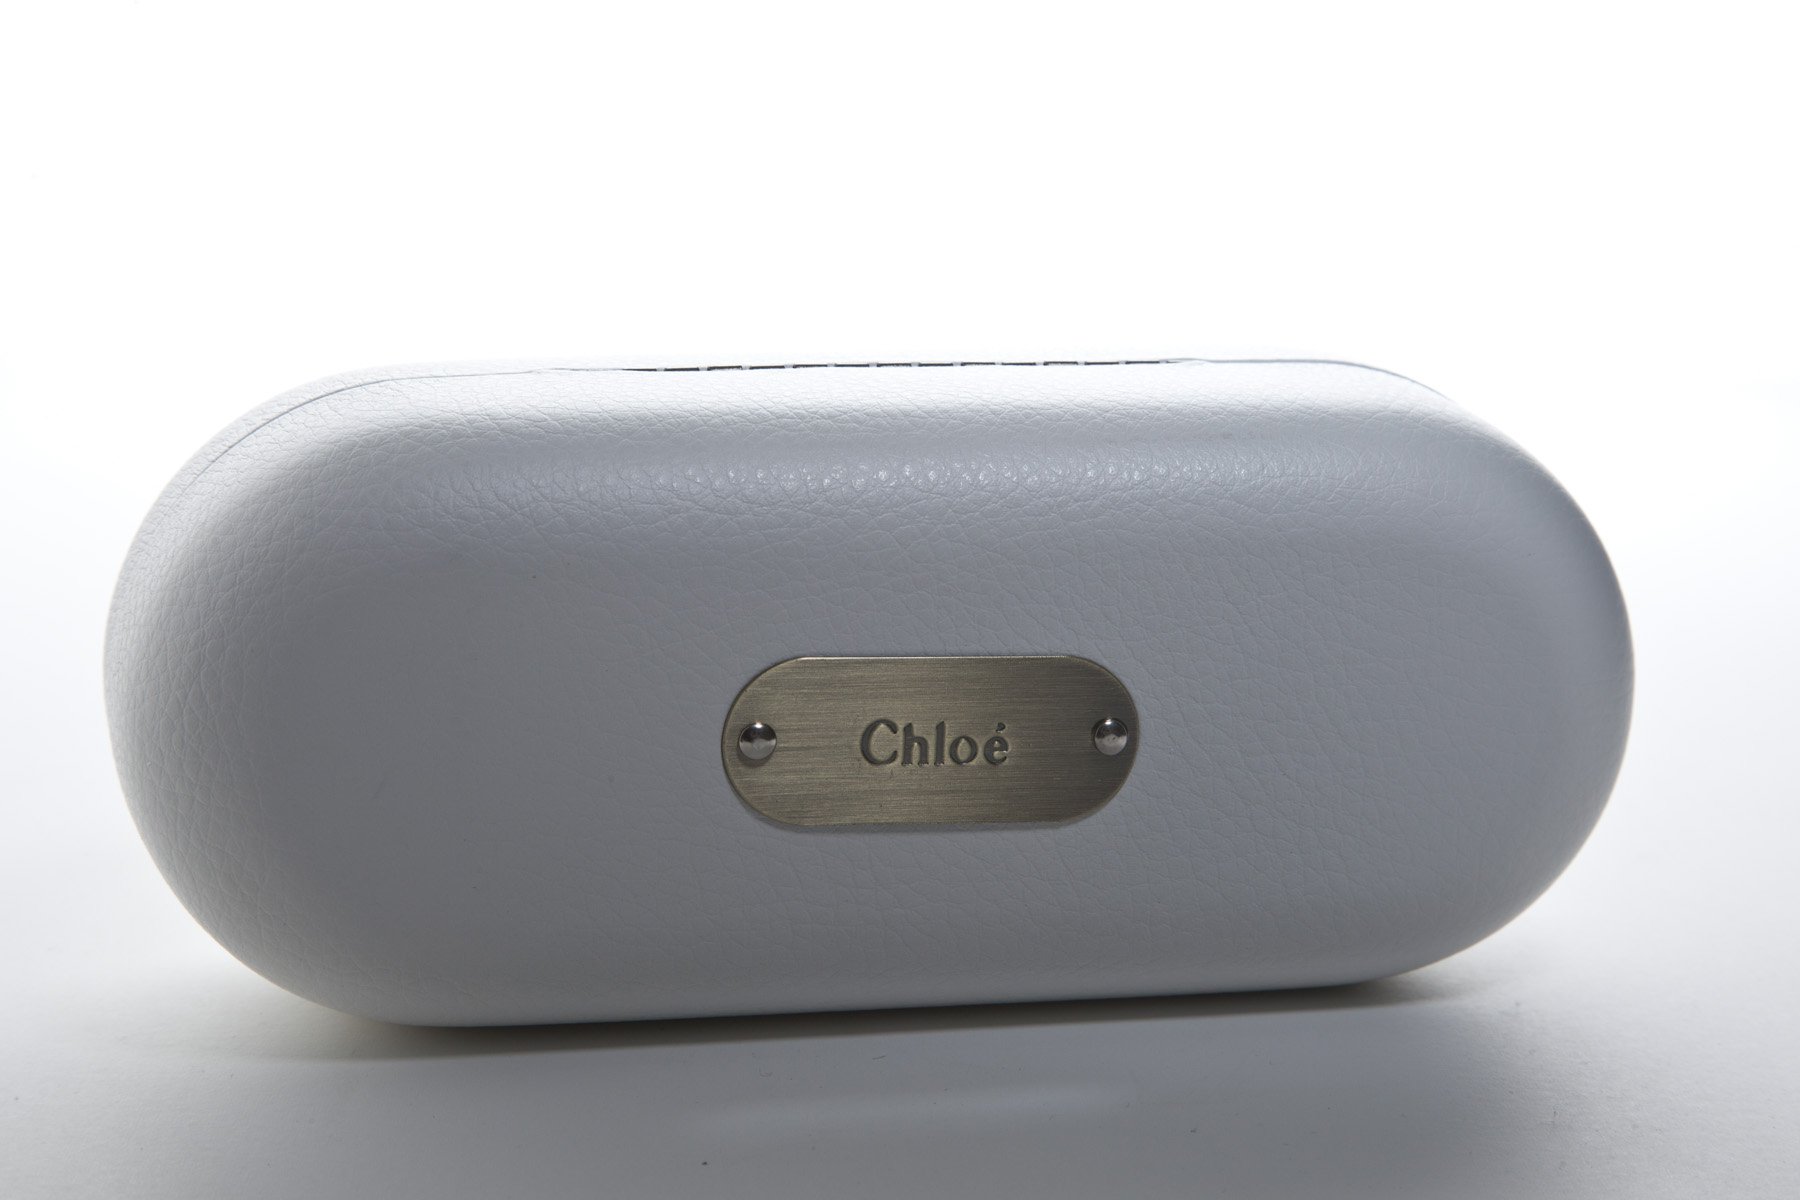
You may either choose to remove the background yourself or outsource background removal to a professional retouching company like Pixelz. Either way, your final images should look as polished and perfectly exposed as this:
Here is our final white on white product image, ready for the web.
The guidelines for shooting white on white are actually quite flexible. You will have to do some experimenting to achieve the particular look that you desire in your product photos, but the technique described in this tutorial will give you a good starting point. Once you become familiar with the materials and shooting process, photographing white products on white backgrounds will pose no problem for you and your team.
The important thing to remember is that the work will seem much less tedious if you learn to enjoy shaping and molding light. Spend some time getting to know how lighting works; even when you think you’ve mastered studio lighting, it may still surprise you!


