Master these 3 lighting setups to minimize reflections in glassy and metallic product photos.
Photographing clear or colored glass without glare
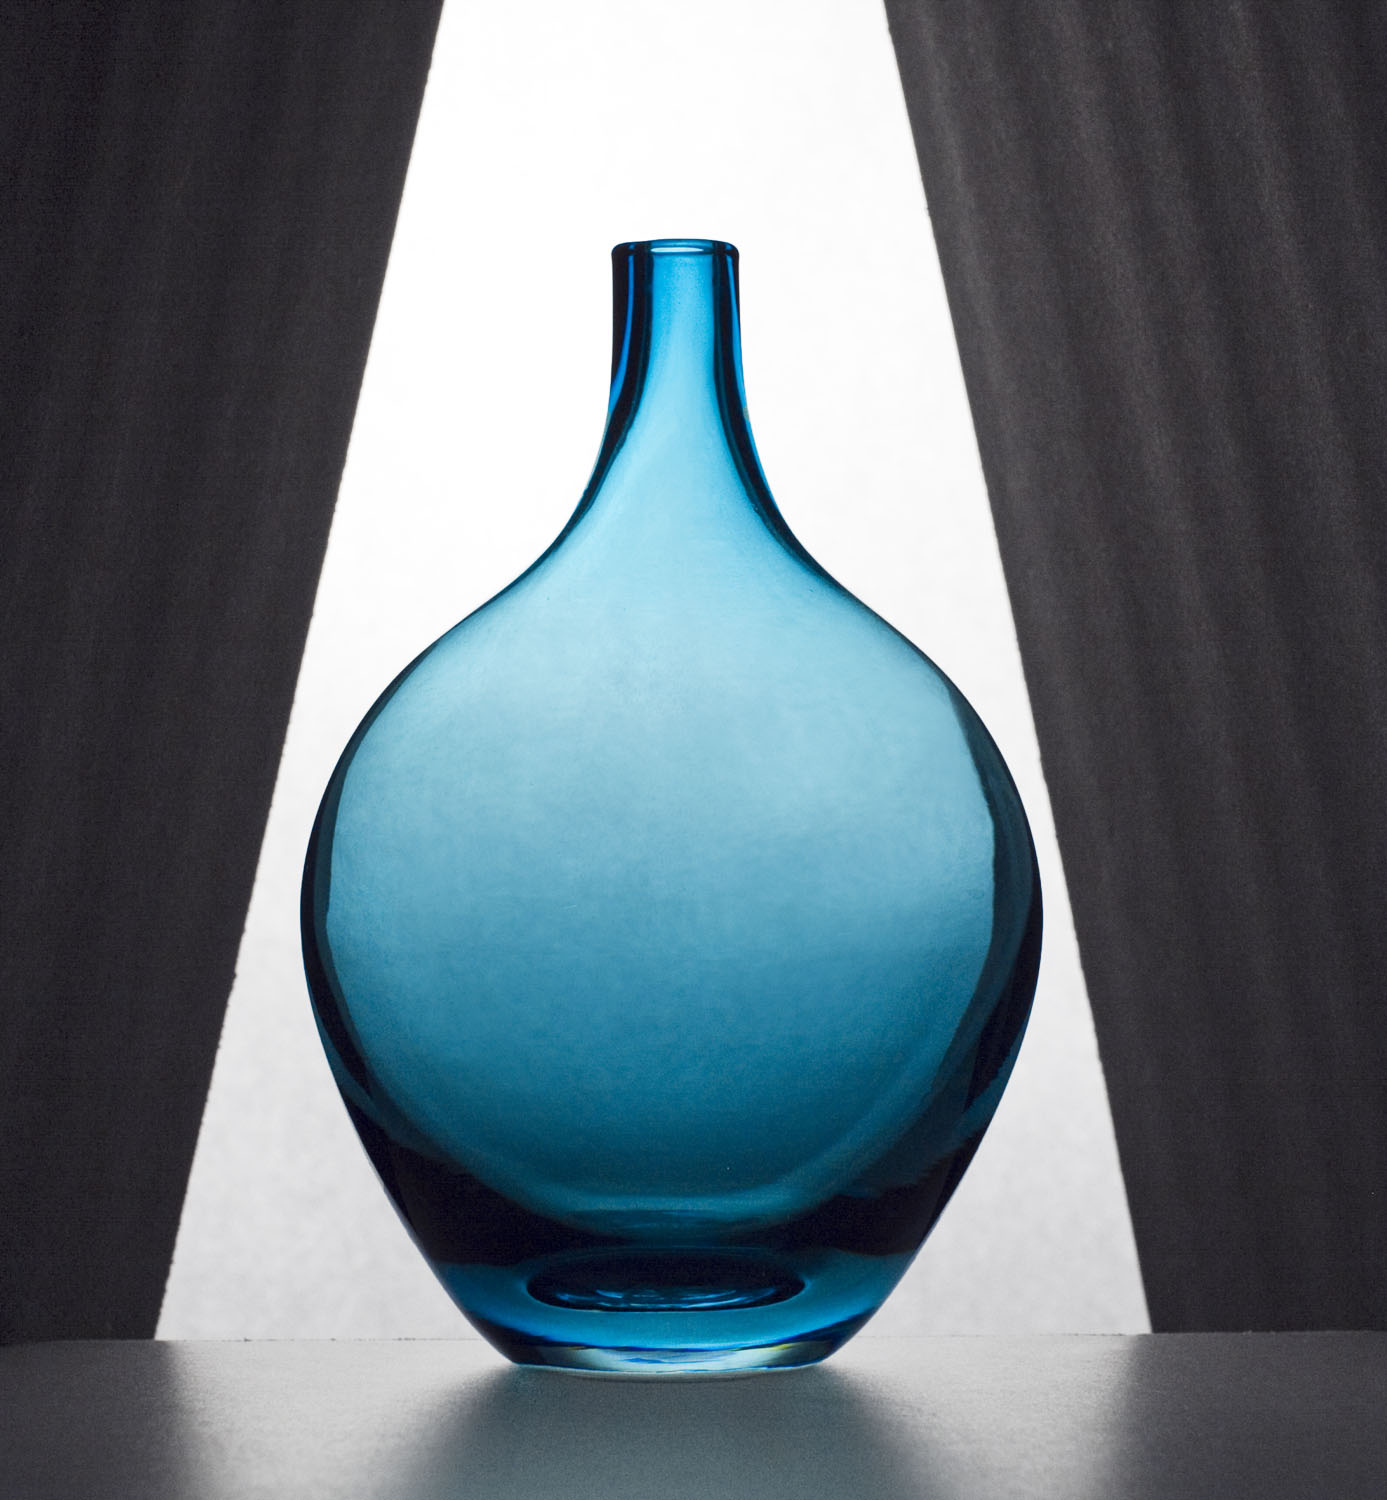
There are a few different ways to photograph glass, but the most flattering and visually-striking method is by lighting a glass product from behind.
This simple technique is called “backlighting” and it will flatter any glass product by taking advantage of glass’ translucency to give your product that pleasing “crystal-clear” appearance.
You can learn how to create a photo studio at home at a very low cost following our DIY Photo Studio Guide.

Step 1: Arranging your Setup
In order to create a backlighting setup, you will need a decently-sized shooting area, especially since you will be handling a fragile product. Do your best to safety-proof your studio by taping down light cords and make sure to use a sturdy table or platform to elevate your product in accordance with your light source. Position your light source behind the product so that the brightest area of light shines directly through the glass and emphasizes the natural outer lines and curves of each piece. If you have trouble leveling the light and the product, try lowering your light or elevating your product with a block. You can use continuous lighting or strobe lighting—either way is fine because you will be utilizing a tripod.
Next, you need to diffuse, or soften, the light source with an umbrella and/or several layers of rolled paper or thin white fabric. Position the white paper or fabric between the product and the light and supplement that by placing white foam board under the product and to both sides, as shown above.
The foam board will help to reflect light back onto the product and cause it to wrap around the subject softly. We suggest adding an additional piece of white paper or fabric on top of the setup in order to reflect light onto the subject from above as well.
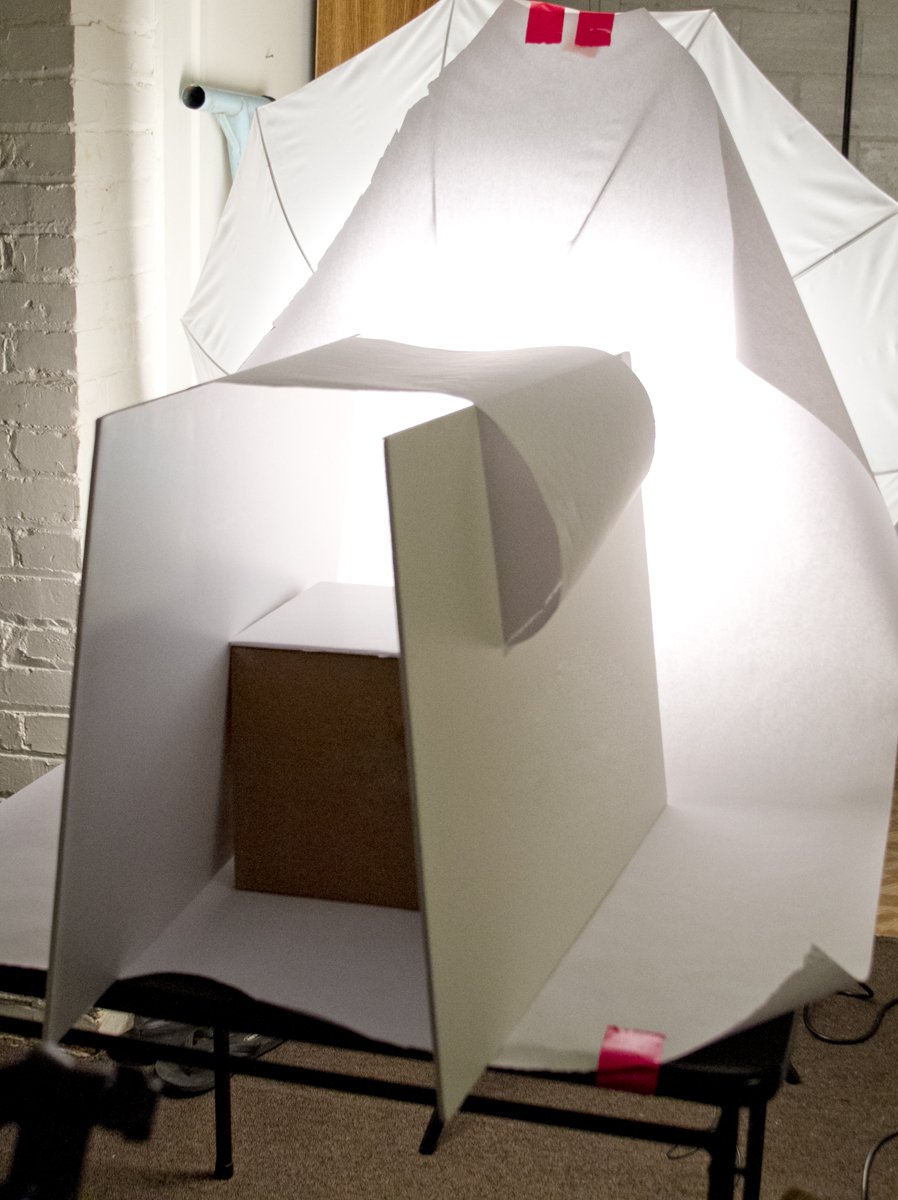
Think of this “box” lighting setup as trying to imitate soft window light—you want the light to wrap around your subject evenly without creating harsh “white spots” or distracting reflections.
The foam board will help to reflect light back onto the product.
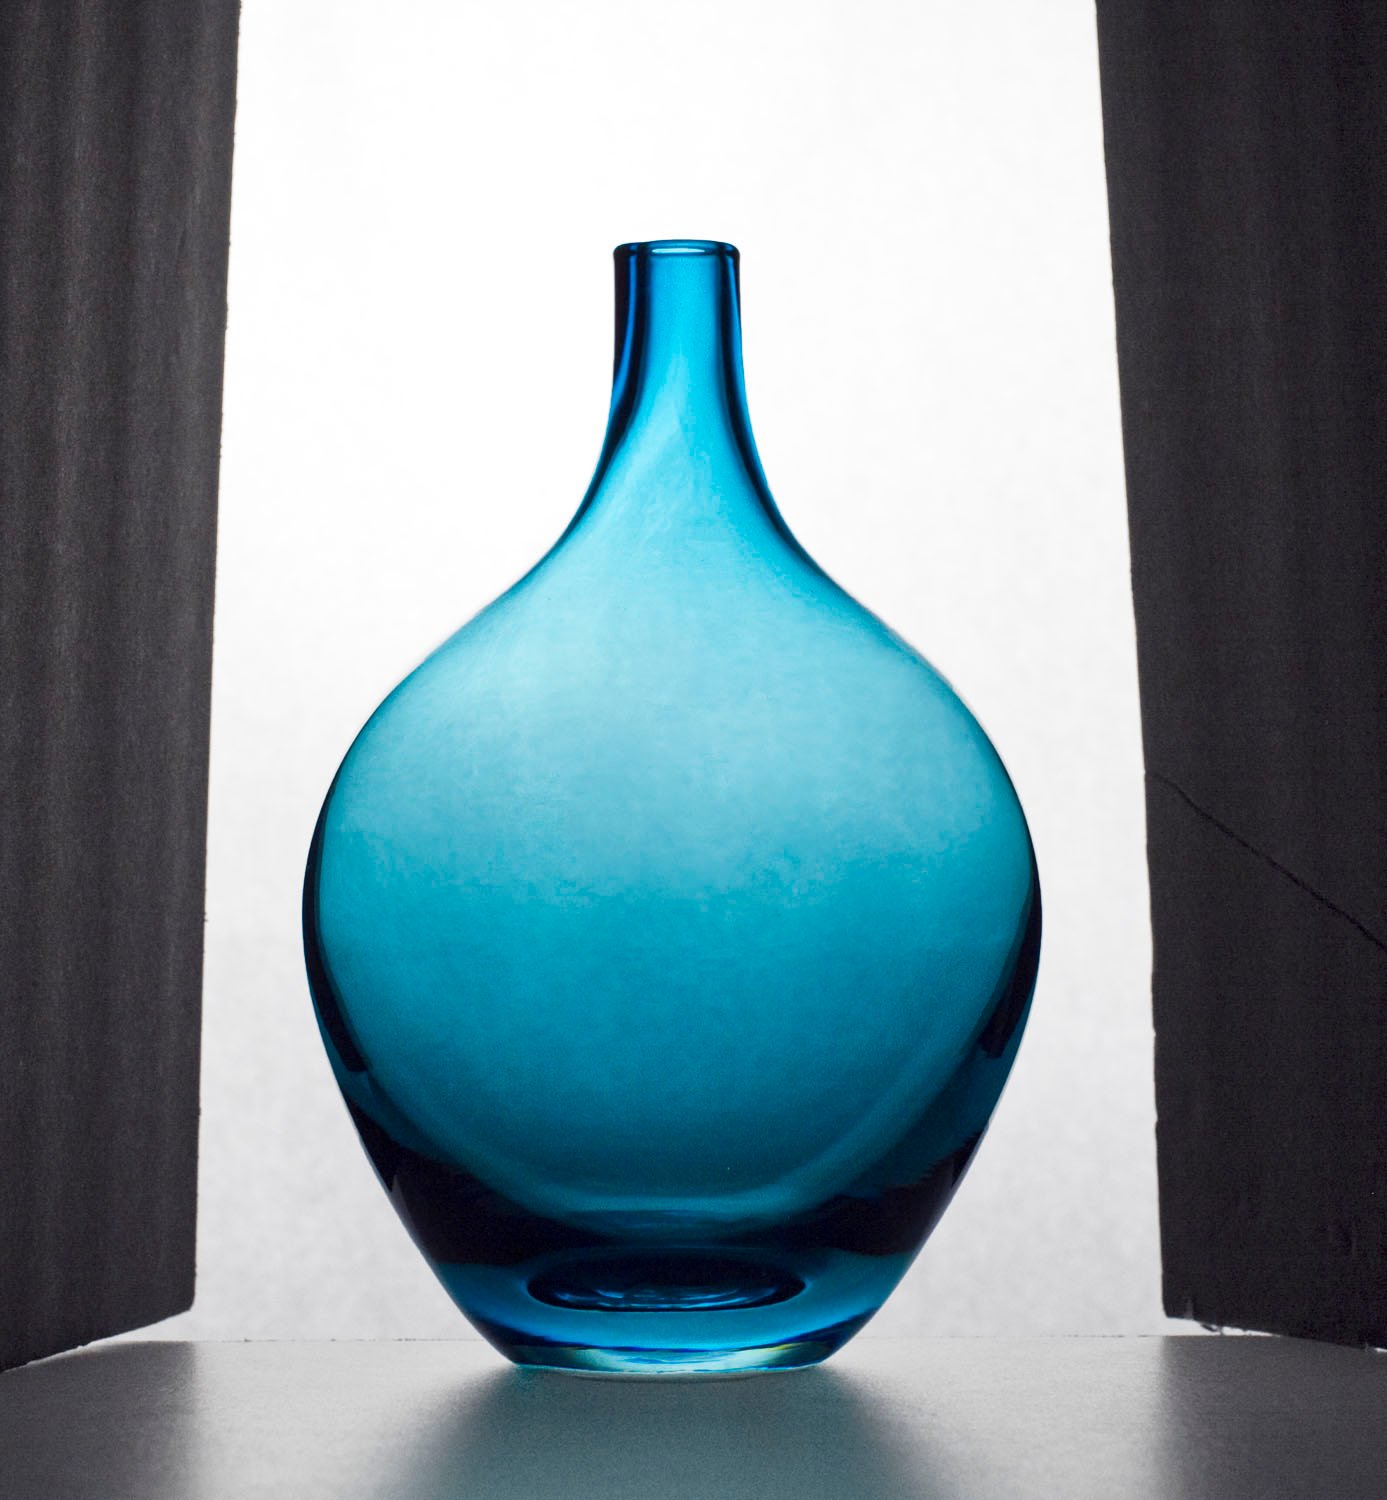
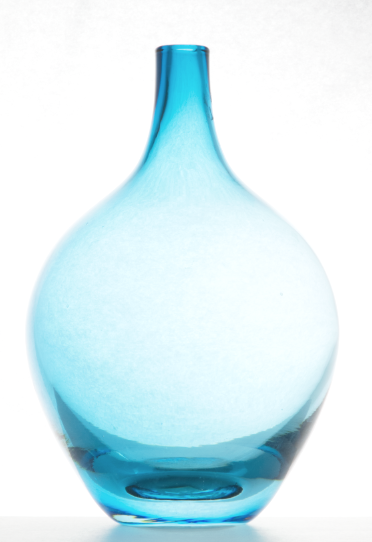
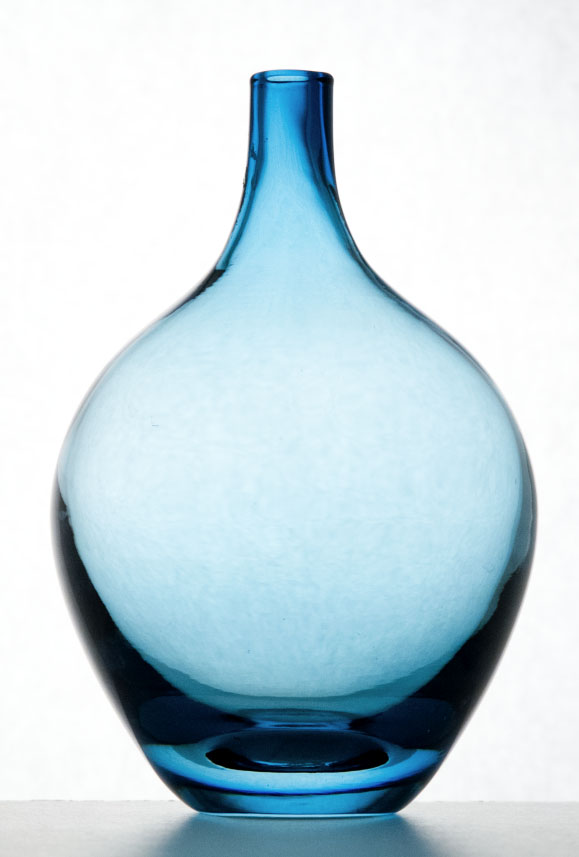
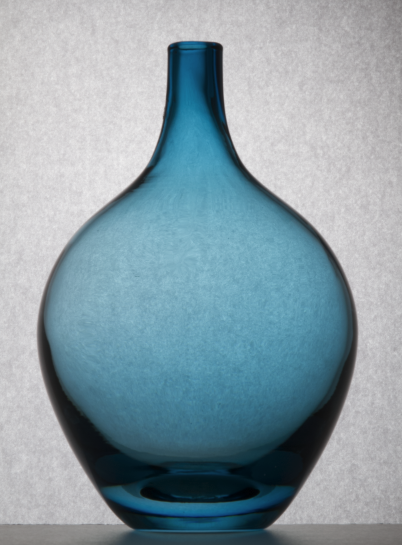
For bolder outlines and colors, try using black foam boards to either side of your product. This will better saturate your colors and emphasize the edges of your glassware. In the image series below, you can see the differences between using no foam boards on the sides, using white boards, using black boards, and using black boards pulled in tightly next to the product. Most notably, you will notice that the outer black line of the vase gradually becomes more defined as foam boards are added, darkened, and moved in closer.
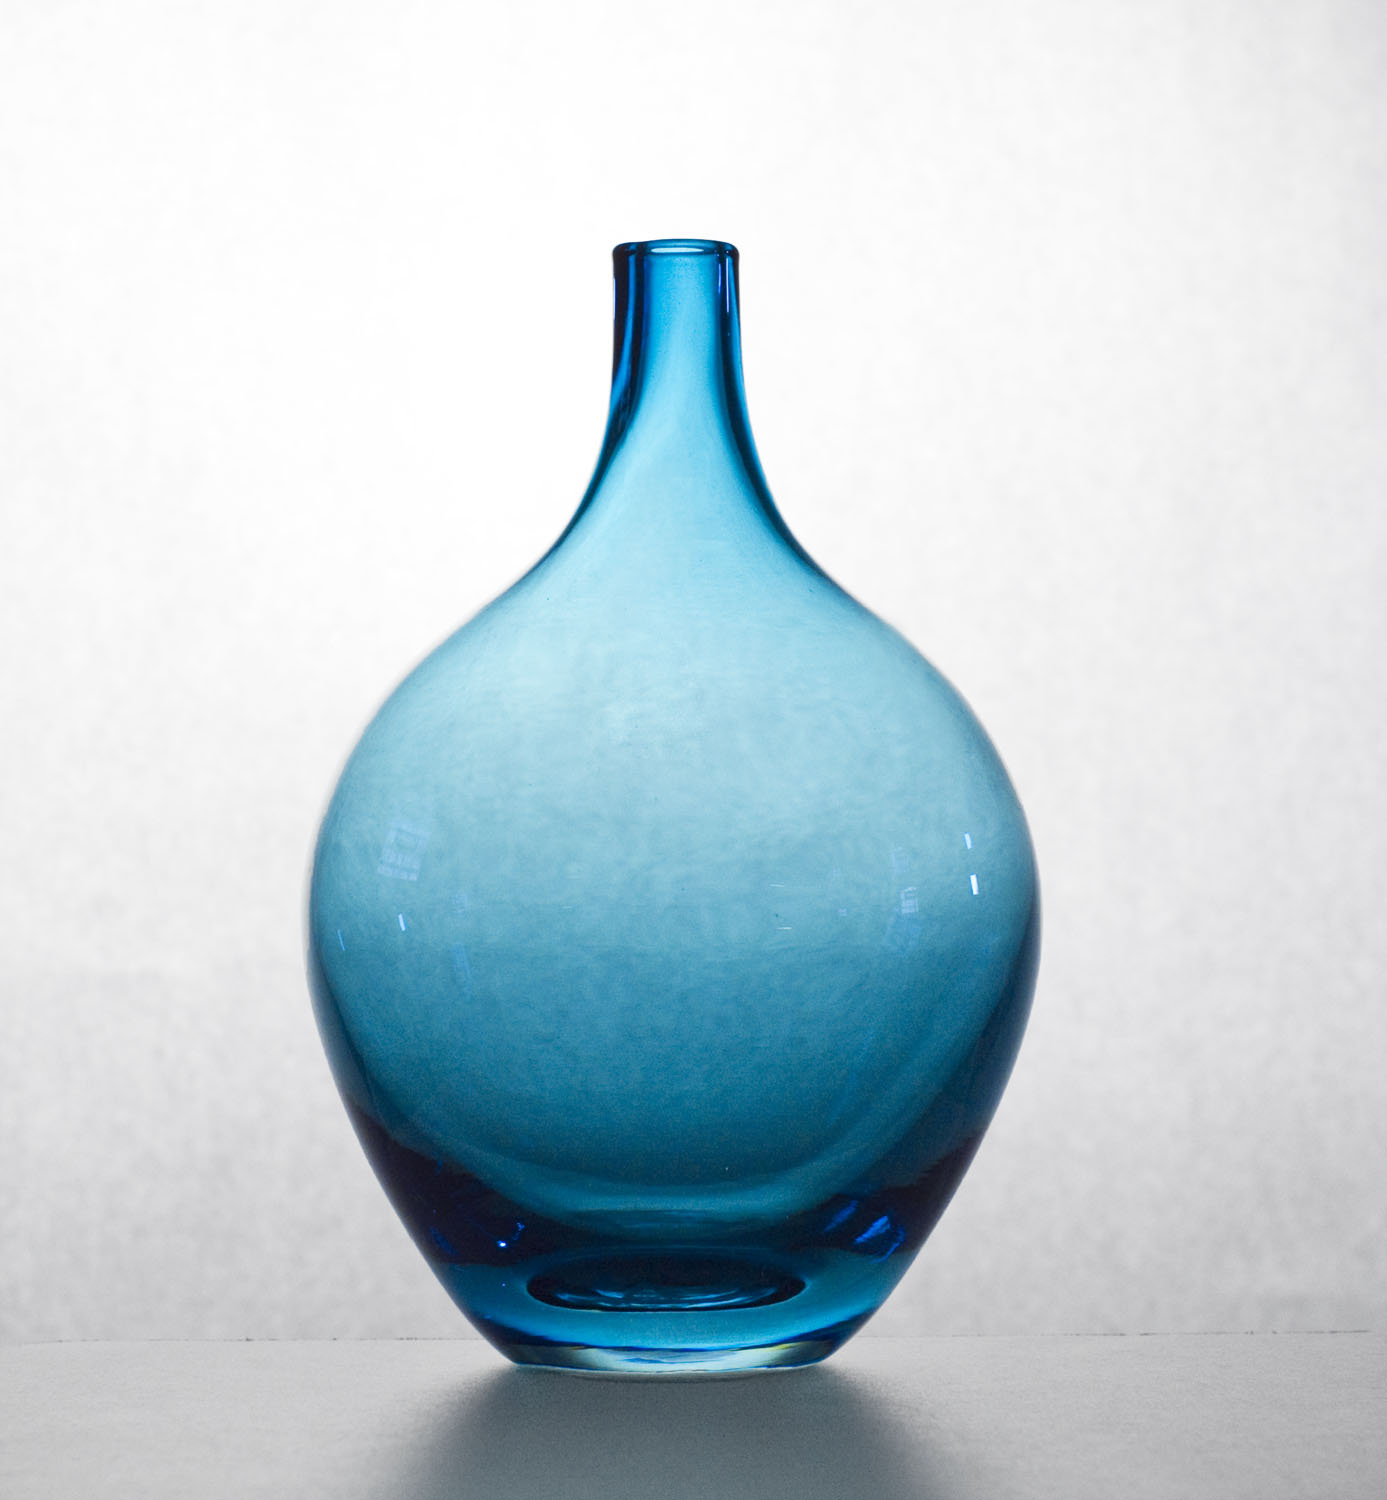
No boards – Reflections
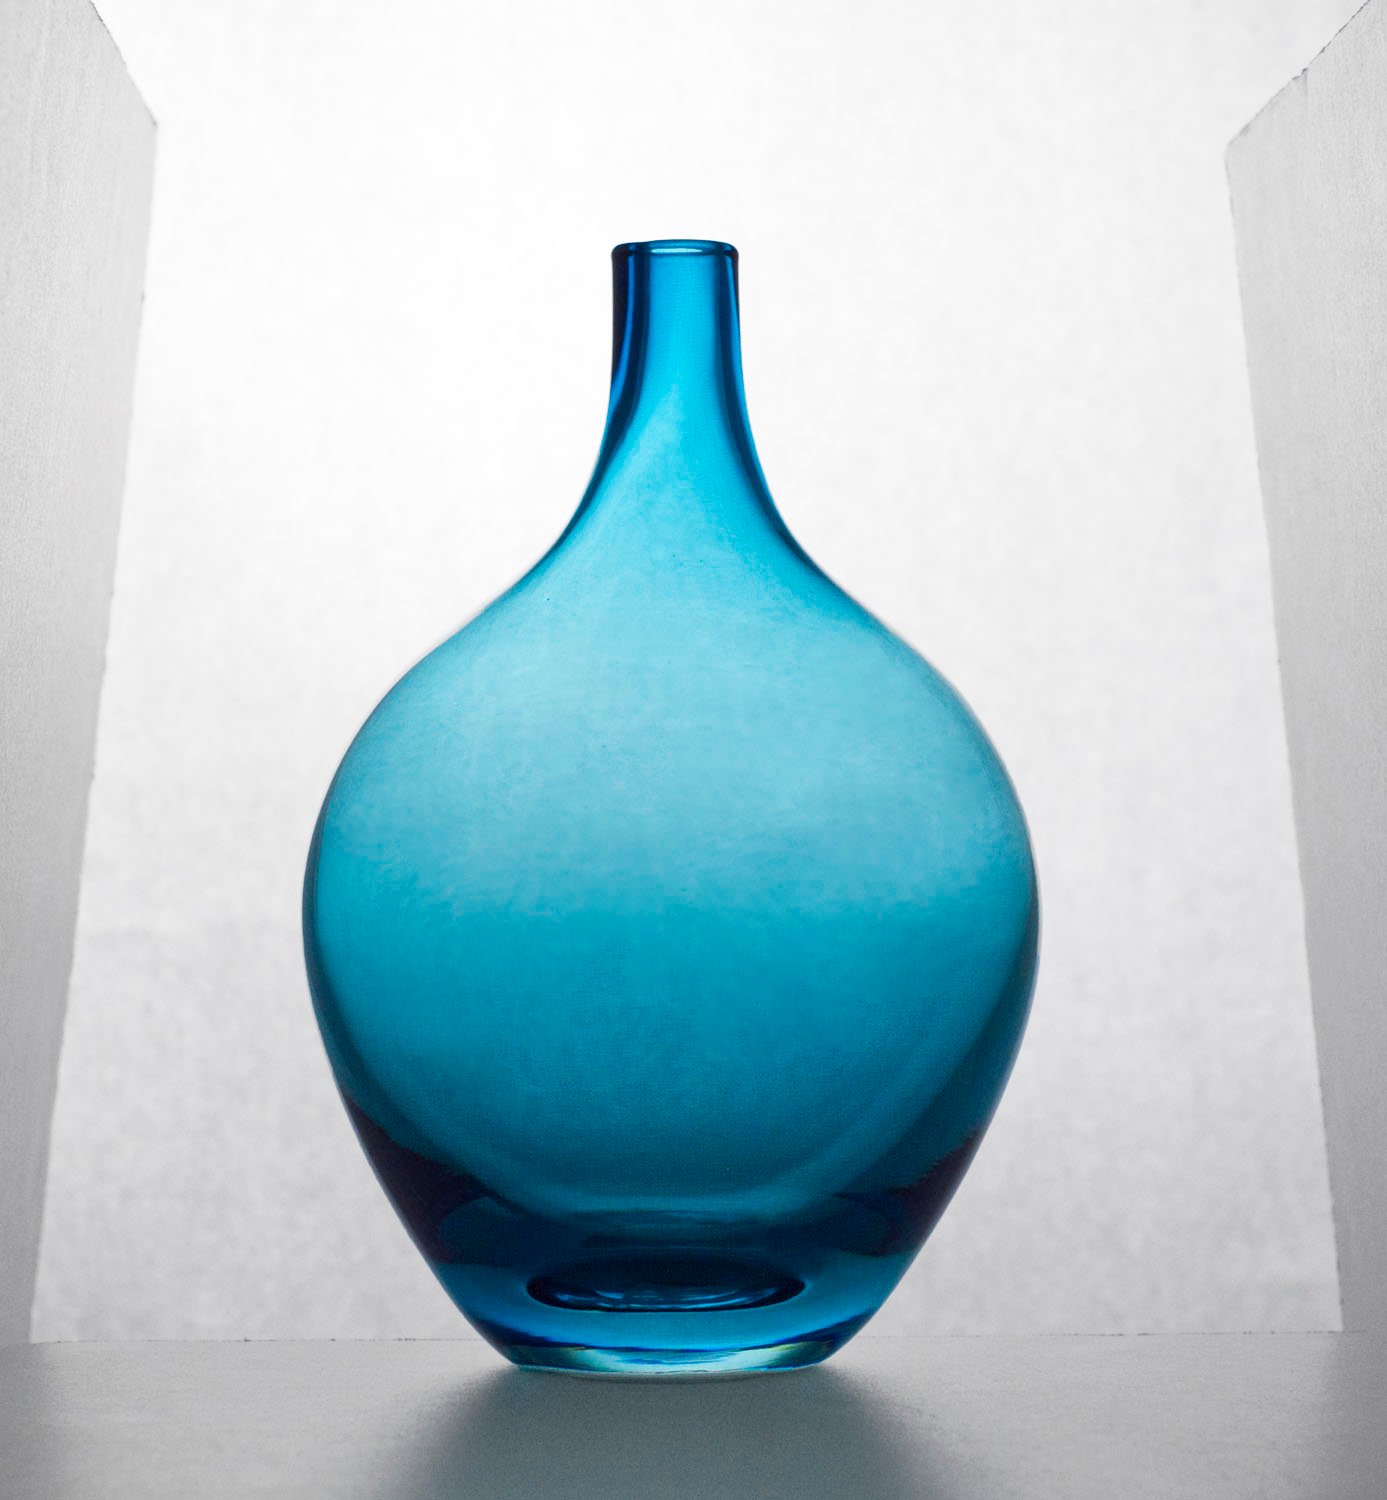
White boards
Black boards
Black boards in closer
You will also need a tripod to keep images of different products consistent from frame. Make sure to align your tripod to level it exactly with the product to get an accurate perspective of your product.
Finally, before you begin adjusting your camera settings and shooting photos, double check that your product has been cleaned with glass cleaner and is free of dust and smudges. This will help to make your post editing even faster!
Step 2: Setting your Camera
Depending on what style of lighting you choose to implement in your lighting setup, adjust your white balance accordingly using your camera’s internal shooting menu. In this tutorial, we will be using strobe lighting, so we have set our camera’s white balance to the flash setting to compensate for the blue cast of the strobe’s bulb. When in doubt, use your automatic white balance setting.
You will be focusing on one of the outer parts of your glassware because your camera’s autofocusing system needs a defined object to focus on. Choose some element of your subject that is noticeable and will be easy for your camera to recognize. In our example, we have focused on the bottom edge of the vase since it is darker and more apparent.
We recommend shooting in Manual mode, which will allow you to have total control of how your camera interprets light and records your images. You will want to set your aperture to f/11 or greater (such as f/16) in order to capture as much detail as possible. Similarly, use the lowest ISO (such as ISO 100) setting possible to preserve the most detail and prevent unappealing grain that begins appearing in images captured at higher ISOs.
If you are using continuous light, you may choose to use your camera’s meter reading in the viewfinder to dictate your shutter speed. However, since it is important to overexpose, or “blow out,” backgrounds in backlit images in order to properly expose for your subject, you will probably need to adjust your shutter speed down one or two stops from what your camera’s light meter recommends, as shown in the image series below.
Too light
Perfect
Too little light
Don’t be afraid to take test shots and spend some time making small adjustments to your setup and camera settings in order to capture the best images possible to promote your products!
You can learn more about how to take advantage of your camera settings by reading our DSLR Camera Settings Guide.
Step 3: Post-Production Processing Your Images
Fortunately, the backlighting should blow out any imperfections on your glass product, which will greatly simplify your post-production workflow. However, if any spots or smudges are visible, clone them out. After that, work on desaturating and cleaning up your background to pure white. These simple quick touch ups will make your images look great.
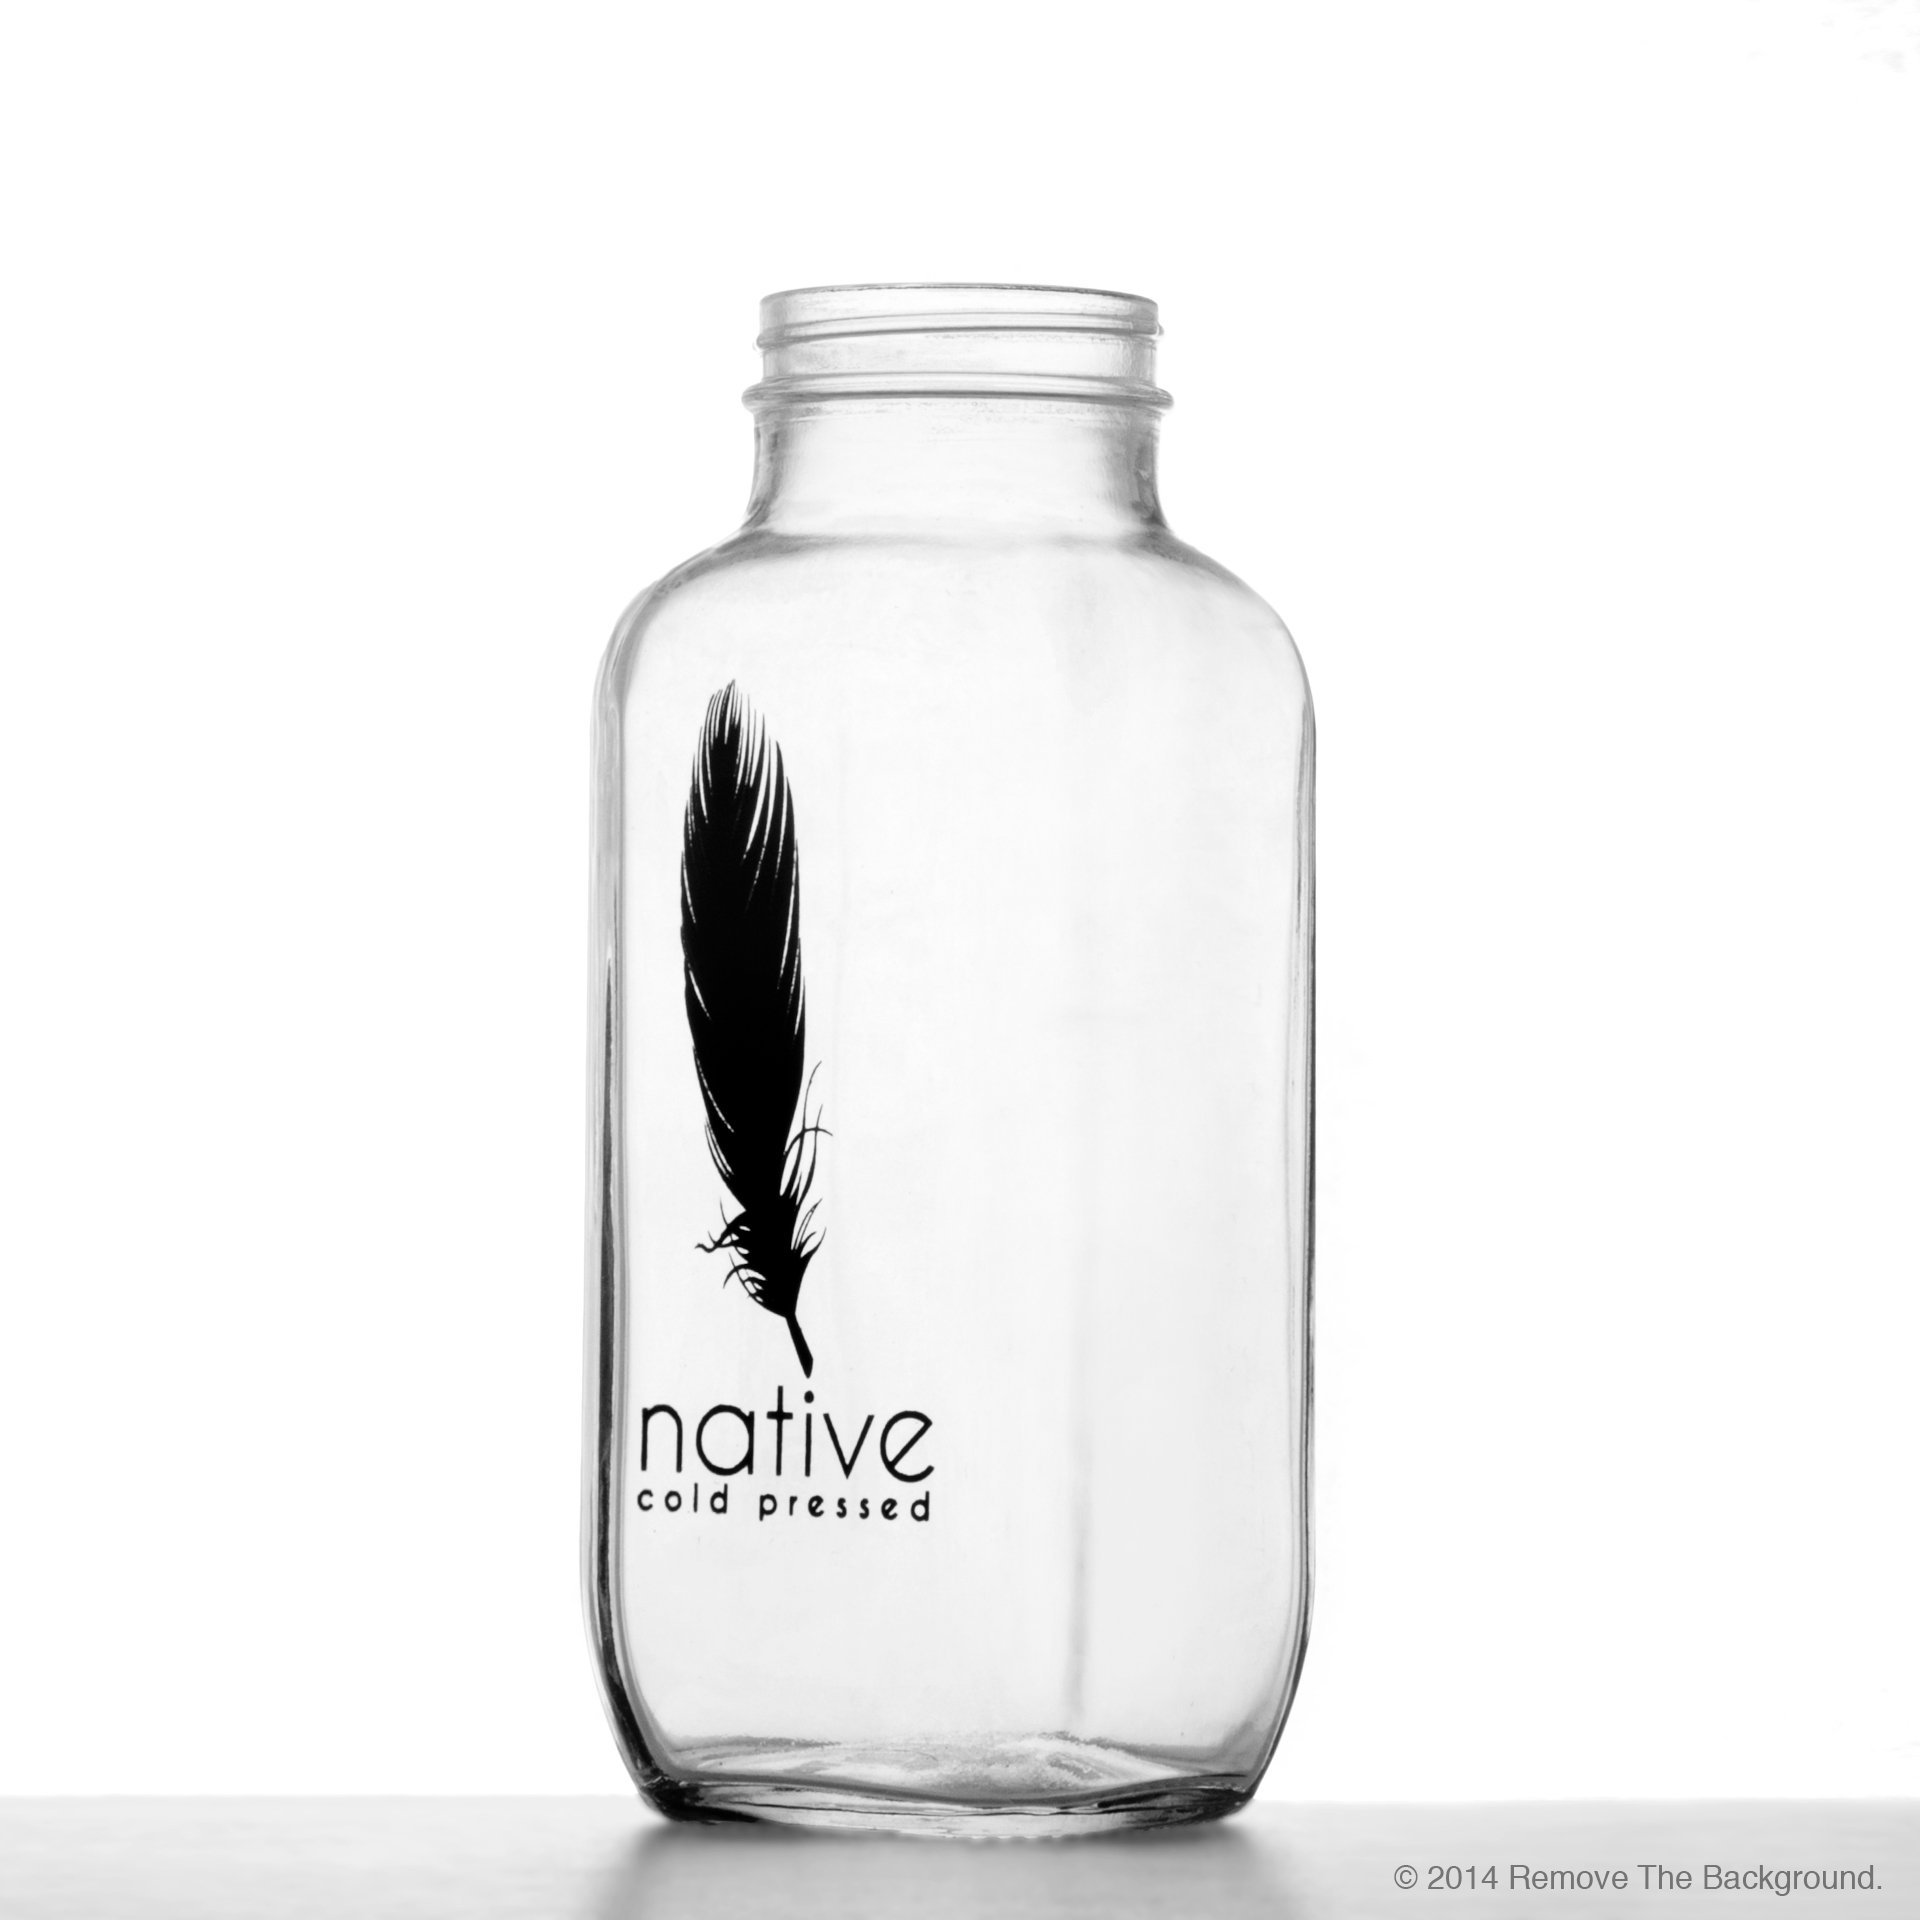
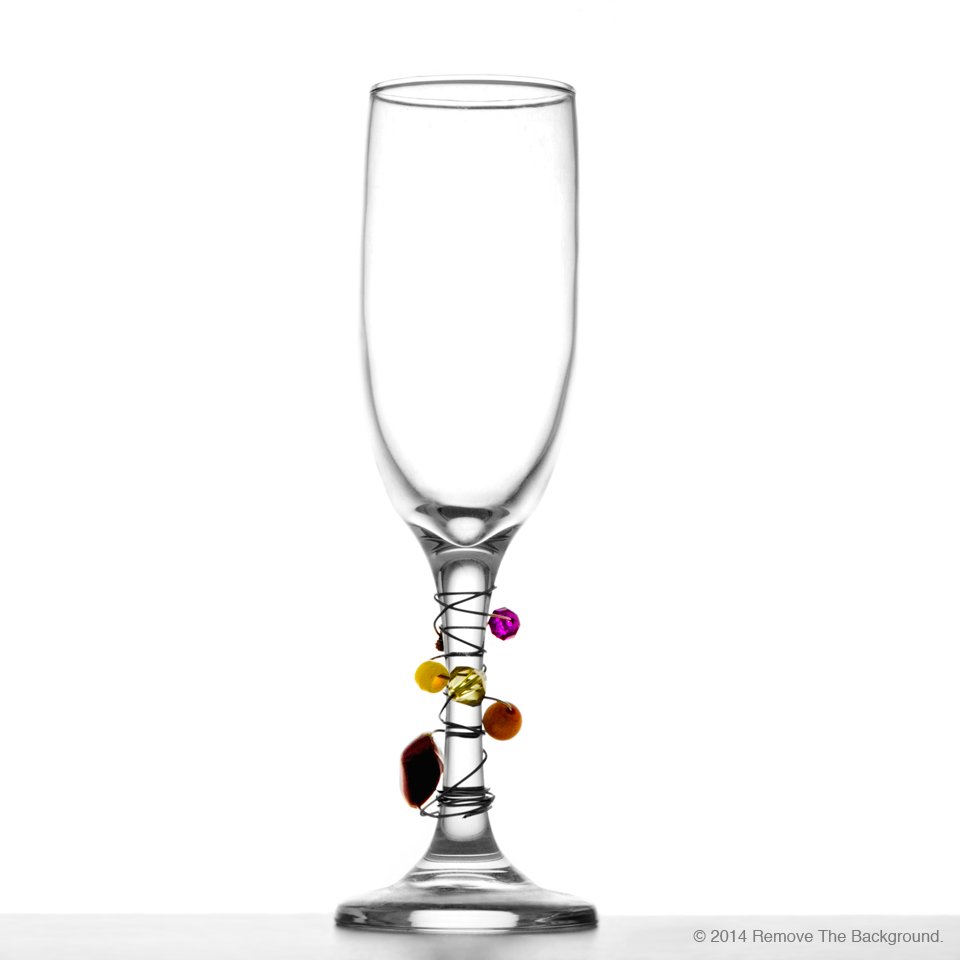
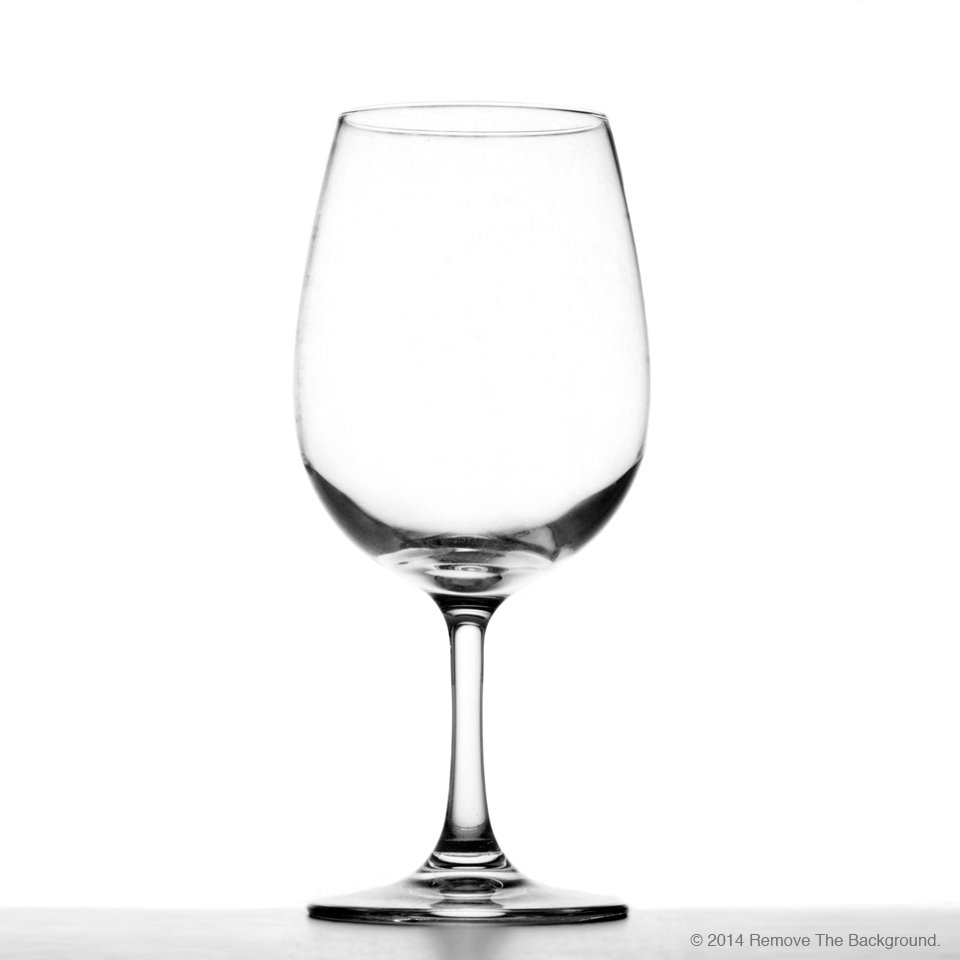
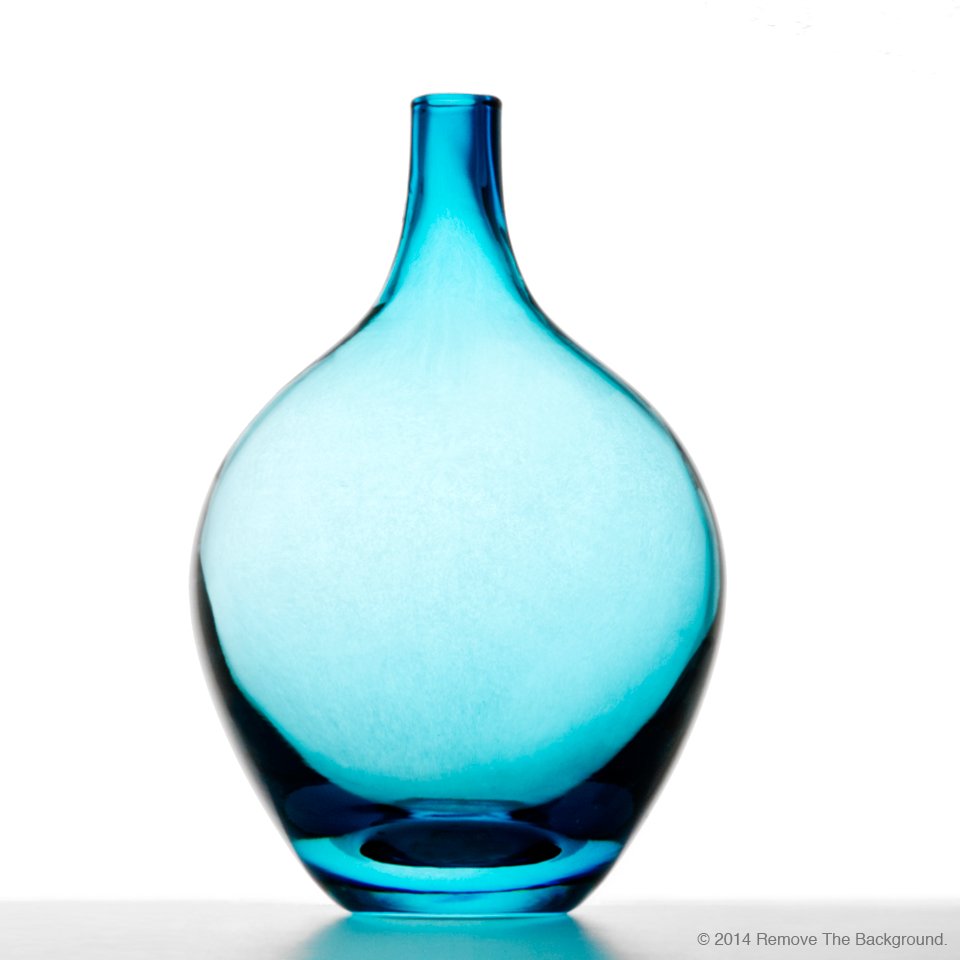
The following images were shot with the same “box” backlighting setup that we demonstrated earlier on in this tutorial, which you can see is flattering to each piece.
Photographing Detailed Glassy Products: Sunglasses and Watches Product Photography Guide
Photographing glassware is easy because you’re able to overexpose the glass itself, but other reflective products like sunglasses and watches contain details that you cannot blow out with backlighting.
These types of products need to be lit differently so that customers will be able to see the full product that you are trying to sell.
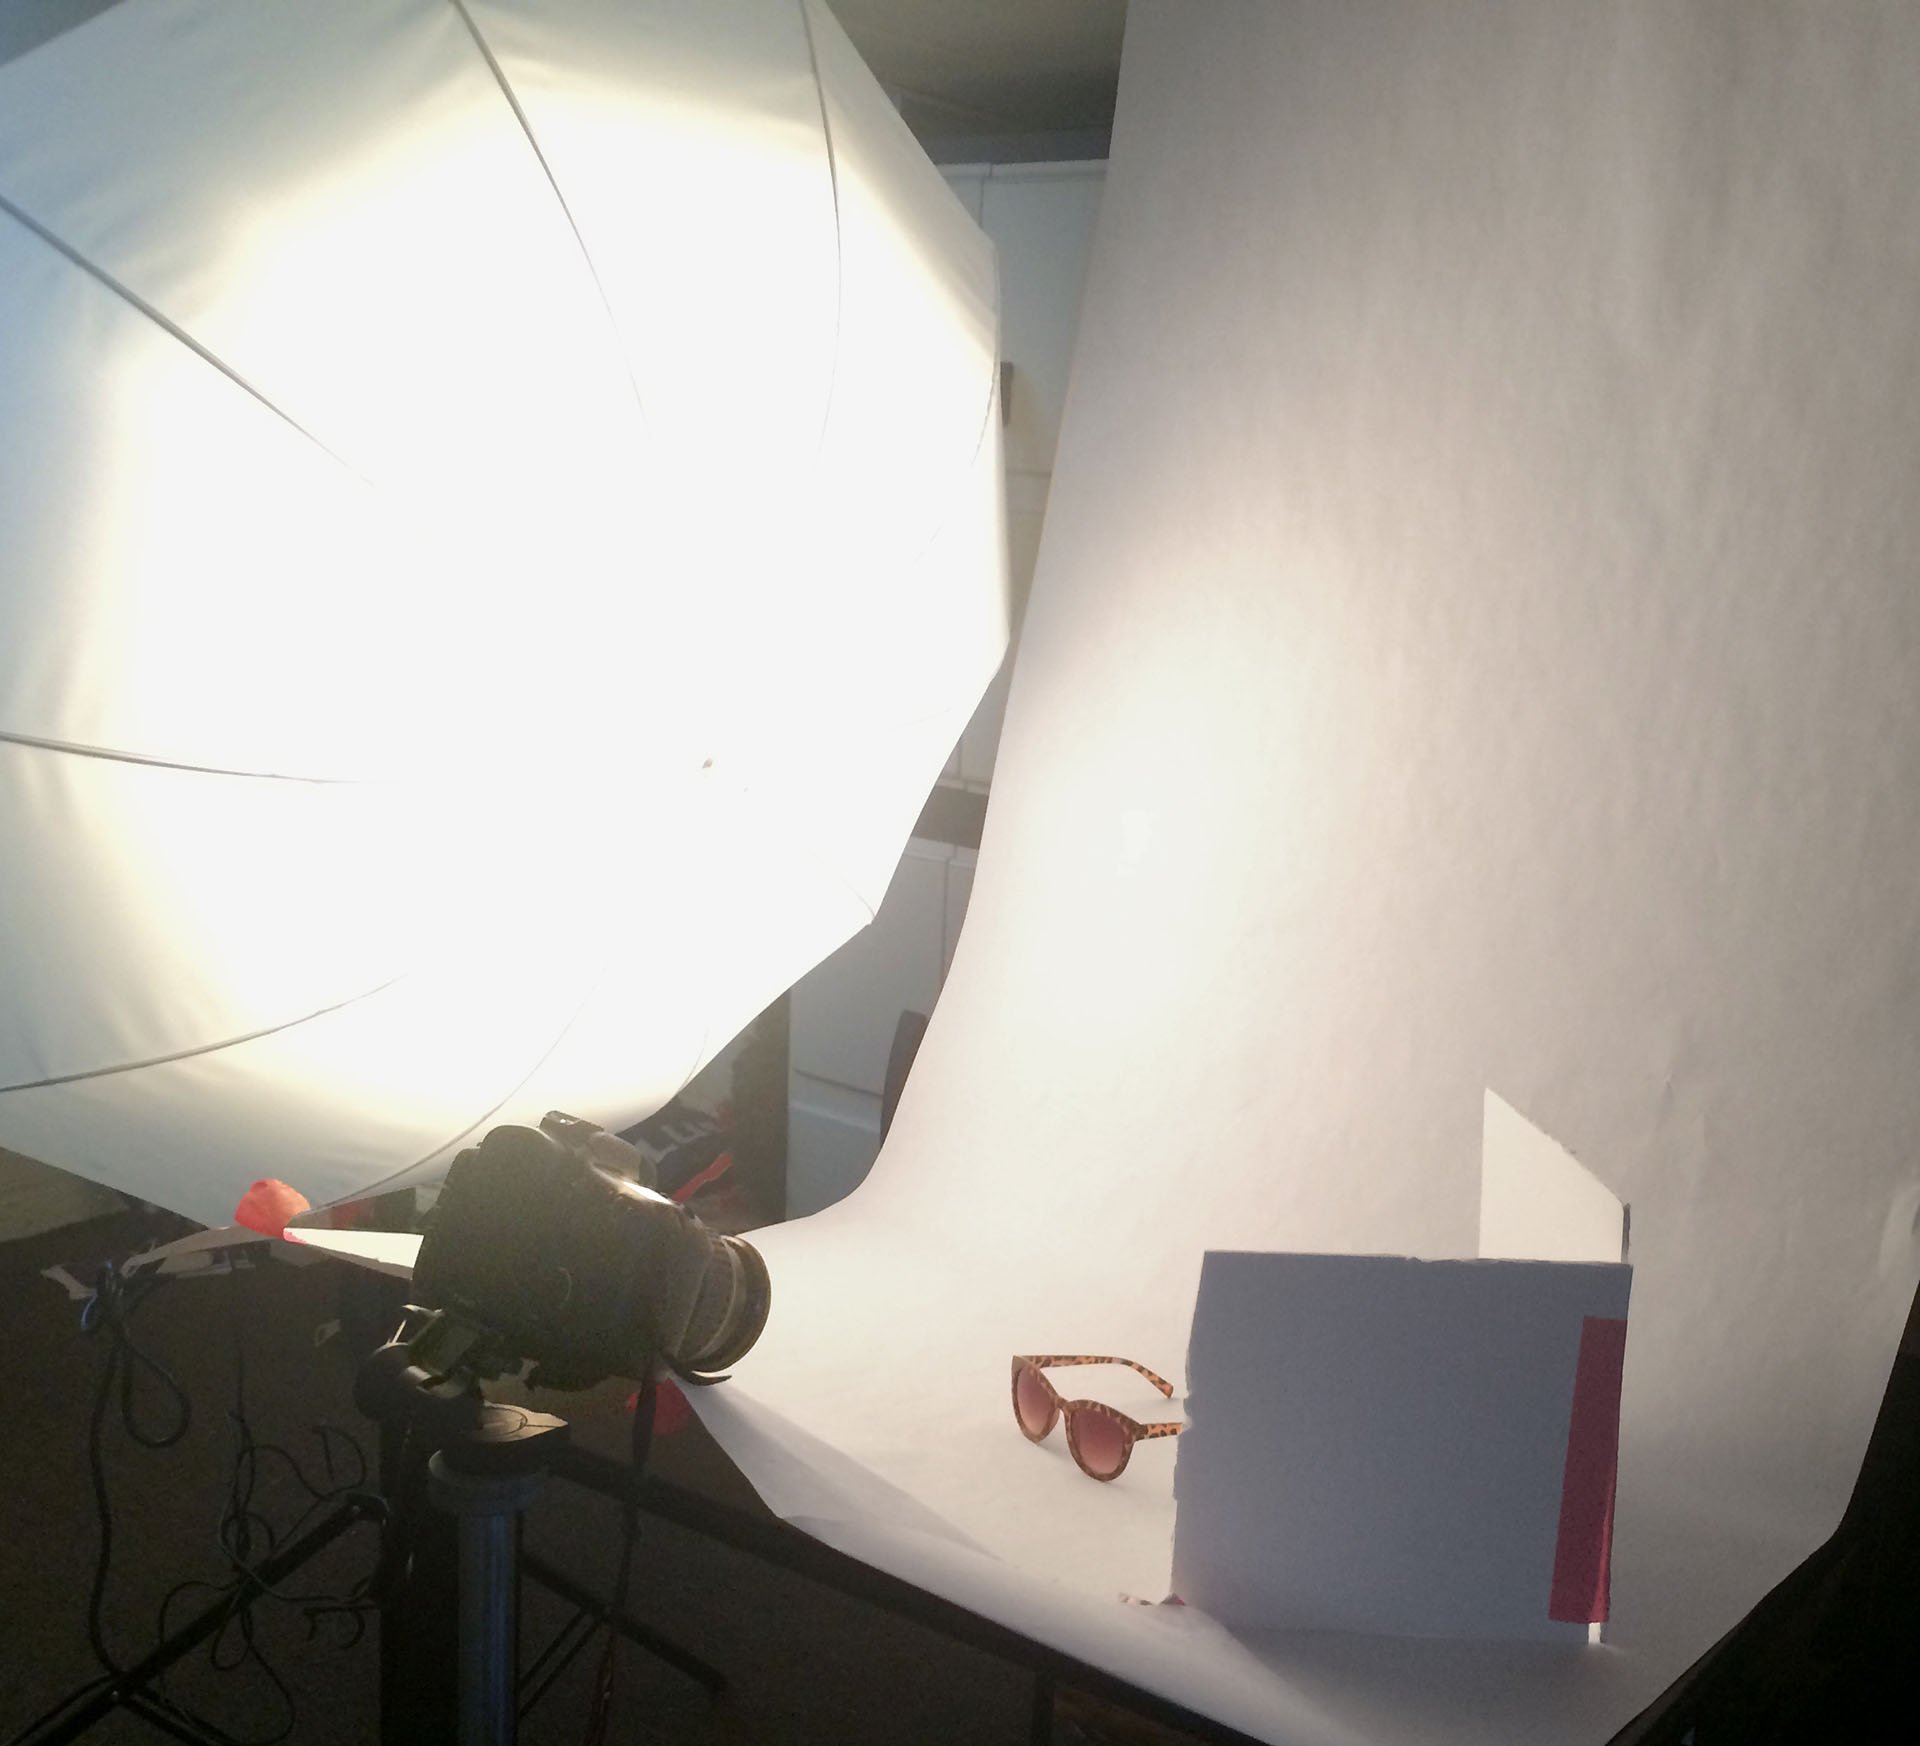
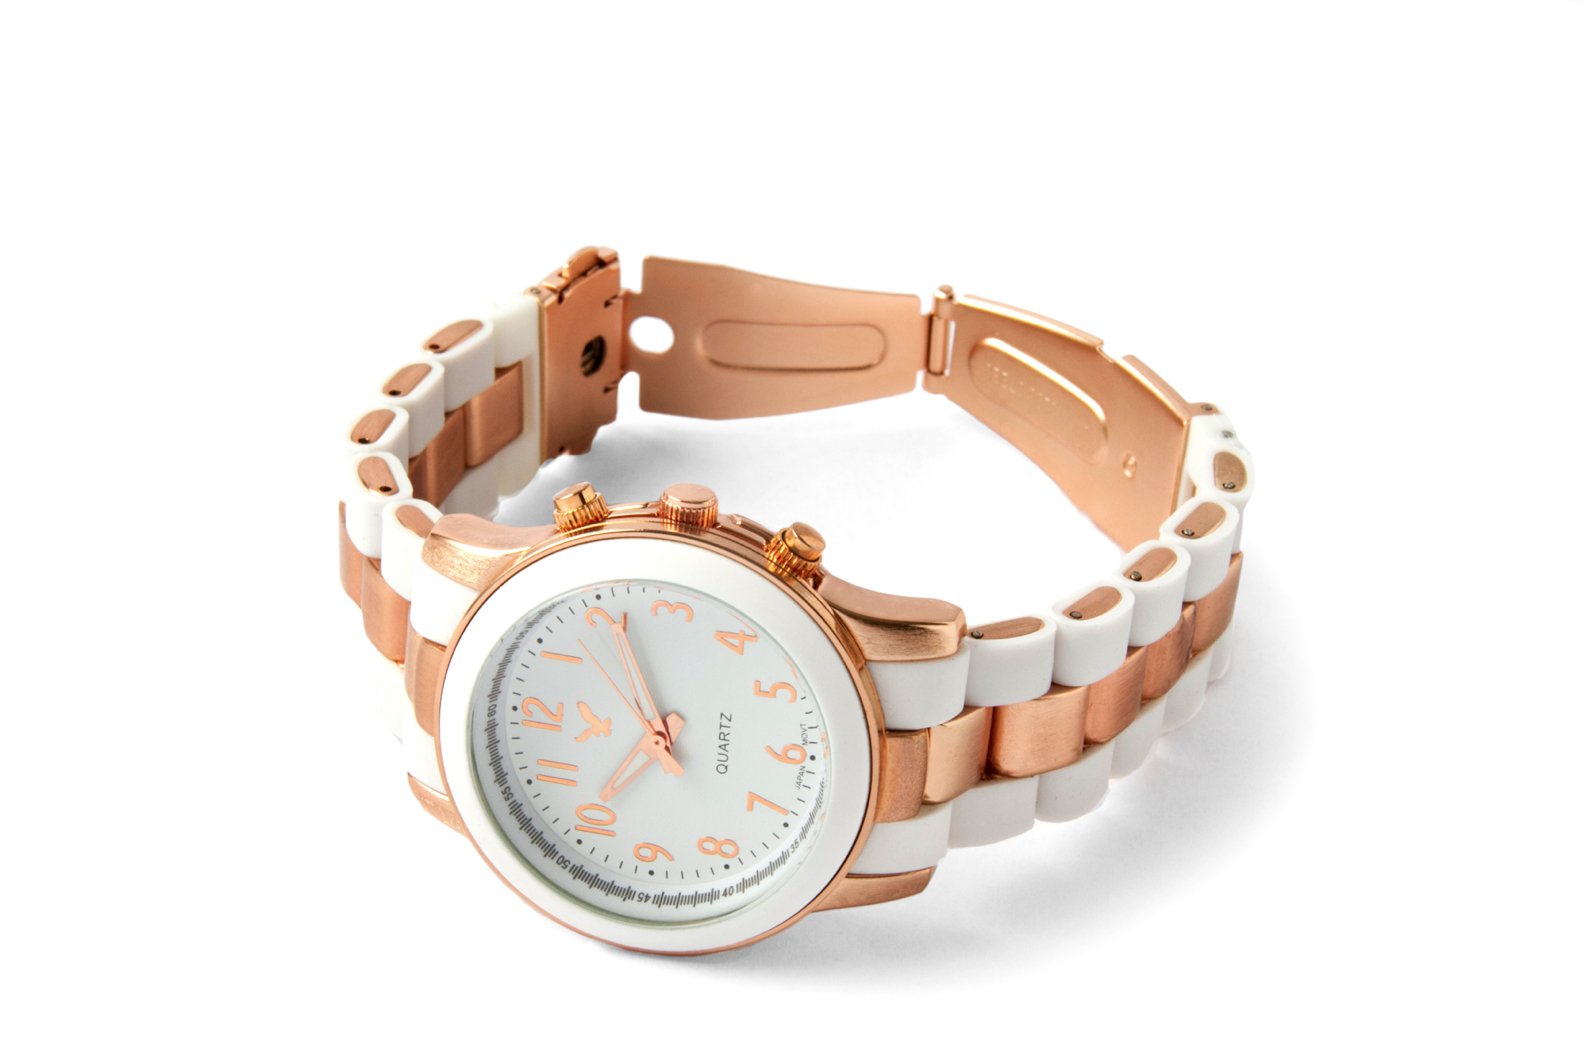
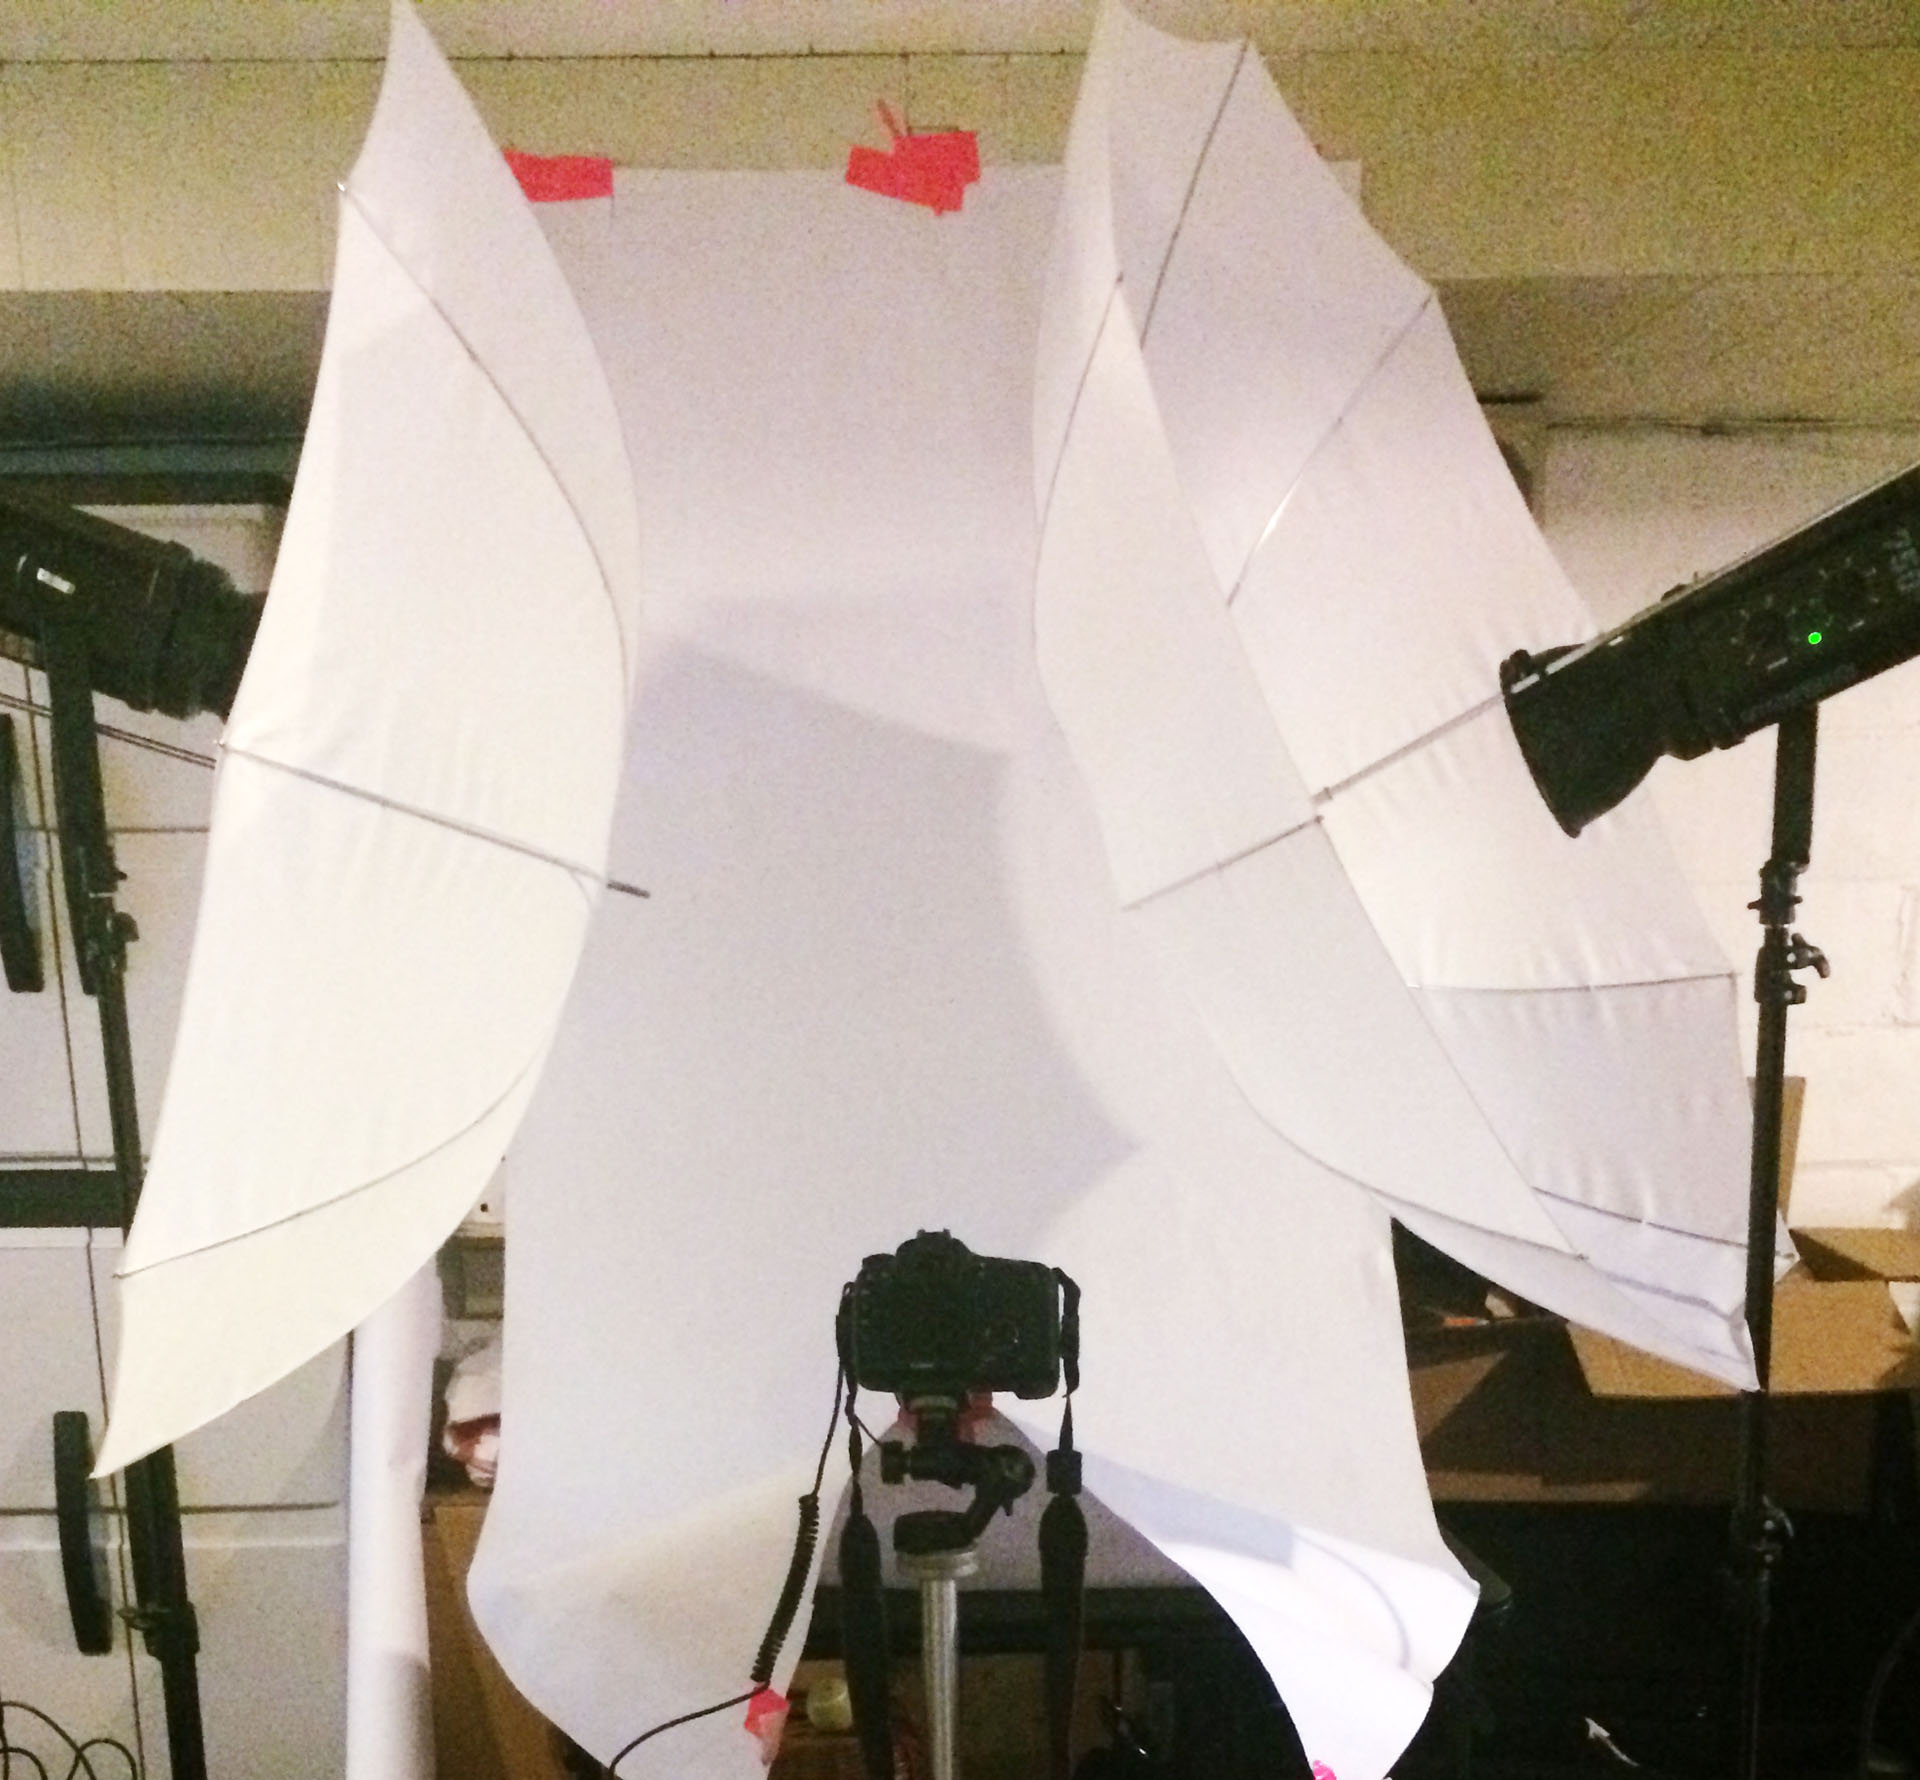
Step 1: Sunglasses and Watch product photography lighting setup
You will need a large table to set your sunglasses or watch on and one large light diffused by an umbrella positioned to the left of your product. Next, hang white rolled paper so that it sweeps down underneath your product, as shown above; for best results, connect the end of the sweep to the bottom of your camera lens to reflect some light back onto the product and eliminate any foreground reflections.
Similar to the “box” backlighting setup, you will need to place foam board next to the sunglasses on the side opposite from the light source, which can be either a continuous lamp or a strobe. It’s best to tape two pieces of foam board together into a “V” to funnel the reflected light around the sunglasses and achieve soft, even light.
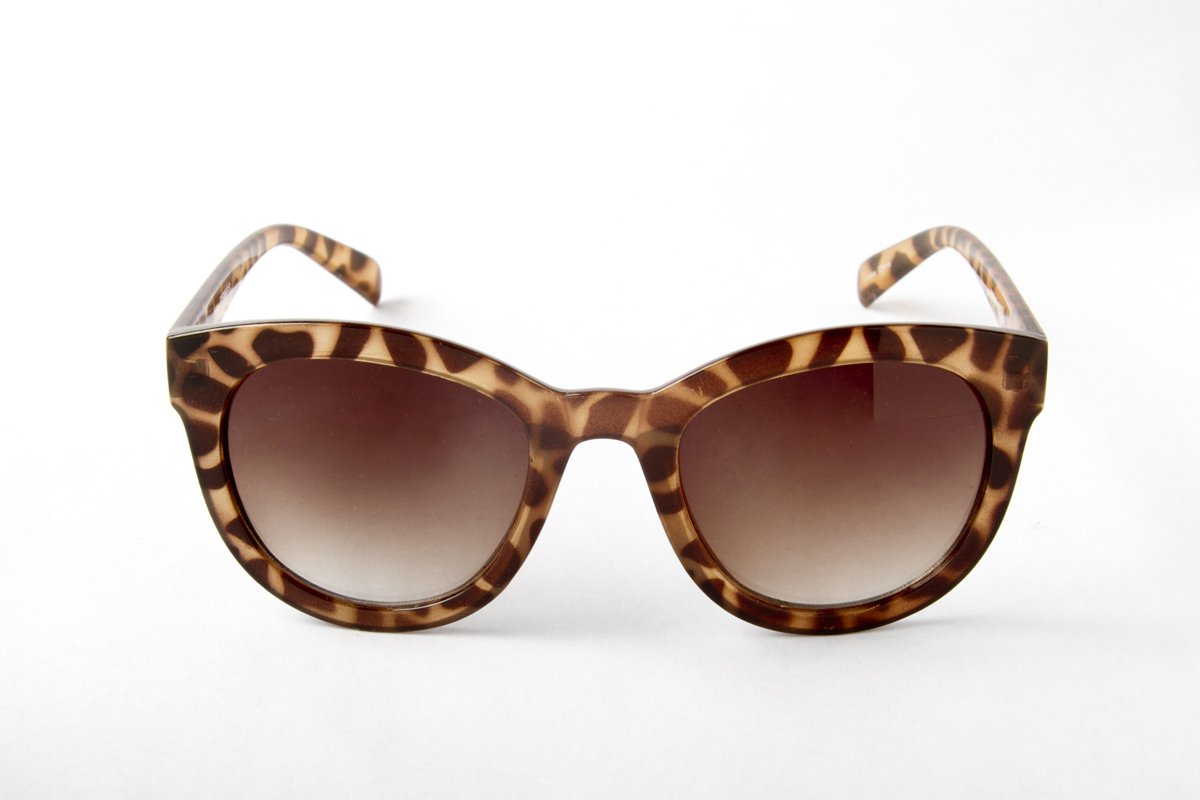
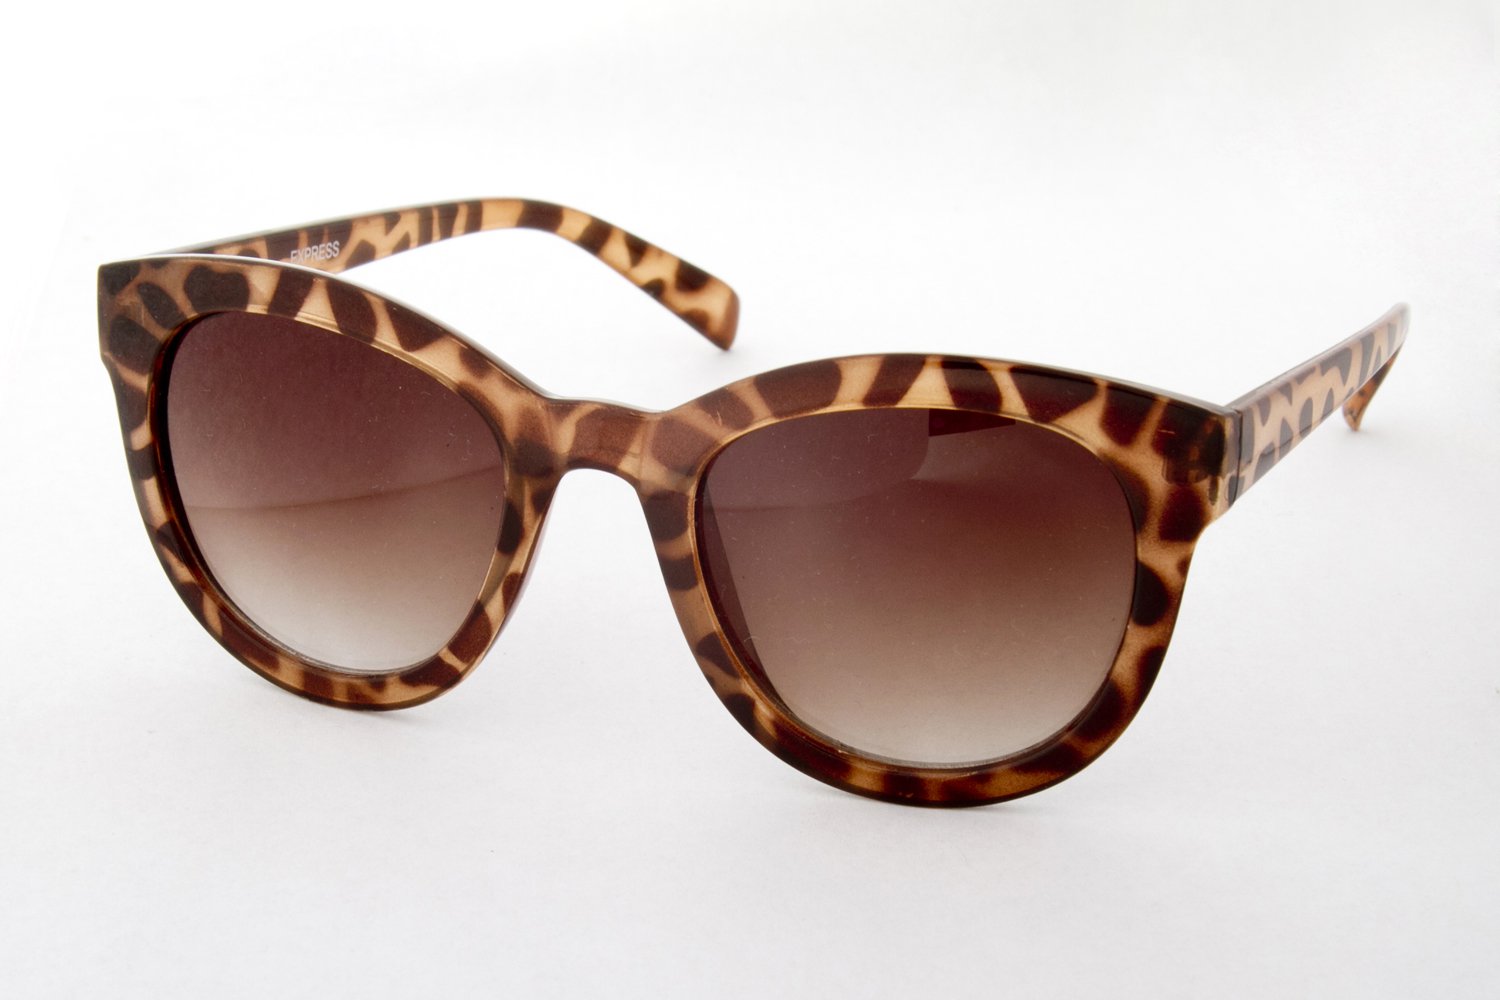
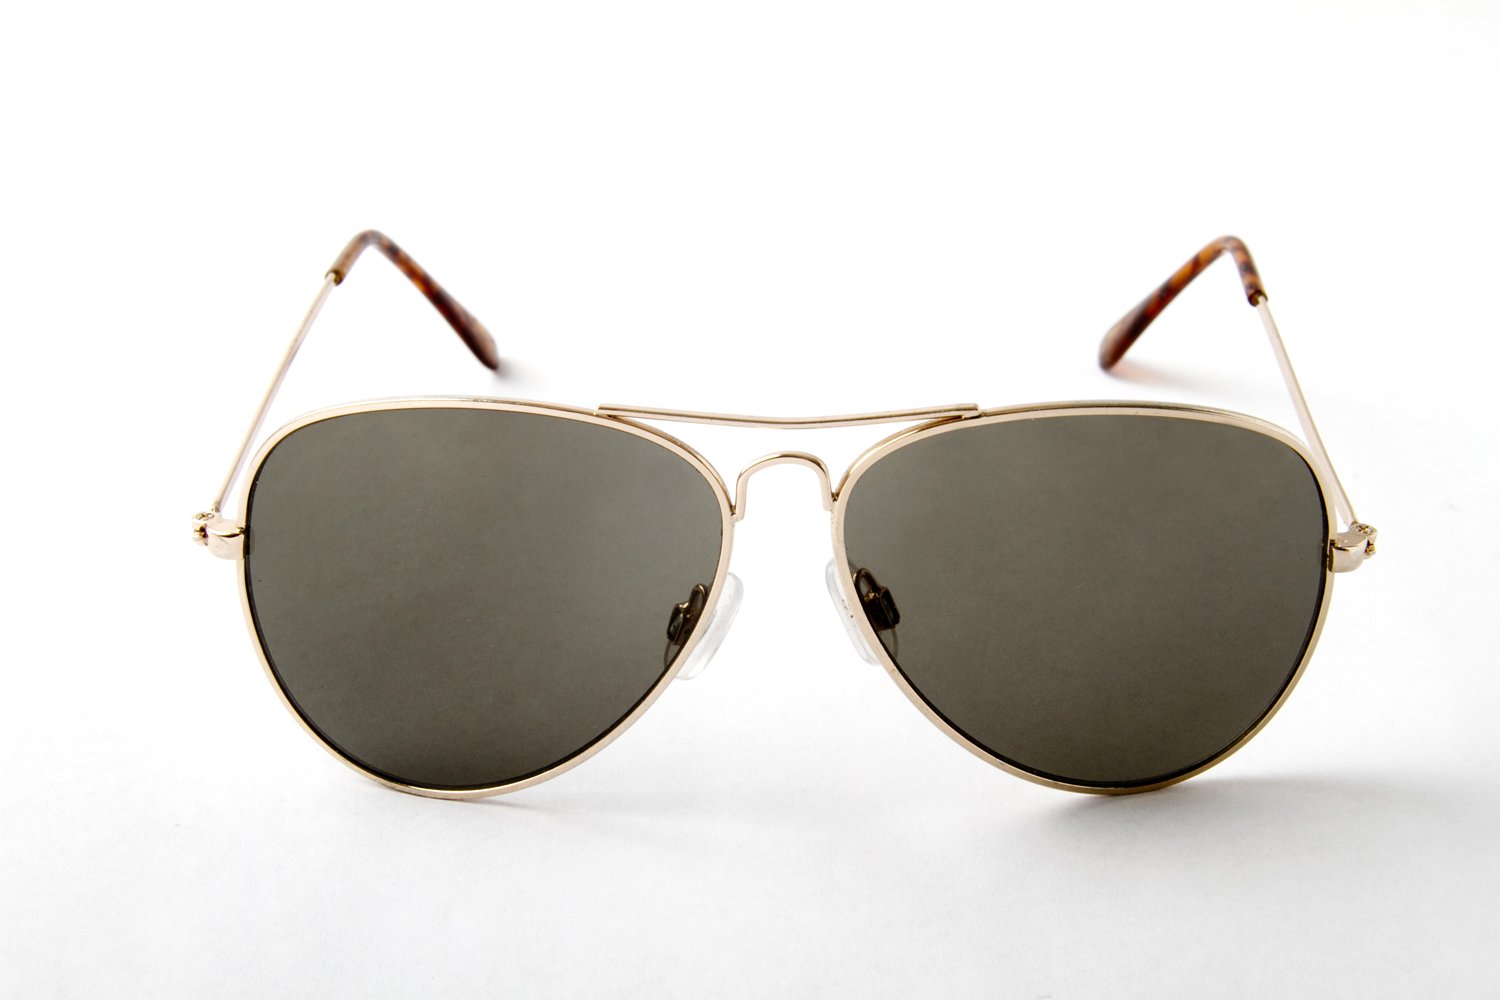
The sunglasses photos below demonstrate both bad and good lighting techniques.
The reflections here will likely distract customers from the product and even lower customers’ perceptions of their quality.
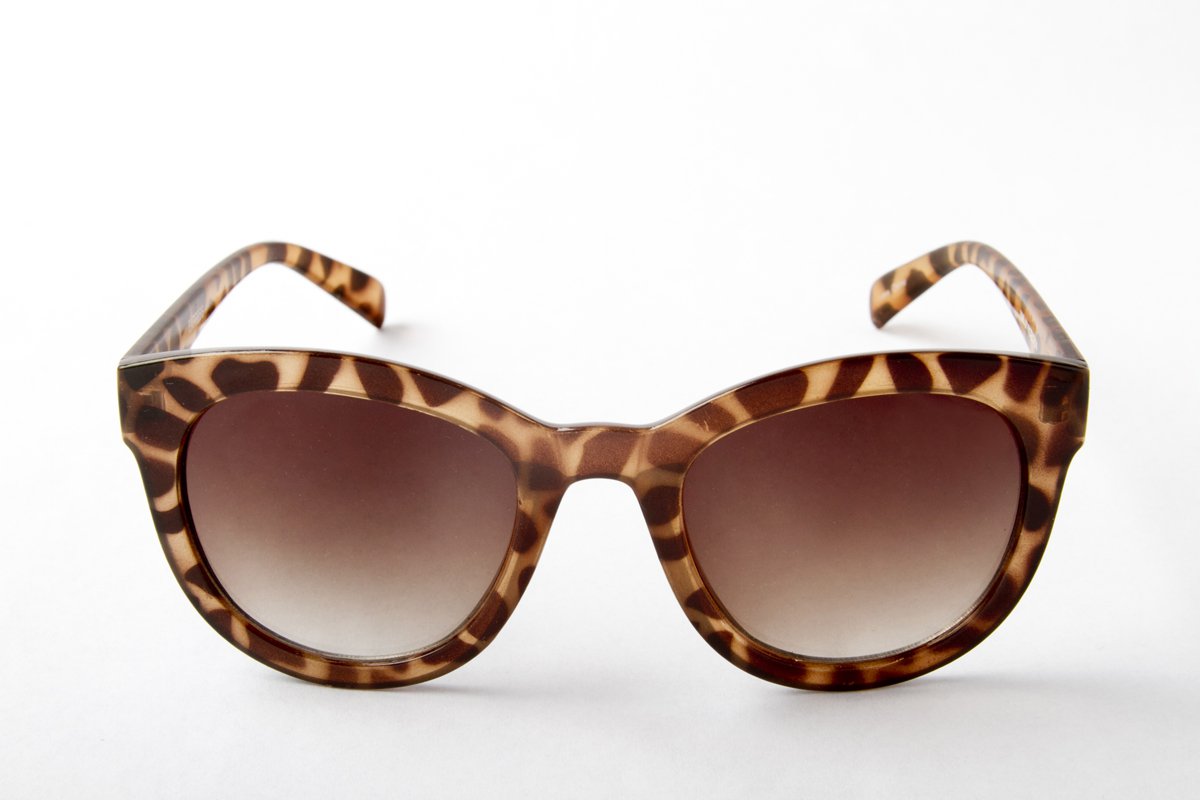
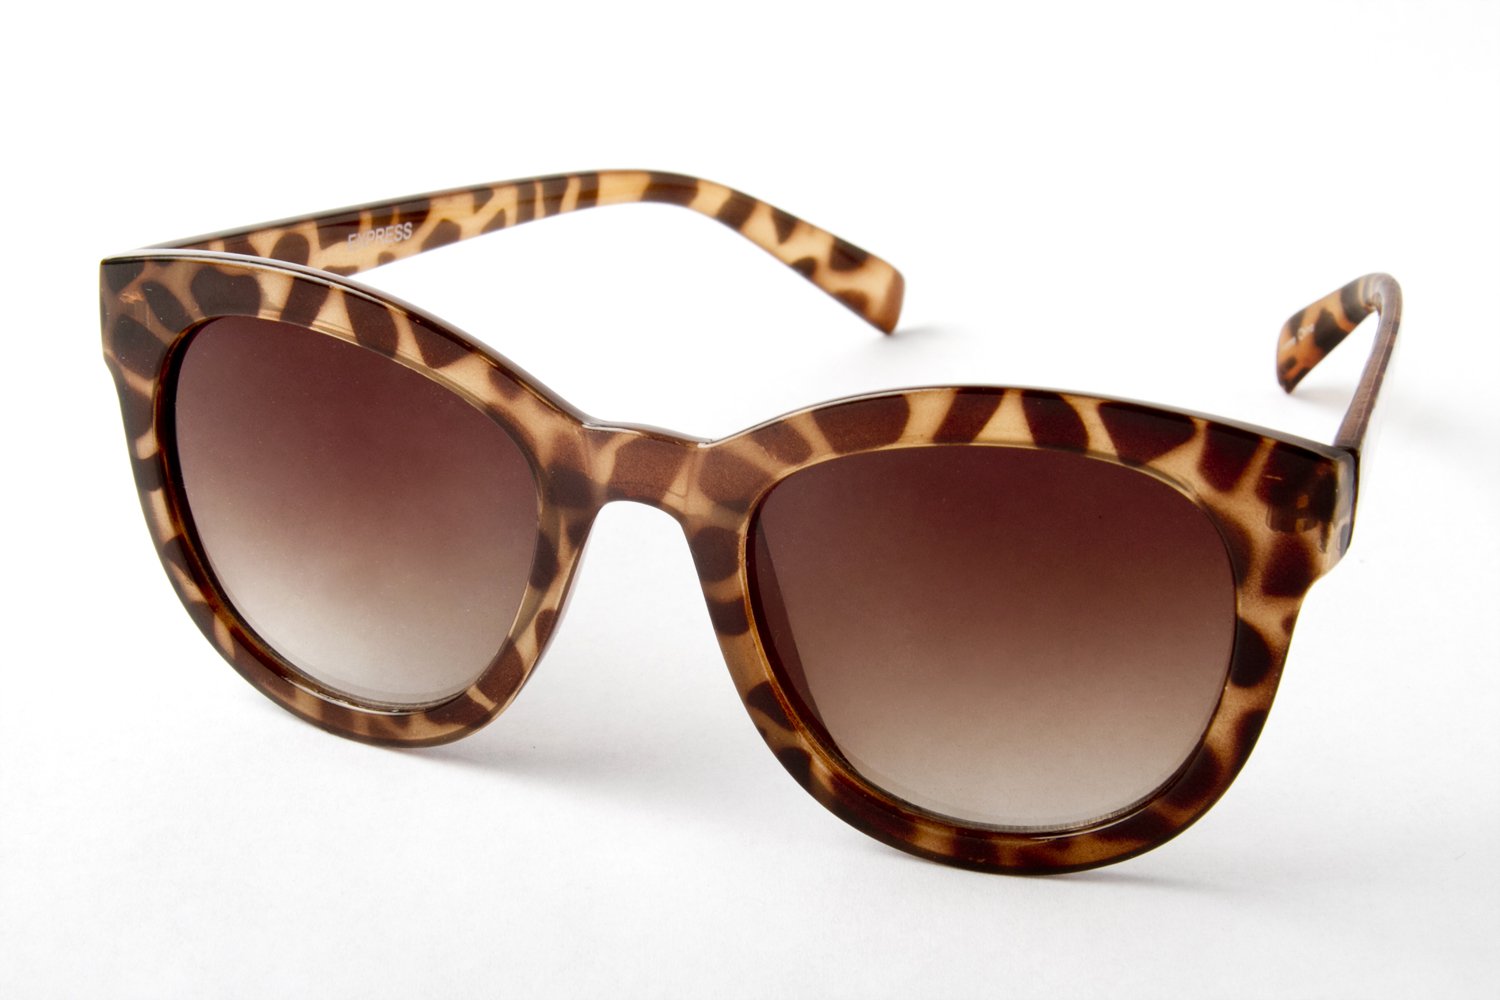
Attaching the white paper to the bottom of the camera lens allows for a much more becoming reflection.
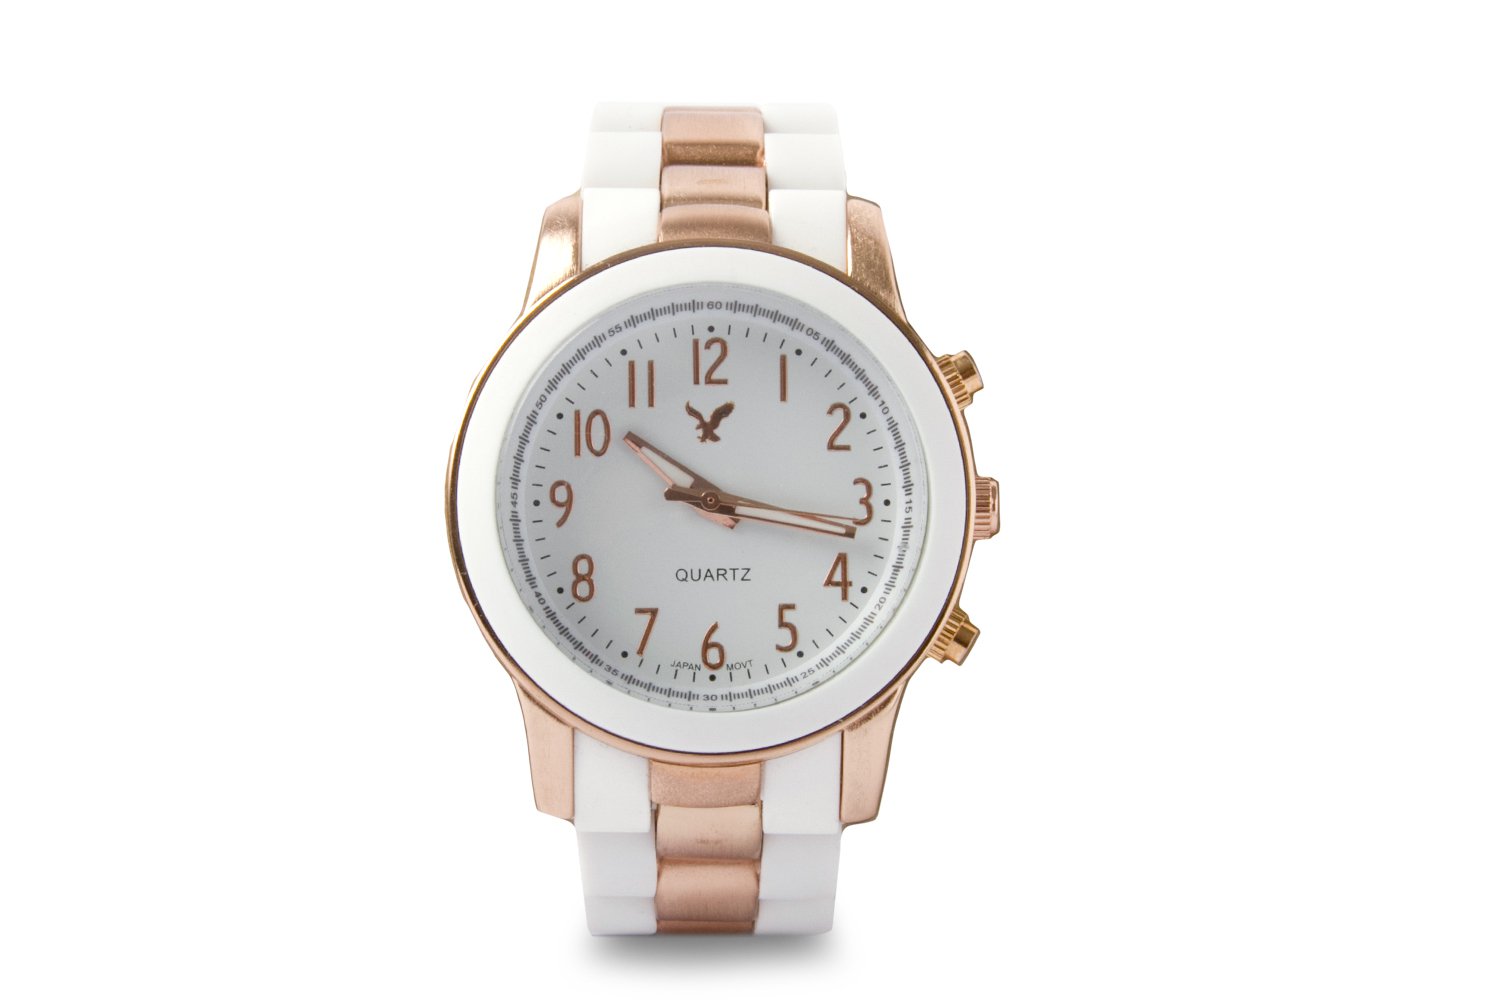
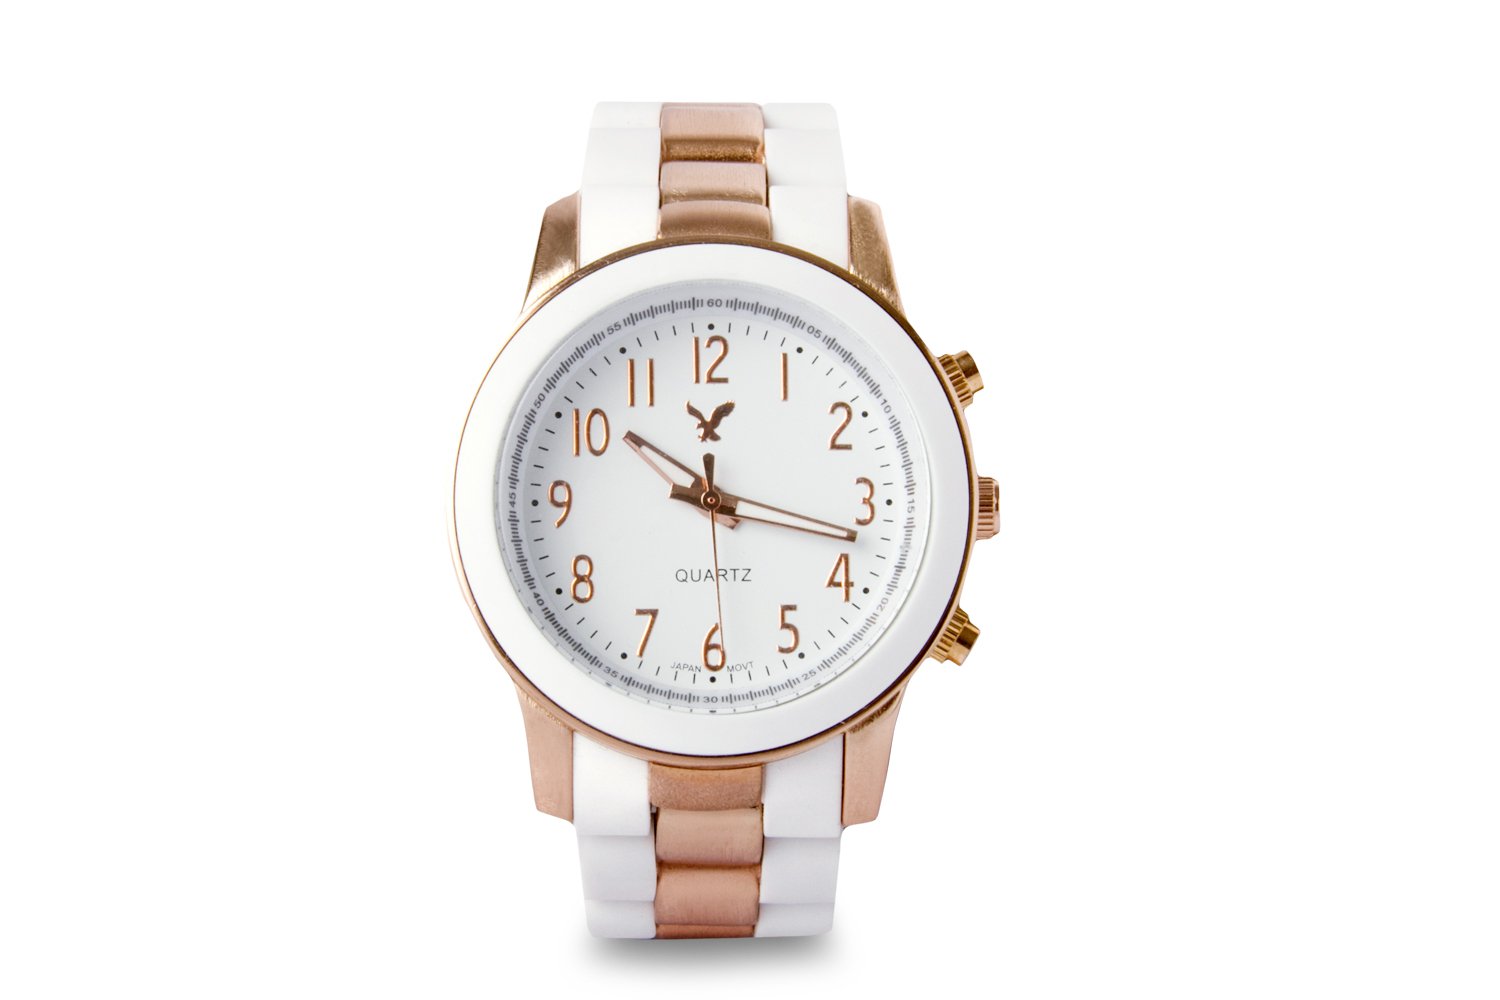
To achieve the effective lighting in the watch photo on the right, we moved our light source from direct side lighting to 45-degree side lighting so that the watch’s face would become brighter without causing a spot glare on the face.
You will also need to utilize a tripod with this setup to keep your image framing consistent. Position your camera slightly higher than you would to light a backlit glass product so that you are shooting slightly down at your product. This will eliminate reflections and allow for a flattering angle of your product. And as always, make sure that your product has been cleaned thoroughly.
Step 2: Setting your Camera for Sunglasses and Watch product photography
As with the backlighting setup, you will need to adjust your white balance according to the type of lighting you are using (e.g. tungsten, fluorescent, daylight, etc).
Focusing is much easier with sunglasses and watches because these types of products contain more details that your camera’s autofocus will easily be able to lock onto. Focus on the center part of your object and use an aperture of at least f/11 to get the sharpest images.
With side lighting, it’s fine to simply follow the promptings of your camera’s light meter about what to set your shutter speed. If you’re having trouble finding the right settings, set your camera to Aperture Priority mode and your camera will optimize shutter speed for you.
Don’t forget to set your ISO to the lowest possible setting! If you’ve taken our advice to use a tripod, you should be able to use ISO 100 without a problem!
Set your ISO to the lowest possible setting, or use ISO 100 with a tripod.
Step 3: Editing Sunglasses and Watch Product Images
Proper execution of the side lighting technique means that you should only need to very minimally post-process your images. Make sure that your product is free from smudges and dust specks, that the background is pure white with no shadows or spots, and that the color of your product is accurate. This is also the time to clone/heal and defects or damages to the sample that you weren’t able to fix prior to shooting, such as hardware scratches and scuffs. Don’t be afraid to select your product, place it on a white background, and add your own shadows if needed. If you're looking for efficiencies, use Pixelz retouching service to scale retouching quickly and economically.
If you are going to sell your products on Marketplaces like eBay or Amazon, make sure to comply with their marketplace image guidelines to get better results.
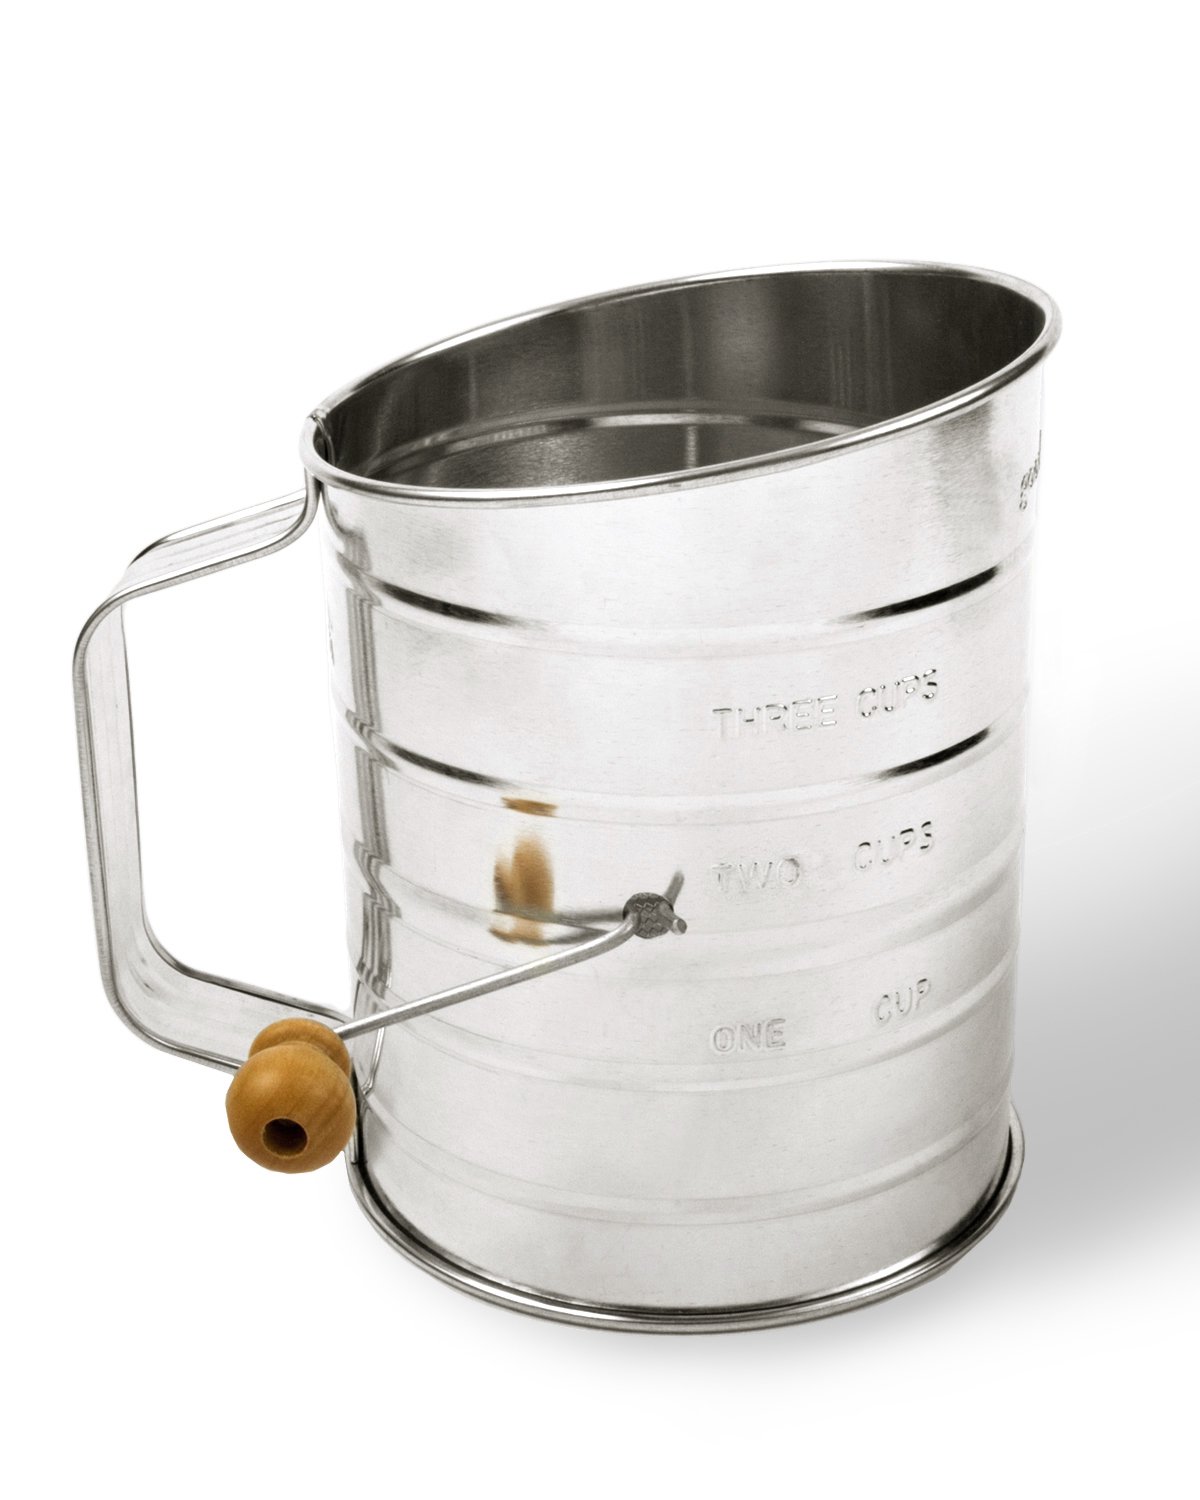
The images below were all shot using the side lighting technique.

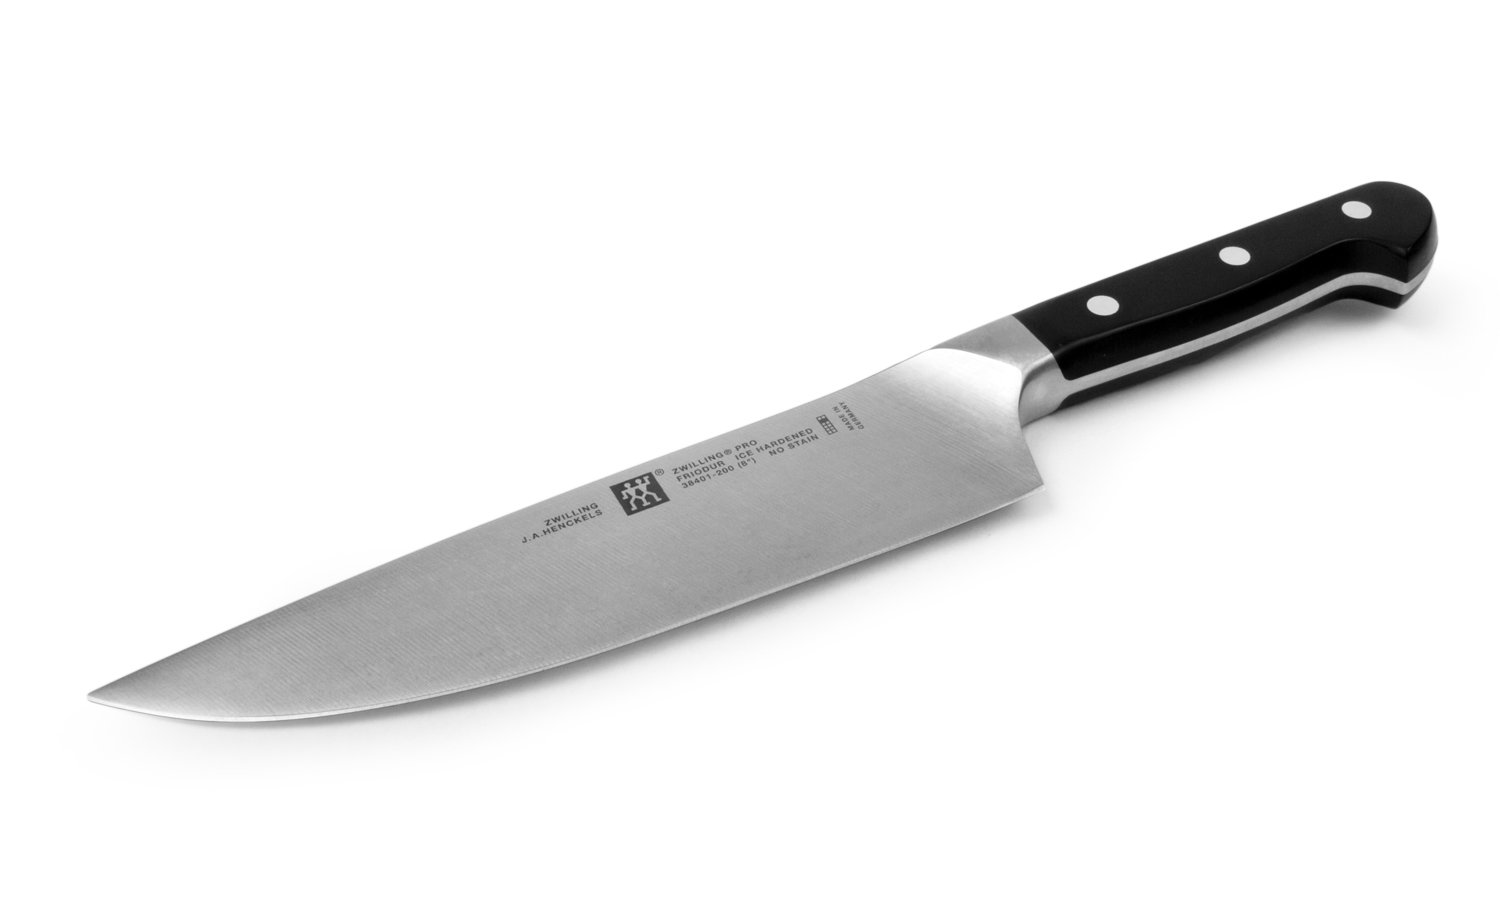
Photographing Metal Objects
Metallic objects are the most difficult to photograph due to their high reflectiveness.
With most, if not all, metal objects, you are able to see all of your surroundings on the object’s surface.
This two-lighting setup looks complicated but can be broken down into easy steps.
The following lighting technique should help you to successfully photograph smaller metal objects without those distracting reflections.
For bolder outlines and colors, try using black foam boards to either side of your product.
Step 1: Arranging your Setup
Place your object on a sturdy surface, such as a table or a block, and position two large studio lights next to it, one on either side. Both lights should be diffused with umbrellas. You will then need to hang a white sheet of rolled paper behind the product so that it sweeps underneath the product and attaches to the bottom of your camera lens to block any fall off reflections coming from the foreground and to reflect more light back onto the subject.
No foam board is necessary for this setup, since you’ll be relying on two diffused lights to softly illuminate the product. Position your camera on its tripod so that you are shooting slightly down at the product, as with the side lighting setup.
We recommend using strobe lighting for metallic products because strobes allow for more lighting control, but continuous lighting would suffice. Whatever you decide, position your lighting above your product to either side, angle them down at the product, and set them to the same power. This, along with the diffusing umbrellas, will help to evenly fill the frame with light without creating ugly bright spots on your product.
Before you begin shooting, make sure to wipe away any fingerprints or smudges that you created on the product while positioning it in the shooting space. You can spot clean the product as you go, but if possible, wear gloves to eliminate this step.
As you can see below, ineffective lighting is very ineffective for metallic products, so the importance of mastering this two-light setup is paramount.

Do whatever it takes to eliminate ugly reflections like those in the images on the left and create the even, reflectionless lighting in the images on the right.
Step 2: Setting your Camera
By now, we have explained all of the necessary camera settings that you will need to achieve the highest quality images that your camera can deliver. Use a large aperture of f/11 or greater and a shutter speed that properly exposes your product according to the light meter in your camera’s viewfinder. Set ISO as low as possible, preferably ISO 100, and focus on the center of the product to ensure that you get everything in focus. Auto white balance usually works fine, but it is also worth it to consider manually adjusting white balance according to the “warmth” of bulb used by your light sources.
Step 3: Post-processing your Images
Similar to the section on camera settings, post production should be relatively straightforward. Use healing and cloning tools to eliminate smudges, fingerprints, dust, and other types of imperfections and damages to make your product look its best. Pay special attention to color accuracy and, above all, make certain that your background is clean and white.
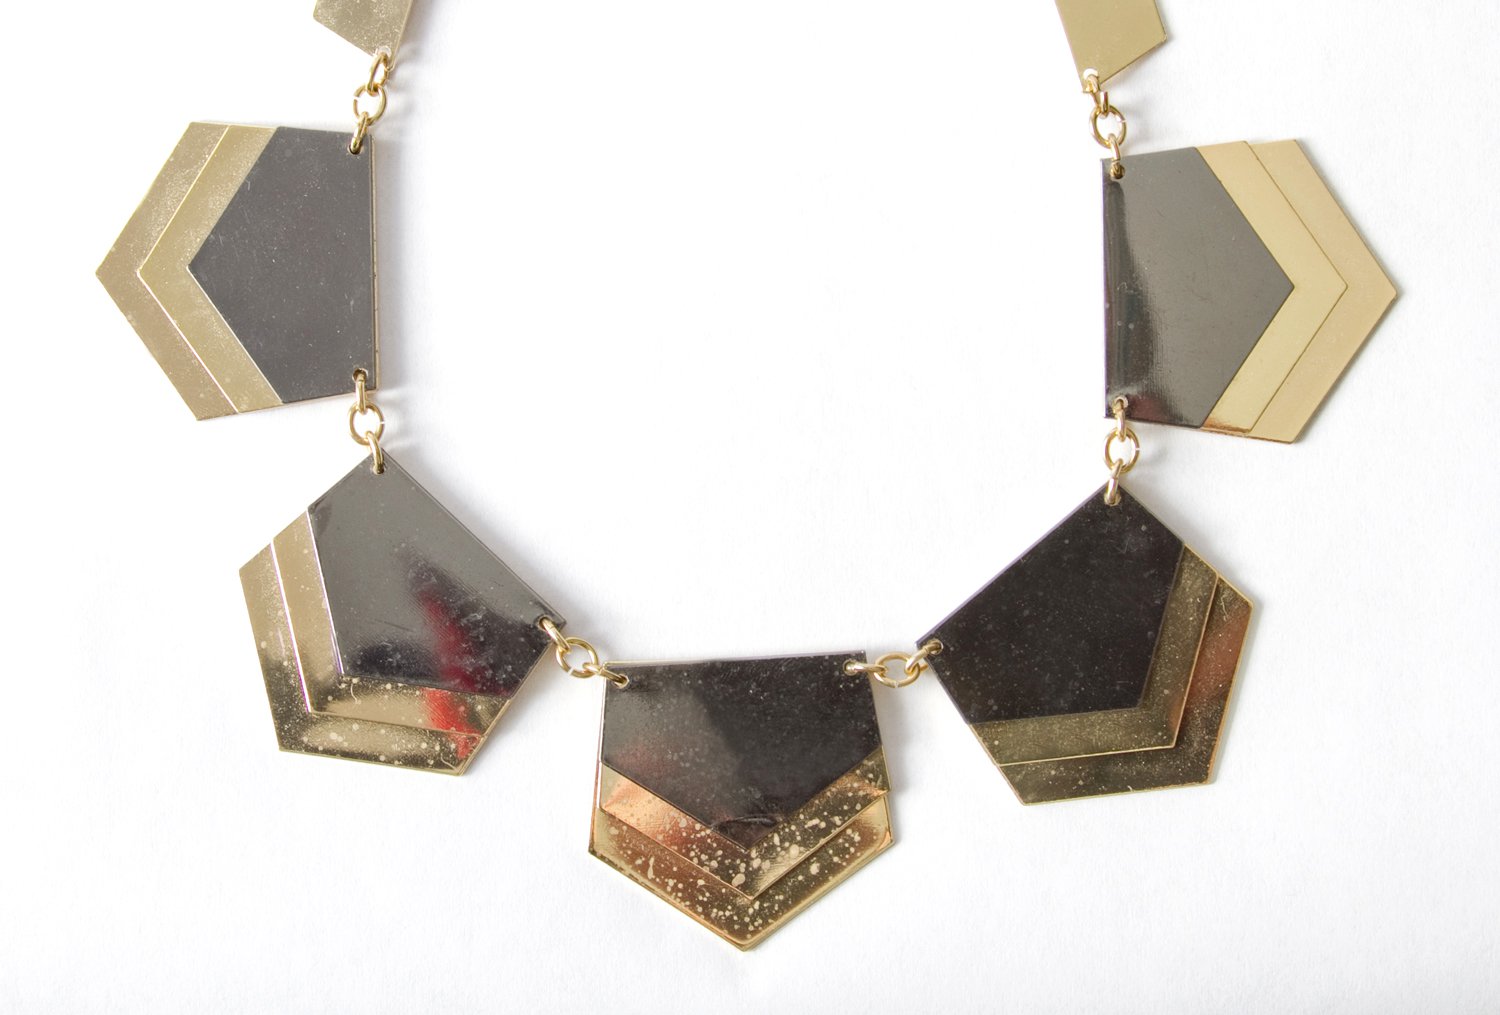
The images below were shot using double overhead lighting.
There are many ways to light reflective objects, but these three simple lighting setups can cause your product images to wow customers and stand out from the rest!
Sometimes the post-production process can feel tedious and lengthy, especially if you feel that your product images need extensive work to look their best. If you’re feeling overwhelmed, try an outsourced retouching service like Pixelz who can make your images shine with very fast turnaround. Outsourcing can help to alleviate some of your post-production and marketing workload so that you can focus on mastering these lighting techniques and making sales!


