
ISO, diafragma en sluitertijd zijn de belangrijkste camerainstellingen voor productfotografie.
Wanneer je voor hoge kwaliteit gaat dan stel je je camera zelf goed in. Lees de Handleiding Zelf je Camera Instellen, of lees hier vast een paar basistips die je fotografie naar een hoger plan gaan tillen.
De camera-instellingen bepalen de reactie van je Camera op het licht. Met ISO stel je de mate van gevoeligheid voor licht in, het diafragme bepaalt hoeveel licht er binnenkomt en de sluitertijd bepaalt hoelang je sensor wordt blootgesteld aan het licht.
Welke instellingen heb jij nodig?
ISO
ISO is de gevoeligheid van de sensor voor het binnenkomende licht. Hoe lager het getal, hoe meer belichtingstijd je nodig hebt. Je kunt dus in het geval van weinig licht een hogere waarde gebruiken, maar je betaalt altijd een prijs. De hogere ISO waarden geven een korrelig beeld en je verliest dus aan scherpte.
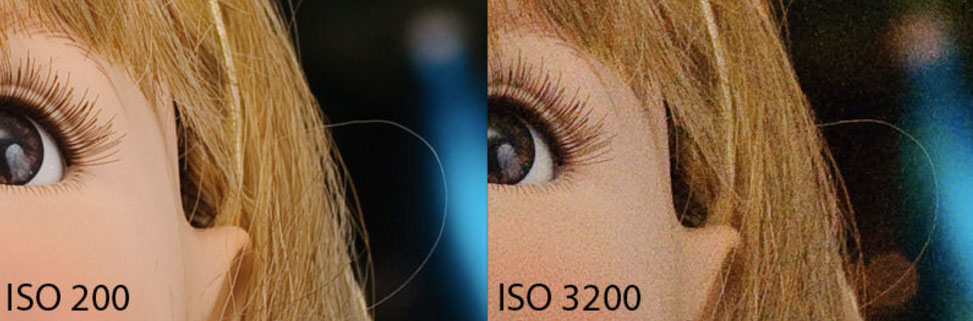
A higher ISO introduces grainy “noise” to your photograph. Img src: photographylife.com
Wil je meer weten over ISO waarden? Lees dan onze handleiding De juiste ISO waarde kiezen voor je productfotografie.
In de basis kun je aanhouden dat hoe lager je ISO waarde, hoe beter. Zet je camera op een statief en bekijk telkens je foto goed. Verlies je detail, zet de ISO waarde een stukje lager.
Diafragma
Diafragma werkt als de pupil van je oog. Wanneer er veel licht is gebruik je een kleine opening en bij weinig licht gebruik je een grotere opening. Het diafragma bepaalt dus de hoeveelheid licht die door de lens gaat en op je sensor valt. Het bepaalt daarna ook nog de scherptediepte van je foto. Wil je meer lezen over diafragma en hoe deze je foto’s beïnvloedt, lees dan onze handleiding over diafragma en productfotografie.
![]()
Het diafragma bepaalt de hoeveelheid Aperture controls how much light passes through a camera lens. Lower F-stop settings allow more light and create a shallower depth of field.
If you want high quality product images, you need to set ISO, aperture, and shutter speed yourself.
Aperture is measured using a system known as F-stops, and generally ranges from F1 to F22. The lower the number, the more light gets into your camera and the faster your shutter speed can be. Lower F-stops also create a shallow depth of field, allowing you to focus on specific details while focus falls off and blurs around your focal point.
For product photography, shutter speed isn’t an issue because your camera is on a tripod and your light is generally consistent (even with DIY sources). You will almost always want to use as high an F-stop as possible, like F16 or F22, in order to capture your product in full focus.
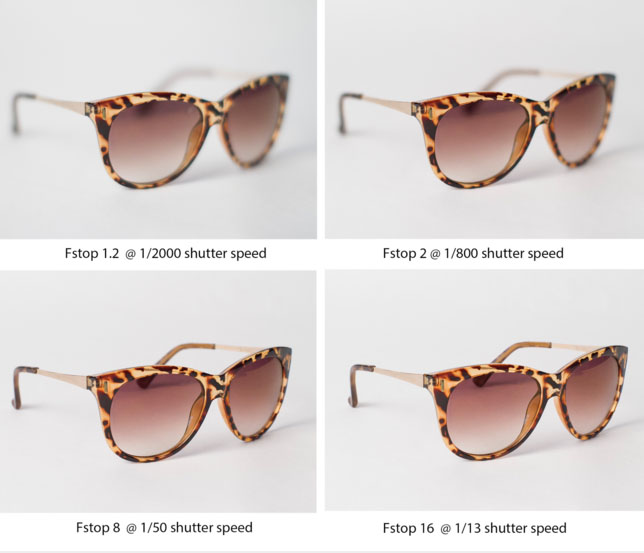
Aperture F-stop settings determine depth of field, which is the area that’s in focus.
The exception that proves the rule is when you’re trying to highlight a detail, like a handle on a knife or a buckle on a belt, and you use lower aperture to draw the eye to the focal point. In almost every other case, you will want the entire product to be in complete focus.
Shutter Speed
The shutter speed setting (also known as “exposure time”) determines the amount of time your camera’s sensor is exposed to light while taking a photograph; literally, it’s how fast your shutter opens and closes. Generally speaking, the faster the shutter speed the more an object is frozen, while slower speeds can create motion blur. You can learn more in our complete guide to DIY camera settings.
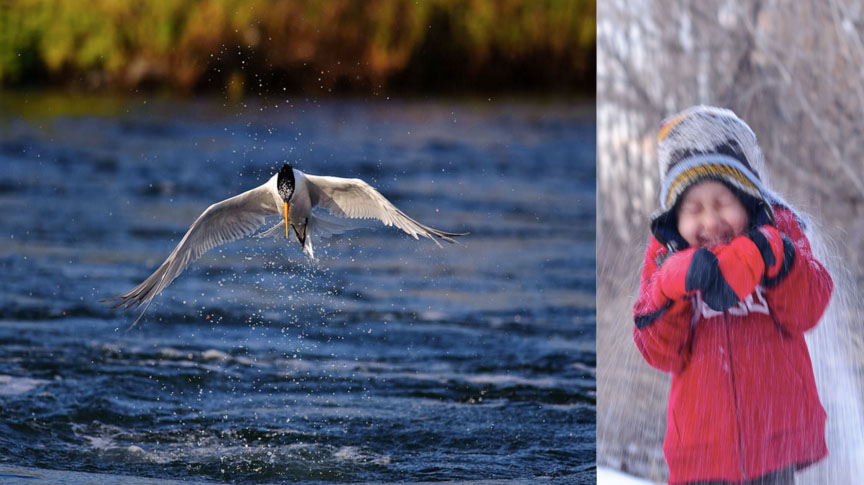
Shutter speed, aka exposure time, can either freeze or blur subjects in motion. Img src: photographylife.com
For landscape, sports, and nature photography, shutter speed is extremely important aesthetically because shots contain moving subjects. The photographer may be moving too, and handholding the camera.
Low shutter speeds are ideal for product photography when your camera is on a tripod and you’re shooting a still subject.
In DIY product photography, your camera will almost always be on a tripod shooting a still object. For this reason, we don’t have to worry much about motion blur or camera shake generated by handholding, so it’s possible to use a low shutter speed to create extremely sharp images.
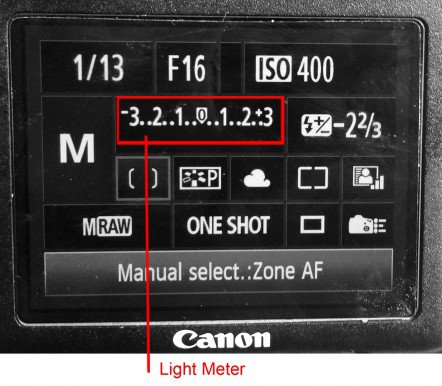
Use your light meter to determine if you should adjust your camera’s shutter speed.
Shutter speeds are given in fractions of a second. When using a tripod in a studio, use a low setting like 1/13 in order to push more light into the camera. Use your light meter to determine your exact setting by adjusting shutter speed until you get to zero.
If you are shooting a model, you may need to increase your shutter speed to compensate for motion.
Learn how ISO, aperture, and shutter speed control your camera’s relationship to light.
Controlling Light
Do you feel like you’ve got camera settings down?
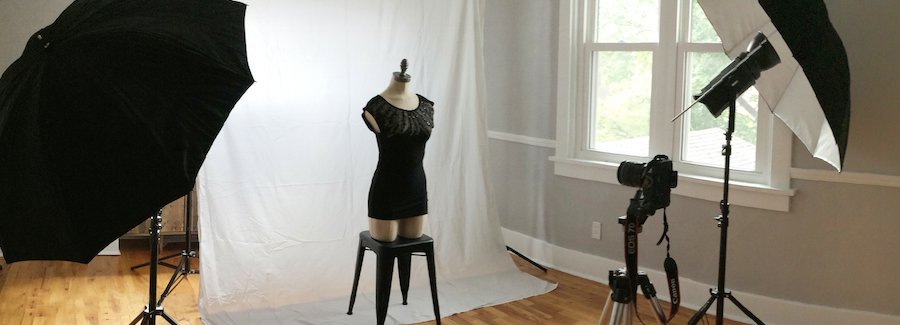
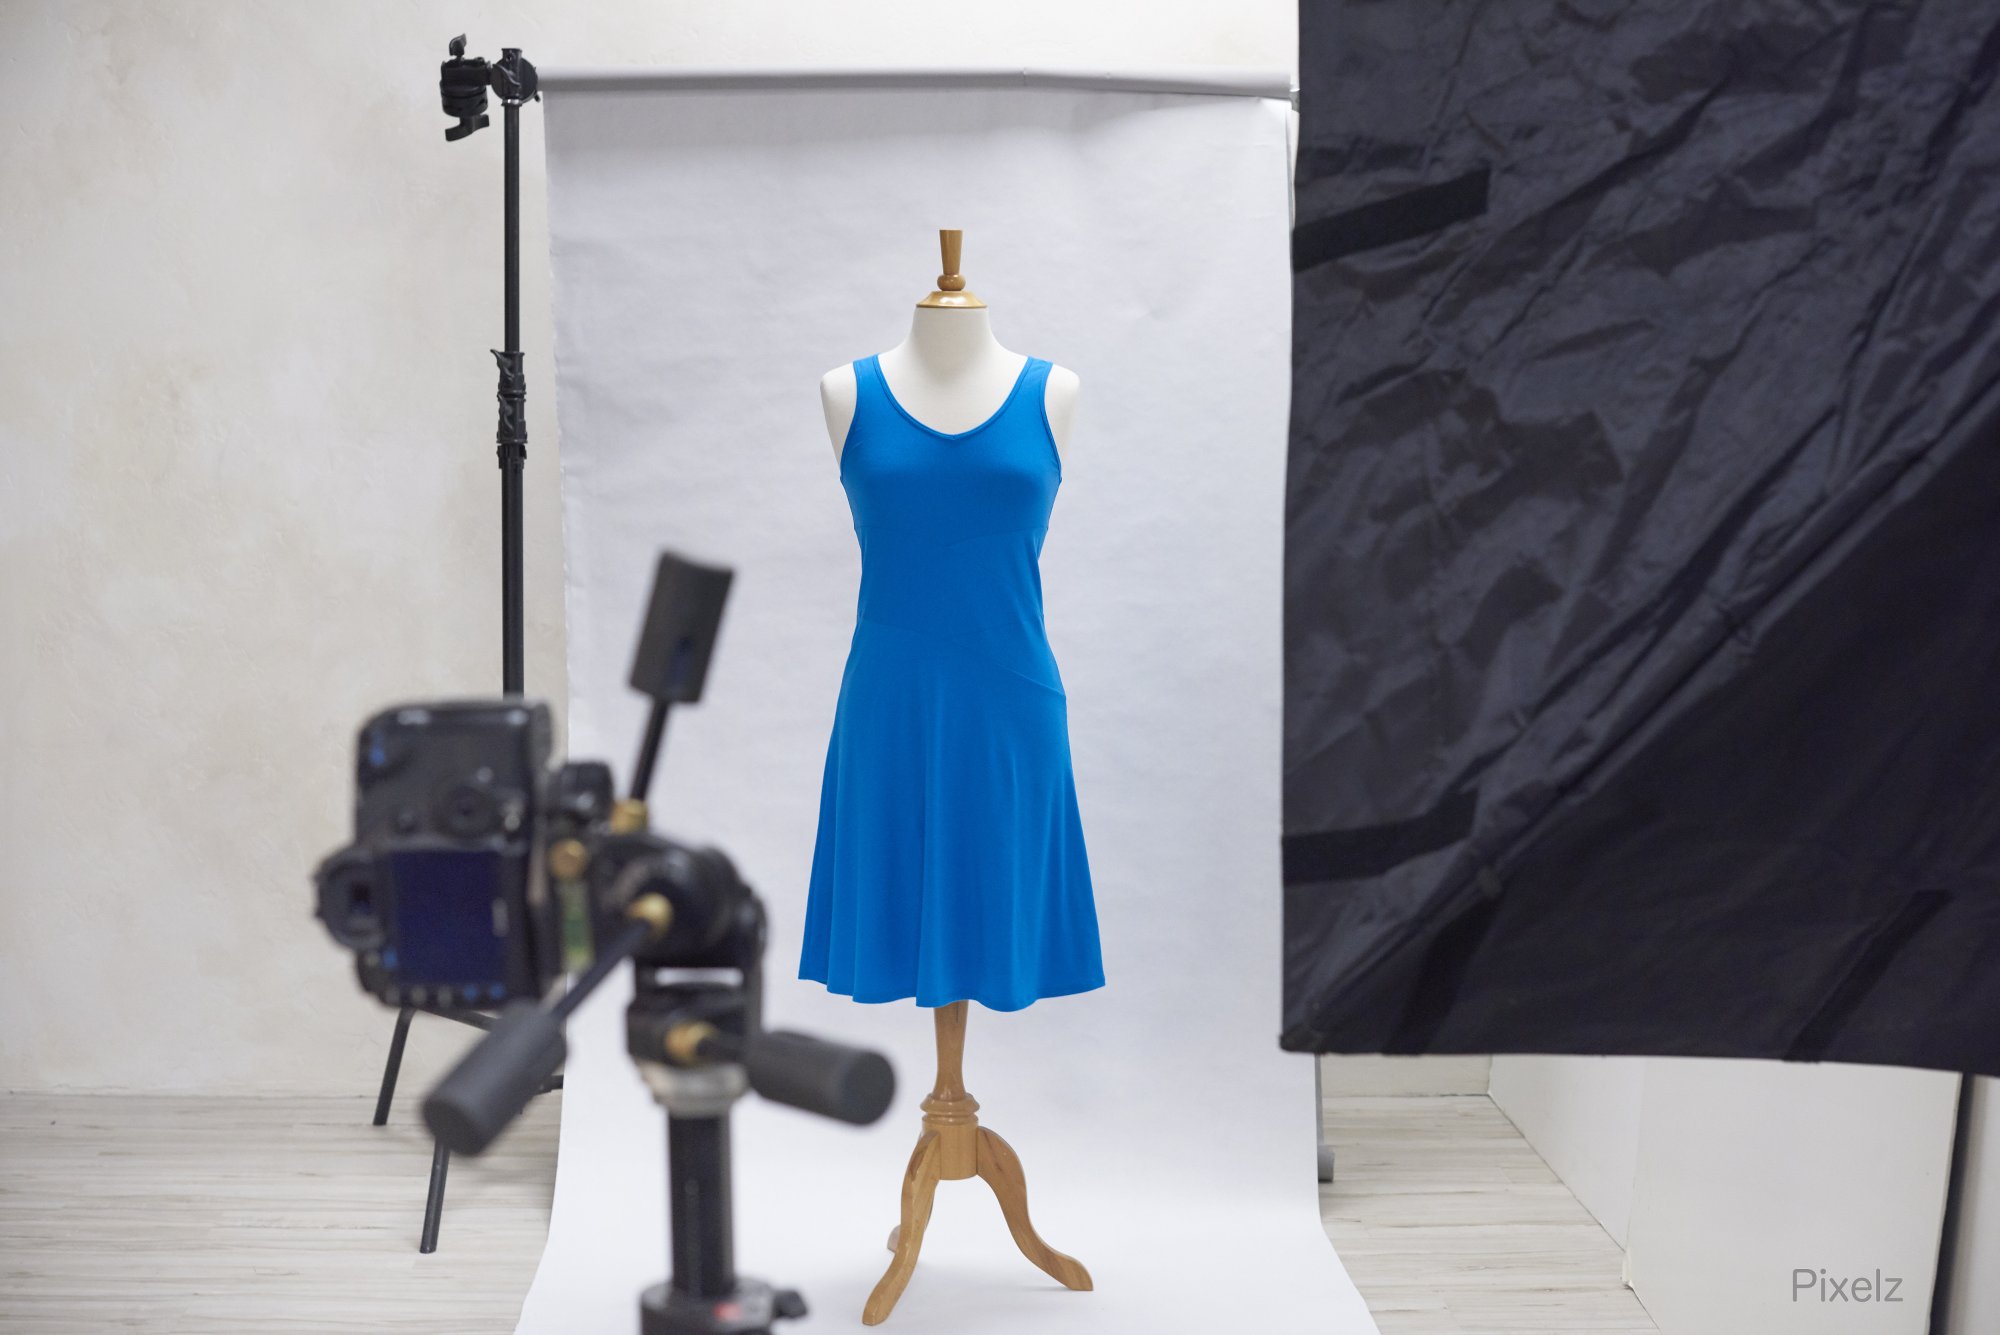
Lighting equipment and setup is crucial for product photography.
Good! The next big step in improving as a photographer is learning how to shape light itself. Read our guide to photography lighting equipment to determine what to buy, rent, or build for DIY product photography. Then check out three common lighting setups and see if they’ll help on your next shoot.
Do you have questions about ISO, aperture, shutter speed, or other camera settings? Let us know in the comments below!