
Grab Your Camera. Let’s Get Started.
Whether you have a compact camera or an iPhone, it doesn’t really matter. If you have a SLR camera, great. I found my old compact camera that I haven’t used since I bought my first iPhone. The camera is more than 5 years old, but a fine camera for this guide.
My object is a wooden elephant. This is a fairly easy object to start with because it doesn’t have a lot of reflections. On the other hand it is very important to show the quality of the build and the nice wooden texture it has.
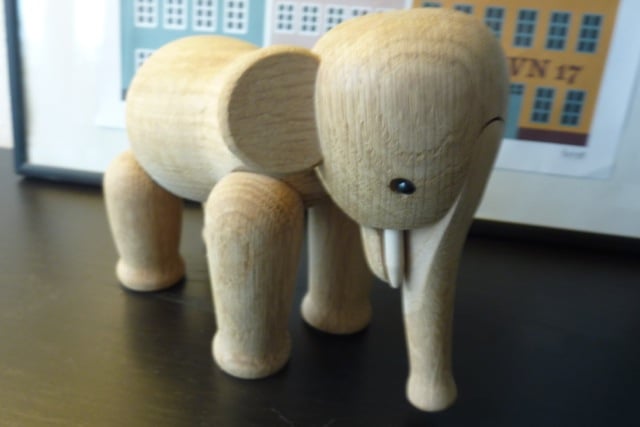
Let’s start with a photo where all camera settings are on AUTO, which will look like this:

This it how the image looks when everything is on auto and the result is not good at all. The head of the elephant is over-exposed and the on-camera flash creates some very drastic shadows (not good!).
1. Don’t Use Camera Flash
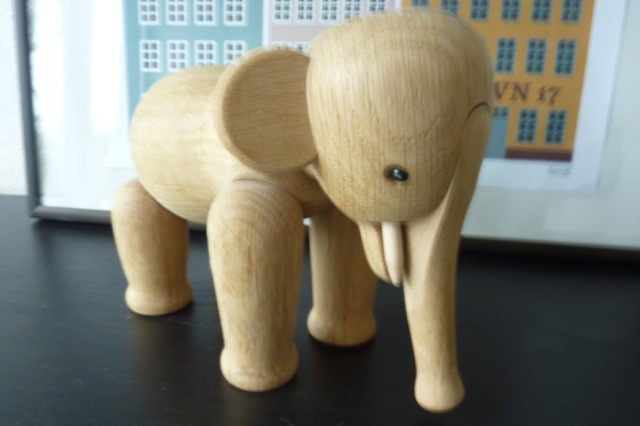
Now let’s try to switch off the flash and see what happens:
In terms of lighting, I am near a big window with plenty of daylight and I also have a lamp with a normal light bulb. Some light bulbs have different light temperatures than daylight. You can see the very warm (yellow) light coming in from above the elephant. Notice how the image also becomes a bit blurry, I’ll get back to that in a minute.
2. Be Careful With Mixed Lighting Temperature
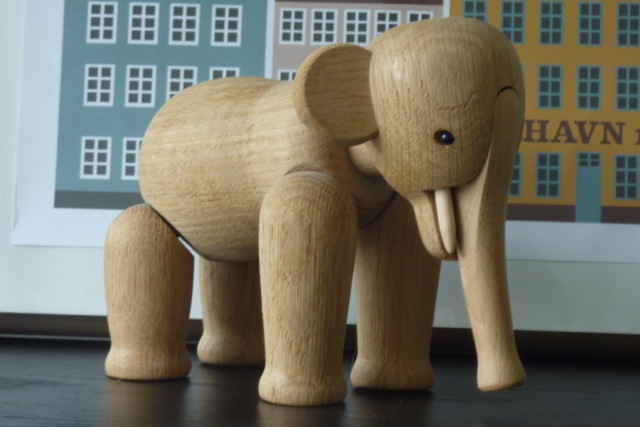
If I were to give you just one piece of advice, it would have to be to avoid mixing different types of light sources. We can’t ‘turn off’ the daylight just now, so let’s try to turn off the lamp. If you are taking photos in the evening (or have a dark room) a couple of lamps will be just as good.
Photo with just one light source (daylight from a big window):
Here the image has become very blurry. Less light means that the camera needs more time to process the image (longer shutter speed). It’s impossible to hold the camera steady when the shutter speed goes down. You’ll need a tripod.
3. Use A Tripod
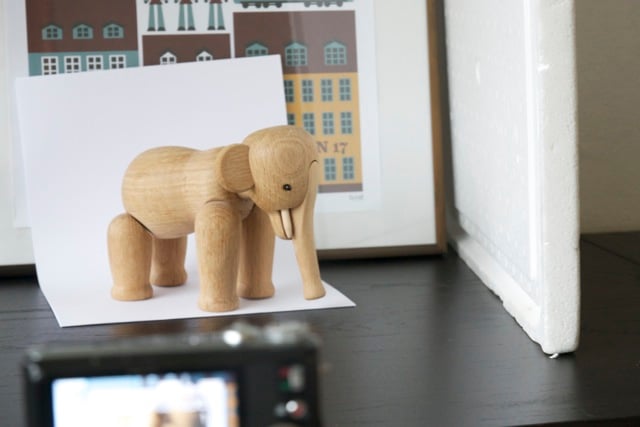
A tripod will also ensure that you use the same camera location when you experiment with lighting. If you don’t have a tripod, you can place your camera on about the same level as the object. In this case you might want to use a remote trigger or the camera’s self-timer so you don’t shake the camera when you push the trigger button. The self-timer gives a delay between pressing the shutter release and the shutter’s firing. The most common delay is 10 seconds, but some cameras also have a 2-second setting. In fact it might be a good idea to use the self-timer even if you use a tripod.
The self-timer icon on your camera will look like this:

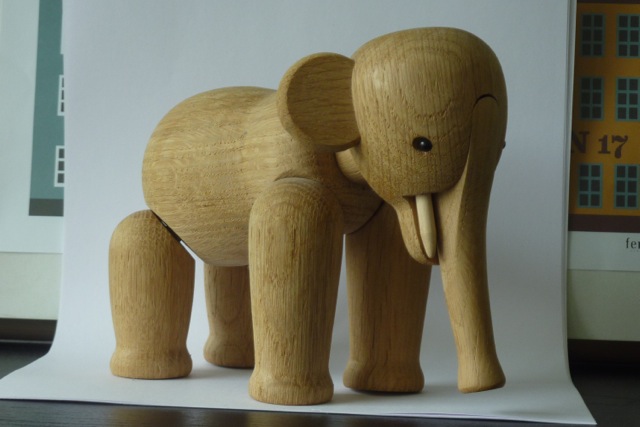
Here is my setup:

4. Zoom In!
Now that my camera is moved away from the object , I’m forced to use the built-in camera zoom. This is actually a very good thing because I avoid the distortion caused by the “wide angle lens”. Tip: You can zoom as much as possible using optical zoom, but never use digital zoom.
Let’s take a look at the result now:
I like the result. The background is a little bit distracting and is not exactly helping me if I want to isolate the object in post production.
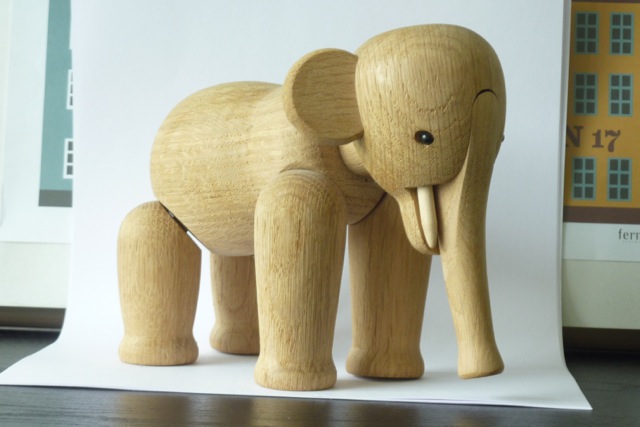
5. Use A Backdrop
I’m going to place a piece of white printer paper behind it as a backdrop. This is what I had at hand, but you might have something that works better for you.
The camera will compensate for the big white area by making my photo darker. This is a little bit underexposed.
6. If Too Dark, Use Exposure Compensation
Luckily most cameras have an exposure compensation feature, where you can adjust this. The icon on the camera will look like this:

I am adjusting it by moving the pointer to the right +1:
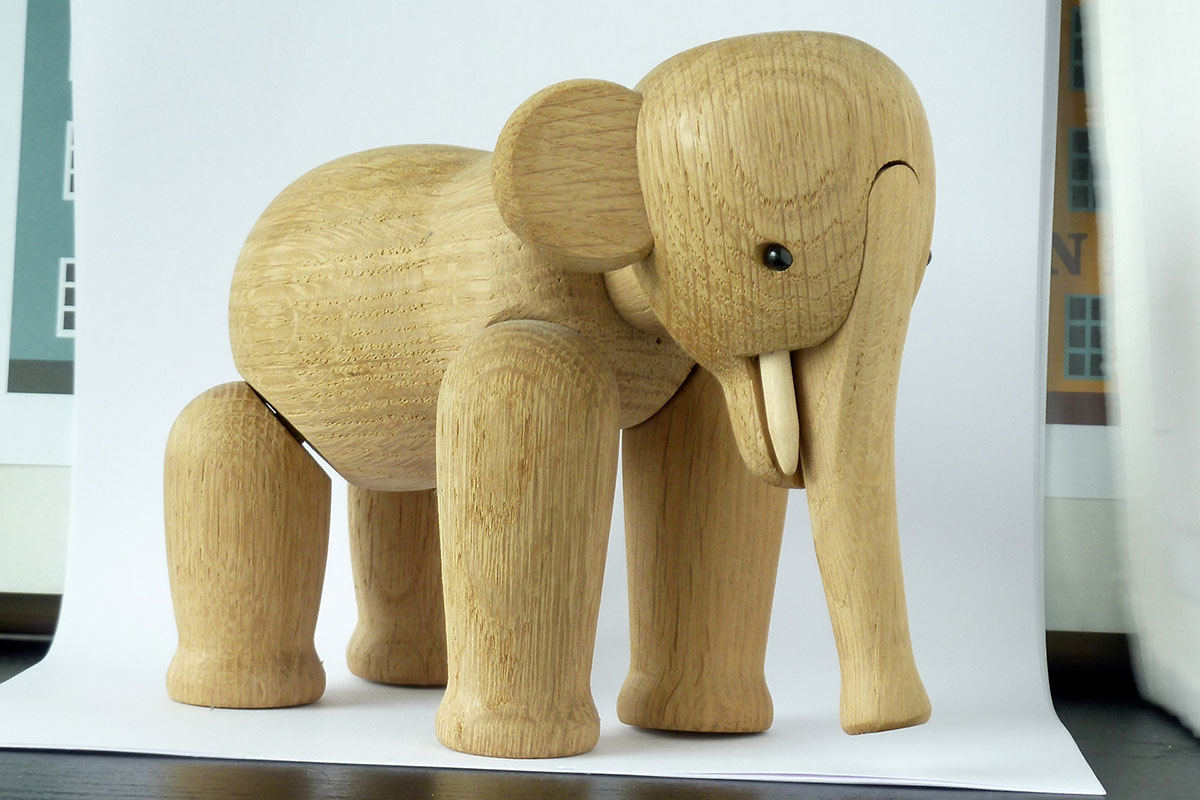
Almost there. I only have one last thing that I’m not 100% satisfied about. I would like the light to be more evenly distributed on the elephant. The head of the elephant is too dark compared to the back. This is just my opinion and a quick fix could be, to turn the elephant so it’s facing the window. For the fun of it let’s try another tactic.
7. Light Up Your Object
Since all the lighting is coming from one source (the window to the left) I need to find a way to get some light from the other direction. One way to achieve this is by reflecting the light. You can use a piece of white cardboard or foam and place it on the opposite side of the window like this:
Now we have the final result and I think it looks great:
8. Post Production
Professional photographers spend about half their time on post production. I handed over the post production to our skilled team of editors. They removed the background but kept a little bit of the natural shadow:
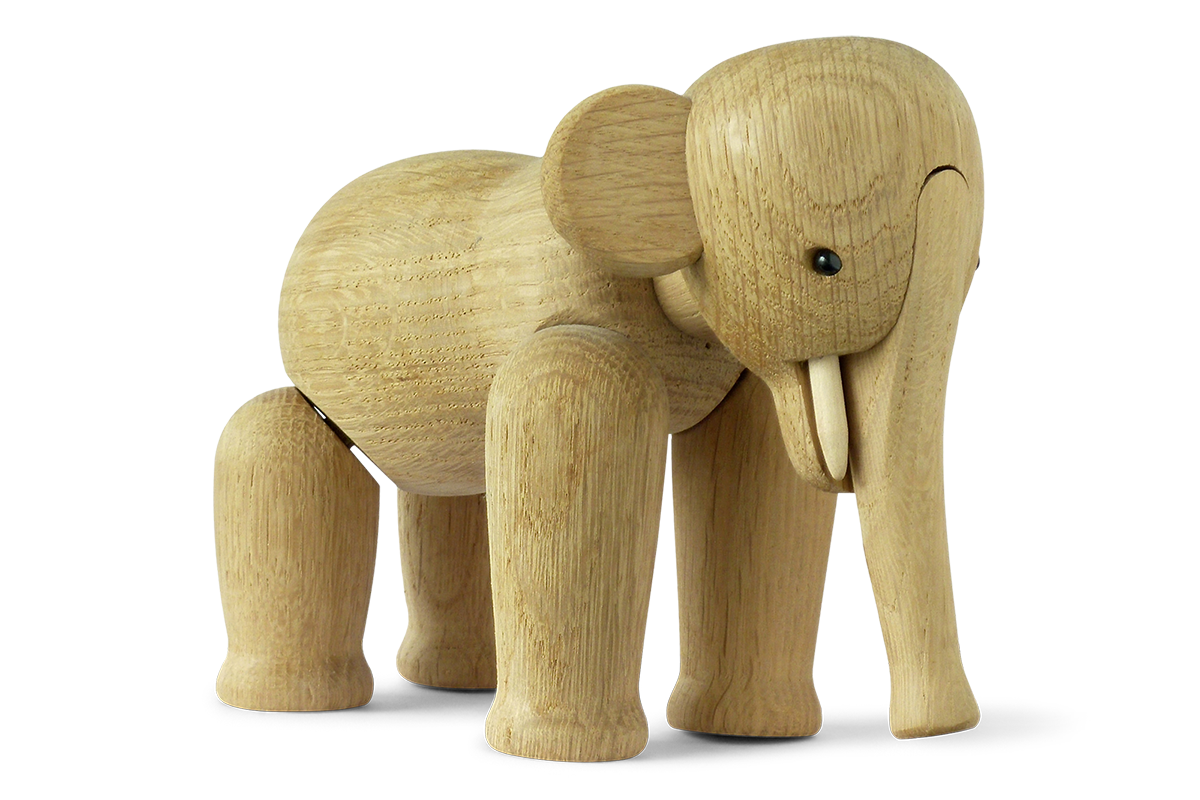
Now I’m very satisfied with the result and will be able to take some additional photos with the same basic setup.