
Trust is incredibly valuable in the uber competitive eCommerce world: Adobe reports that 40% of eCommerce revenue comes from repeat purchasers, who represent only 8% of all visitors. Another way of looking at it is that a repeat customer is worth 5 times more than a new customer.
So how do you turn a new customer into a repeat customer?
One way is to create a positive shopping experience and increase customer satisfaction by showing your customers exactly what they’re getting. Accurately representing your product prevents confusion, limits returns, and builds brand loyalty.
The Sizing Challenge
Scale is one of the trickiest obstacles photographers encounter. Accurately representing different sizes while still creating consistent images is a challenge; you can’t always add in familiar objects like hands, coins, or rulers without creating distracting eyesores.
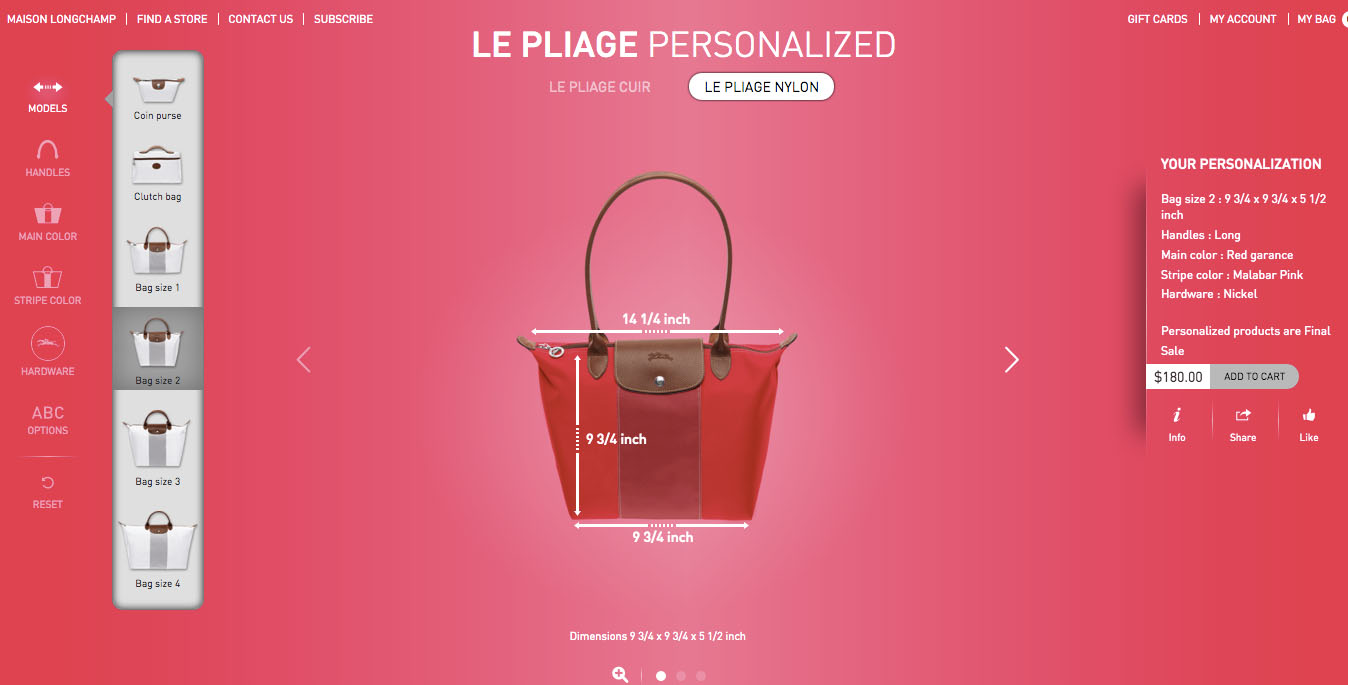
You can’t always put exact measurements on a product image to show its size.
So what do you do when you have small, medium, and large sizes of different products? How do you show product sizing in your product images?
Representing true life scale is nearly impossible during the photoshoot due to elements out of your control, like zoom restrictions and cost. Fortunately for business owners, there are tried and true post-production techniques that can provide consistent representation of product sizing.
We’ll show you how
Margins Give the Impression of Different Sizes
Our goal isn’t to create images that someone with a magnifying glass and ruler could examine and declare perfectly scaled. Our goal is to facilitate browsing and prevent someone from accidentally purchasing the wrong size, like confusing a wristlet and a shoulder handbag.
We’re creating the impression of different sizes rather than creating perfectly proportionate scale.
Let’s compare two pages for a demonstration. First, this is what we’re trying to avoid:
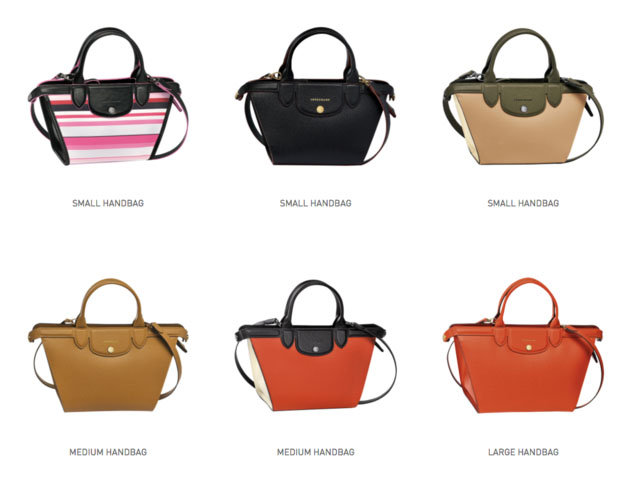
Don’t do this. When similar products are different sizes, they should look like it.
Every product looks identically sized. The only way to differentiate small, medium, and large bags is to read the text. That’s not customer friendly. If I’m shopping for a small bag, I don’t want to read your page – I want to look at it.
Even worse, I might go from one product to the next while browsing and not realize I changed sizes. I’m going to be upset if I place an order and don’t get what I expected.
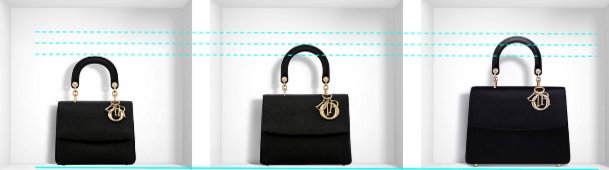
Here’s a positive example. This is much more customer friendly:
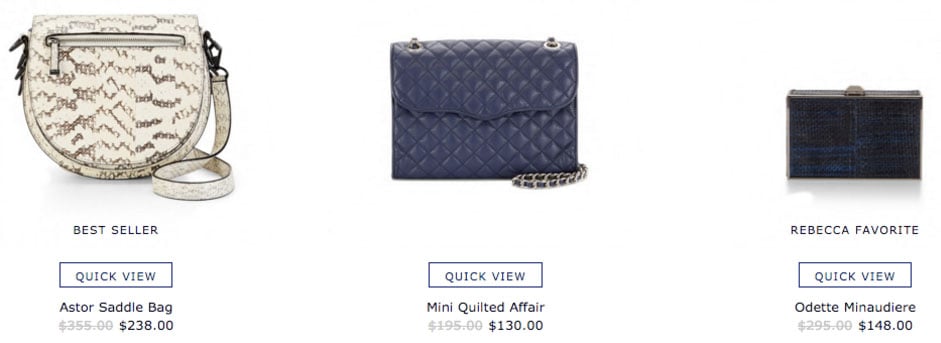
Do this. Rebecca Minkoff reflects sizing changes by adjusting the margin of product images.
If you’re looking for a small purse, you can quickly scan the page and spot options. That’s the way online shopping should be. Keep your customer looking at your product, not reading your page while worried about making a mistake.
Look at the Rebecca Minkoff example above. You may not know how much smaller the minaudiere is than the saddle bag, but at a glance you know the minaudiere is “small,” the saddle bag is “large,” and the quilted bag is somewhere in between. How have they communicated such helpful knowledge?
Rebecca Minkoff has created relative product sizes by adjusting image margins, a simple yet powerful technique. A “margin” in this context is the distance between your product and the edge of its image, measured in four directions: top, bottom, right, and left. We’re primarily concerned with the top margin.
Look at the example again: the minaudiere has more margin between the top of the product and the image frame than the saddle bag. The image stays the same size, but the product within the image becomes smaller. Because the product takes up less of its image and your screen, it’s understood to be smaller in real life too.
How do you do it? Follow this step-by-step guide to sizing your product images.
3 Steps to Creating Sizes in Post-Production
Let’s start with post-production basics: you want to consistently align all of your products. Here’s a guide to consistently aligning your product images that explains how and why.
After you have set category specific (like apparel, jewelry, furniture, etc.) alignment standards, it’s fairly easy to adjust your product size in Photoshop. After shooting and the rest of post-production is complete, we’ll create new standards for different sizes.
If you sell hundreds of goods that are identical except for size and color, you can avoid shooting every individual item variant. We’ll show you how to duplicate imagery and change your image margins to represent different product sizes, while saving time and money.
1. Create your sizing guide
Create a new Photoshop document set up to your existing specifications. Beginning from your existing specs will help you maintain consistency across your site. If you’re not too familiar with Photoshop, here’s a DIY guide to editing product images.
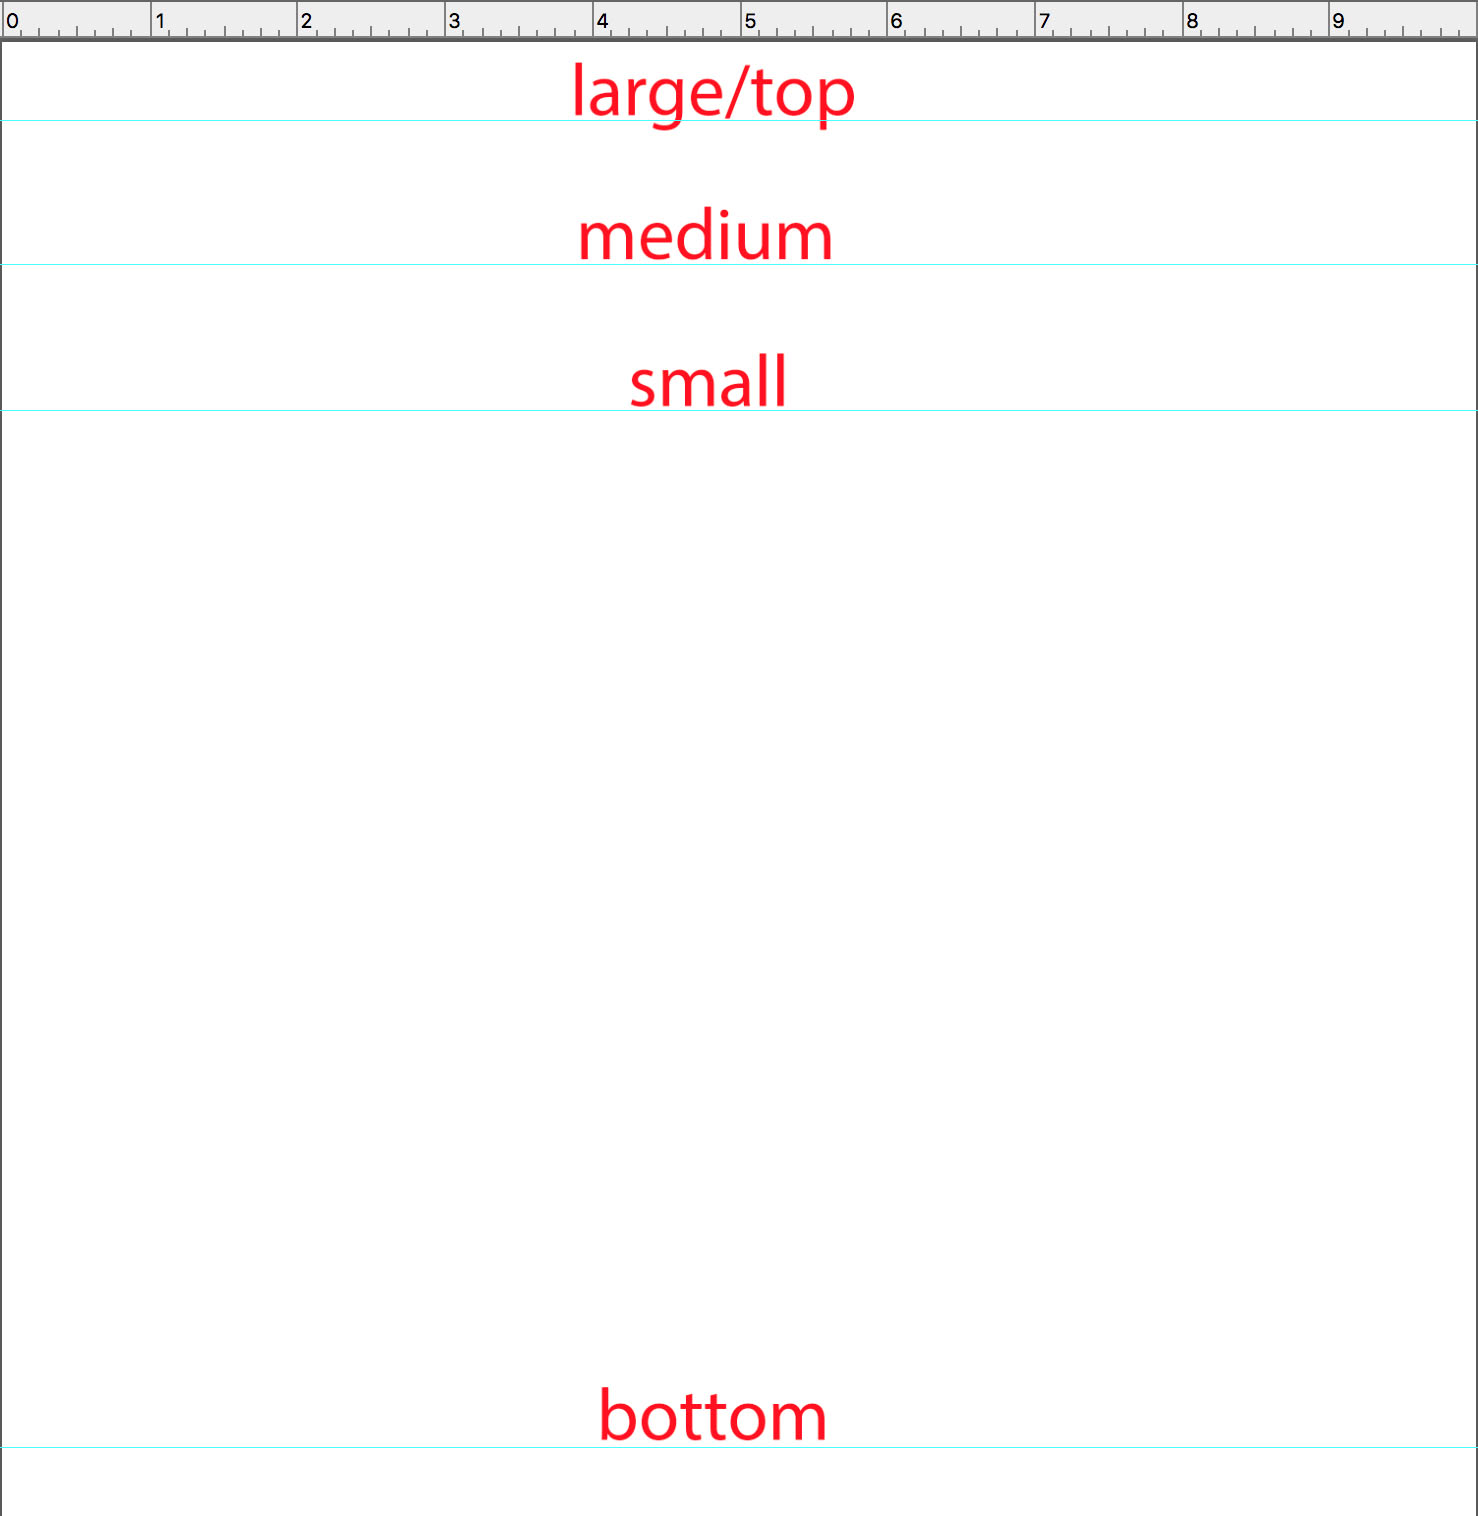
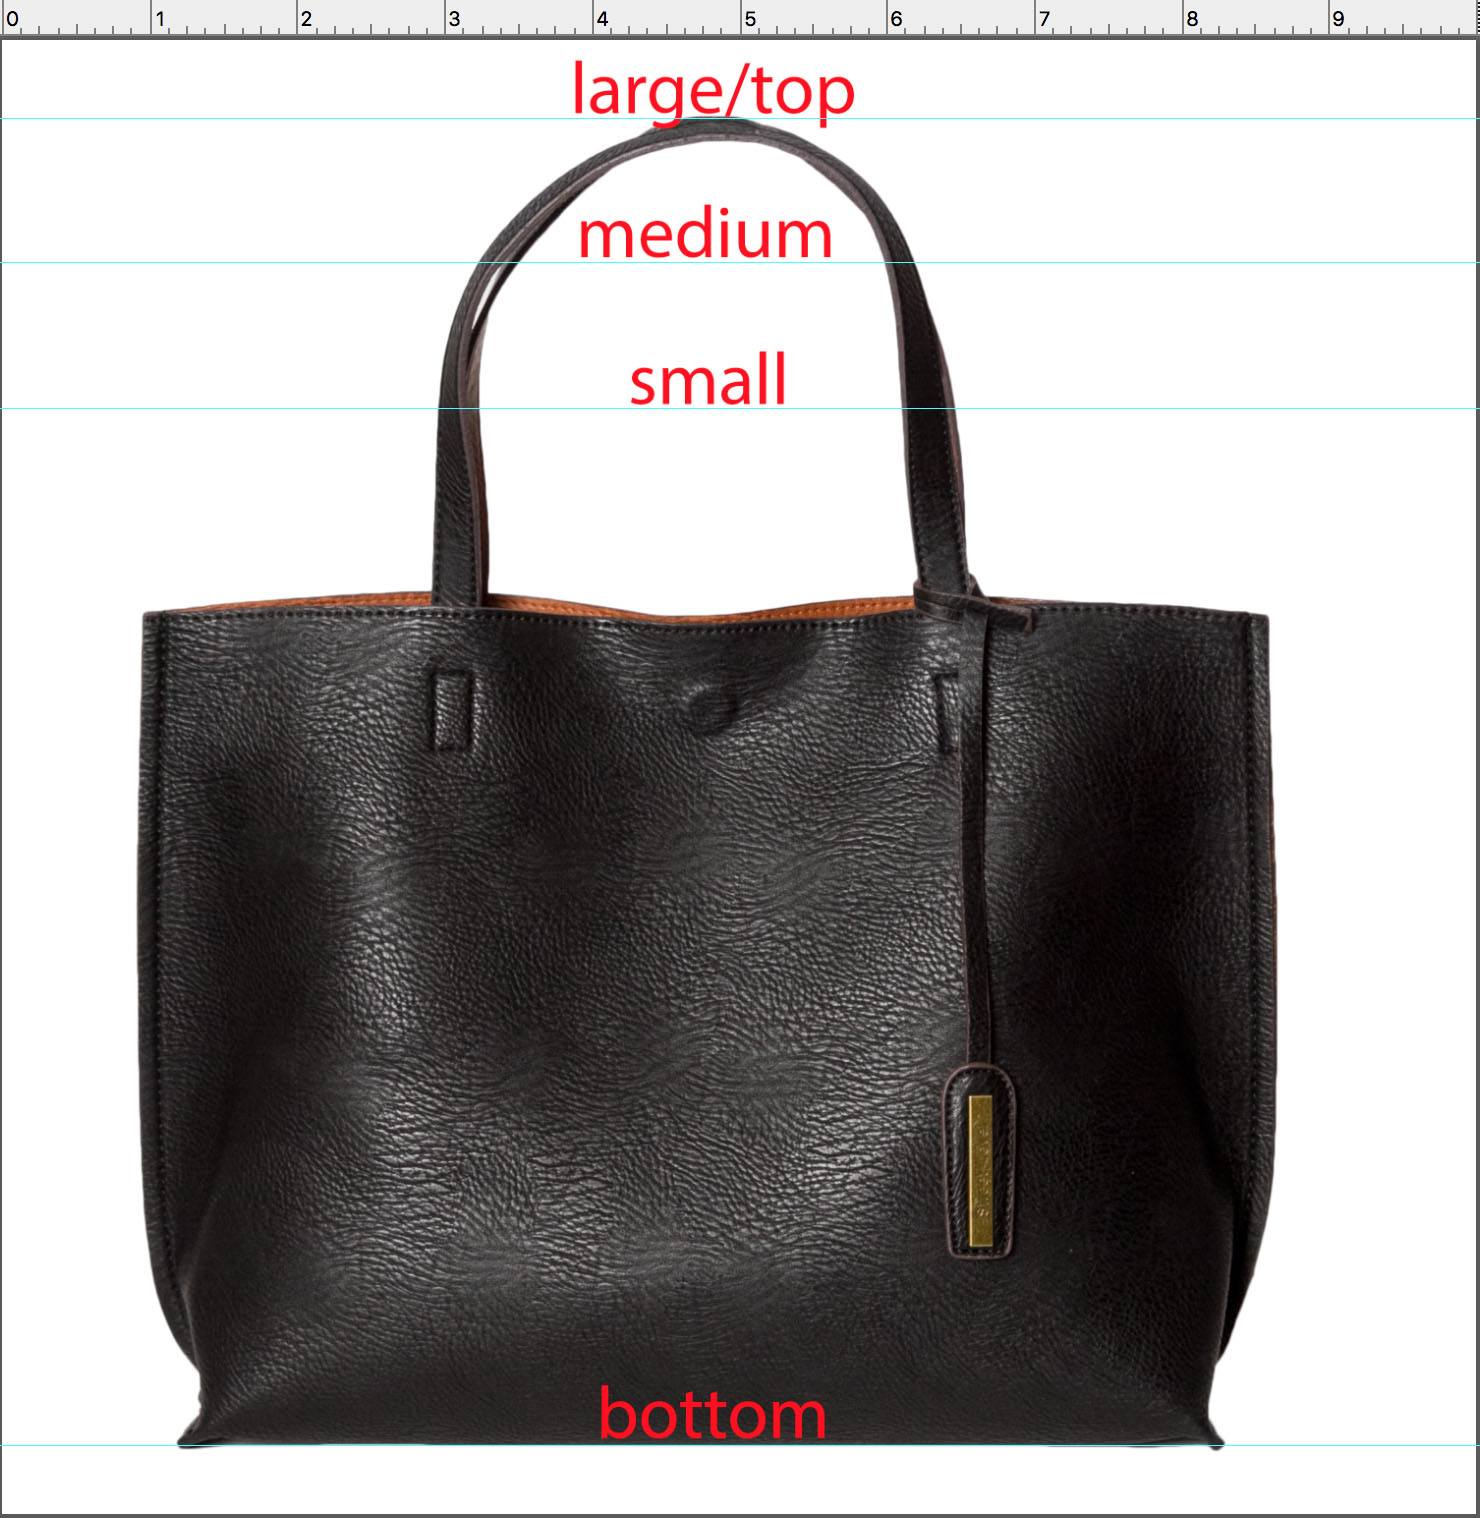
Your sizing guide should be scaled to create an intuitive impression of different sizes.
Set your guide for bottom aligning your product. Leave some white space (margin) below the bottom line to allow a little breathing room for your product; we recommend something in the neighborhood of seven to ten percent. This line will be the starting drop point for all of your product images.
Next, set the largest guide for your biggest product pieces. We suggest using the same amount of top margin as bottom margin, for consistency’s sake.
Set your medium guide the amount you feel represents a noticeable change in measurement from large to medium. It doesn’t have to be proportionate to physical measurements, just significant enough to differentiate it from larger or smaller products.
Finally, set your smallest guide the same distance away from medium as medium is from large. Make sure your product will still be clearly visible at that size. If it’s not, start over from the beginning with an even larger “large.”
You don’t want someone to think they’re ordering a large suitcase, then have it arrive and be carry-on size. If the product is noticeably smaller within an image from one item to the next, the customer will intuitively realize the item is smaller, and they’ll pay attention to the dimensions you have listed on your website.
Accurately representing your product prevents confusion, limits returns, and builds brand loyalty.
2. Edit your images according to the sizing guide
Now you need to adjust your product images to fit the sizing guide. Because all product images within a category will be fit to the same guide, you will be able to maintain a professional standard of consistency throughout your site.
The first image placed in your document will be the largest option. In our example, it’s a “Large” purse.
Create the “Large” product image first.
Duplicate that image and resize the whole product down to your middle guideline. Now you have two sizes, “Large” and “Medium,” which are both visible.
Duplicate your image and resize it to the medium guideline.
Next, duplicate that same image and resize the entire product until it meets the “Small” guideline. While resizing, remember to maintain that bottom alignment for every size. This helps keep your website consistent and accurately maintains scale.
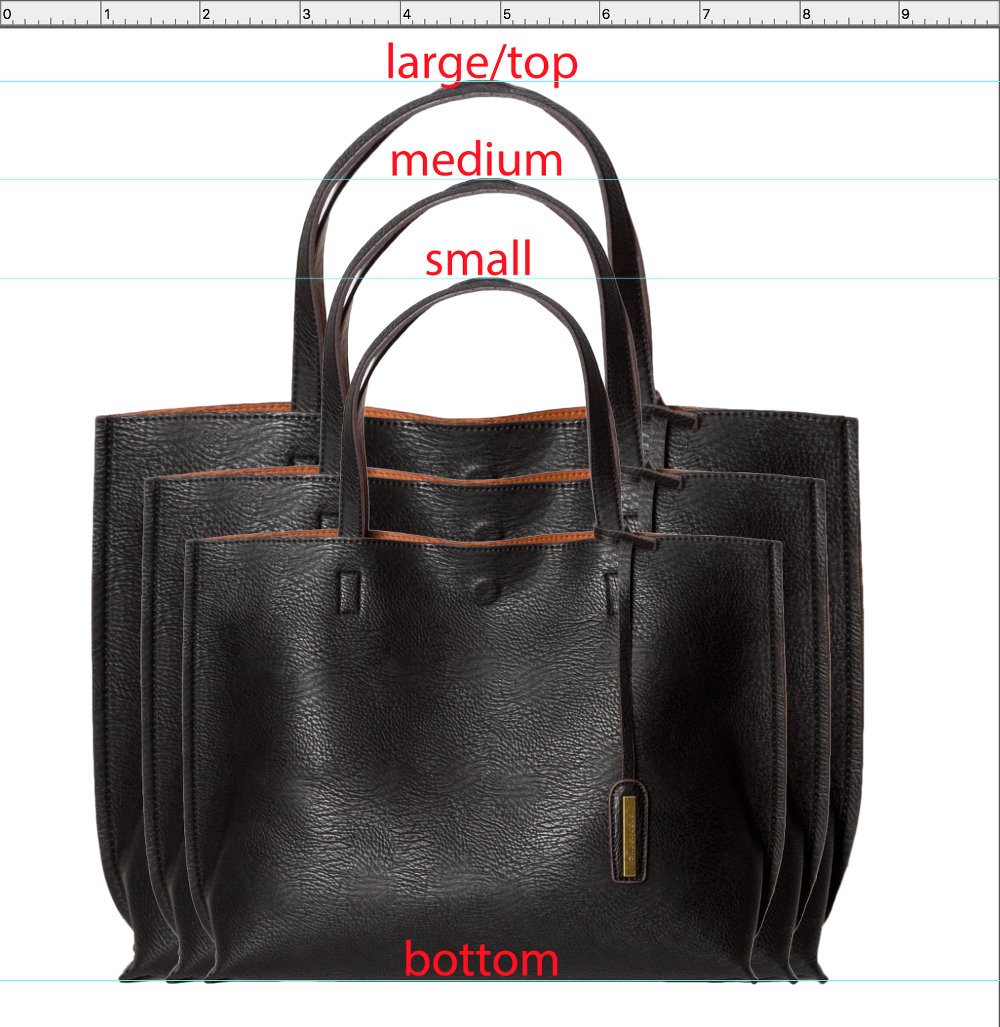
Duplicate it again and resize to the small guideline.
We’re creating the impression of different sizes rather than creating perfectly proportioned…
3. Save and use
Save each size as its own image and use that image moving forward. Using this technique will allow you to represent scale to your customers without the need for expensive studio time from shooting two, three, four, or more times the amount of product (in cases where a single product comes in multiple sizes).
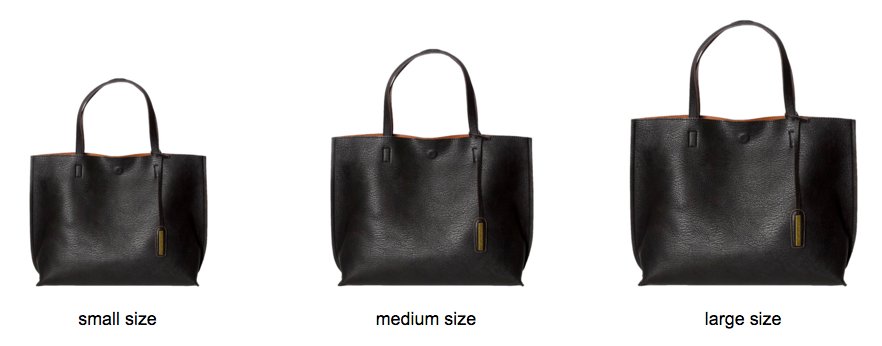
Having scaled product images will make it much easier for a customer to know which version of a product they’re looking at when they’re making a purchase decision. It will also make browsing your site faster, since they can focus in on their products in their desired size.
Don’t worry about size while photographing. Focus on capturing an amazing image, and then either adjust it yourself or send it to us for low pricing and a 24 hour or less turnaround guarantee!