
This is one you can definitely handle yourself!
Step 1: Set up your studio
Prepare your studio for the photo shoot. Not sure how to get started? Read ourDIY guide to building your photo studio on a bootstrapped budget.

Use a white backdrop for hat product photography.
Your setup can vary depending on the space and materials you have available. What is certain is that you will need a white backdrop; if you’re using a model, it needs to be big enough to cover at least the model’s top half. Set up your camera on a tripod exactly in line with where your product will be placed.
Models are expensive and can distract from your product. If models aren’t in your budget, mannequin heads are an excellent alternative.
Heads are smaller, cheaper, and easier to use than a full mannequin when you’re working with hats. Foam mannequin heads come in all different sizes, so choose the best fit for your product.
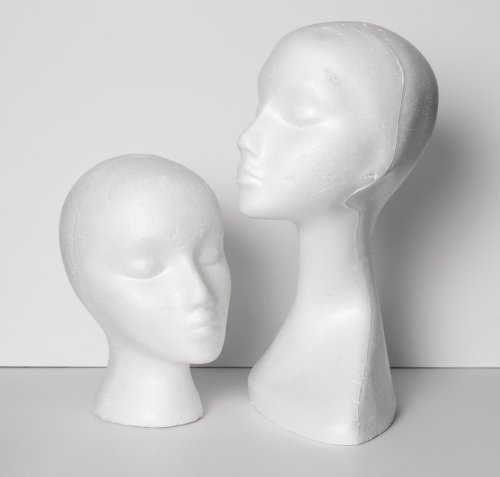
Foam mannequin heads are inexpensive and ideal for hat product photography.
You will need at least one source of light, like a strobe light or window, and two moveable reflective surfaces, like white foam board. For buying recommendations, check out our guide to product photography lighting equipment.
Set your main source of light to the left of your product. Ideally, it will be about face height with the model or mannequin head. If it is too high, shadows cast from the hat will be hard to remove later. The light should be placed slightly in front of your mannequin so it lights the front of the face, not just the side.
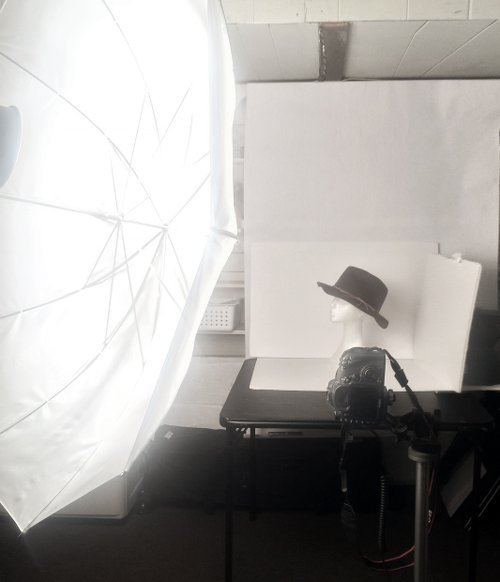
Use a main light and reflective surfaces like white foam board for fill light.
Next, place one of your reflective surfaces on the right side pointing towards the light, still at face level. The idea is that the light from the left will bounce off the surface on the right and lessen the dark shadows on the right side of the face.
If you’re using a model, practice with someone else of similar height first in order to save yourself time and money on the shoot day. Adjust the reflective surface or the light to get even lighting.
While there’s some flexibility in your studio configuration, be sure you use the same setup throughout your shoot and for future shoots of similar products. This will help your images stay consistent, increasing the professional appearance of your website.
Step 2: Prep Your Hat
Hats and caps, just like clothes, need to be prepared before being photographed. The more you fix before the shoot, the less work you’ll need to do in post-production. It’s a lot faster and more professional to clean an item than it is to Photoshop away dirt afterwards.

Lint rollers and hat boxes help you prep your hat for its photoshoot.
Most hats are made of felt or another fabric that collects lint you’ll need to remove. Try using a sticky lint remover as it will help grab all the tiny unwanted things on your hat.
Flaws and price tags should be hidden if they can’t be removed. Hats with brims should be steamed or ironed so that they hold their expected shape for the duration of the shoot.
Always store your hats so they will not get crushed. It takes a lot of unnecessary work to get your hats back to their original shape, if it’s even possible. Try these hat boxes from The Container Store or look for similar on Amazon.
Eliminate the need for models, save money, and create professional product images of hats by using…
Step 3: Prepare your product
If you are using a live model, style them with clothing that will complement the hat. You want the hat to stand out and be the clear centerpiece of the shot.
What catches your eye first? The hat, because it’s red and the focal point.
Faces also draw the eye, and it’s nearly impossible to shoot a hat in a natural position on a model without showing the face. That’s another reason you may wish to use the invisible mannequin technique instead of a model.
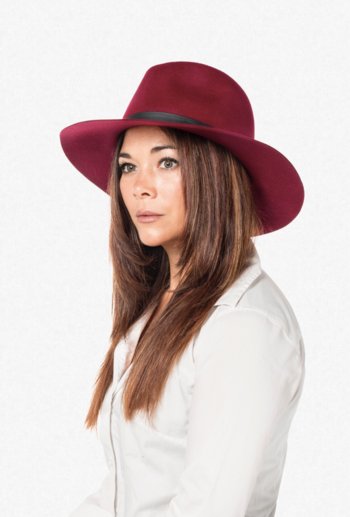
Style your model so their outfit doesn’t compete with the hat for attention.
When styling a model while shooting hats, try to create a realistic outfit. For example, a warm wool hat may be paired with a wool coat and scarf, while a summer sun hat may be paired with a colorful dress and necklaces.
Your choices count. The more practical and complementary they are to your product, the better. Create context, but don’t compete for attention.
Step 4: Shooting process
After you’ve set up your studio, prepped your hat, and styled your model (if you’re using one), it’s time to capture your image.
Follow our DIY guide to camera settings to find the optimal settings for your photoshoot. It’s important that you find the right white balance, ISO, and aperture for your shoot.
Mannequins are cheap and convenient, but you don’t actually want your final product image to include a mannequin head. Customers can find mannequins alienating, or think that you’ve cut corners by not using a model. Your goal is to use the invisible mannequin technique to show the hat floating on its own.
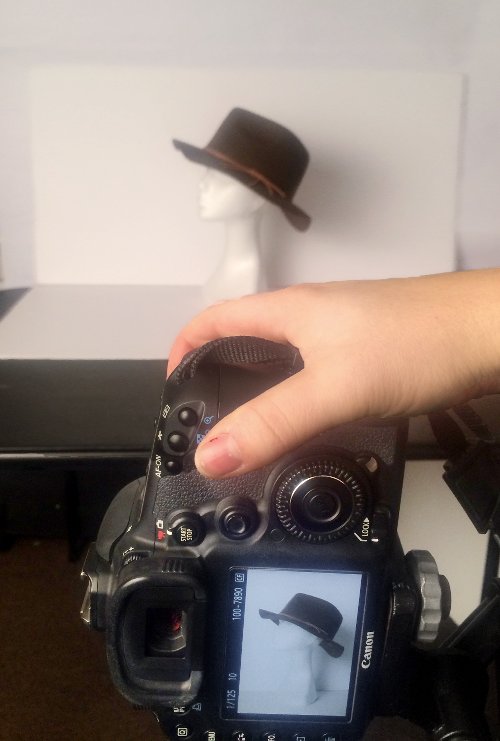
Use a DSLR with manual settings to capture your image.
To create the 3D invisible mannequin effect, you must photograph your hat on the mannequin and then without.
First, shoot your hat on the mannequin. Position it straight on, so you can see somewhat underneath it. Next, remove the mannequin while keeping the hat as close to its original place as possible, and shoot it while holding the hat in place. The two images will be combined in post-production processing.
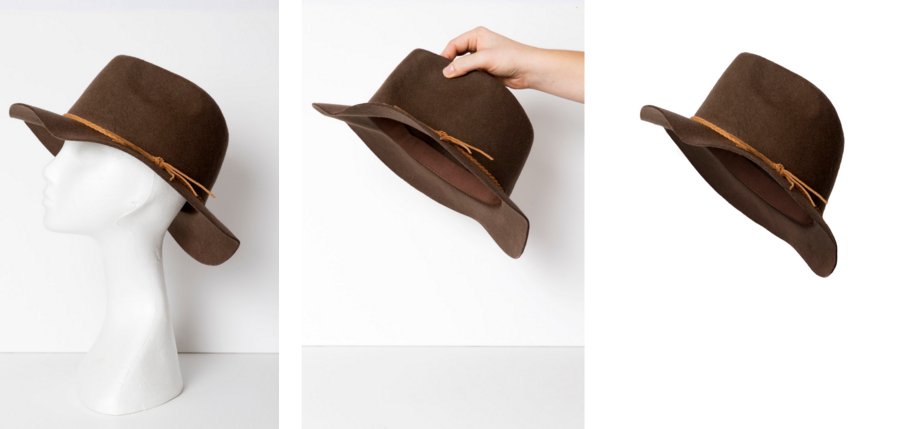
Shoot two images now so you can combine them later for an invisible mannequin effect.
Step 5: Optimize in Post-Production
Even with great photography, image editing is always a must. I suggest photo editing software like Adobe Photoshop, though there are many similar free programs. You can trial Photoshop and Lightroom free for 30 days using Adobe’s “Creative Cloud Photography” plan.
Your first step is retouching. The main things to look out for are blemishes on your model’s face, wrinkles on clothing or hat, heavy shadows on the face (especially under the brim of the hat), and minor changes in contrast. Basically, remove distractions and imperfections.
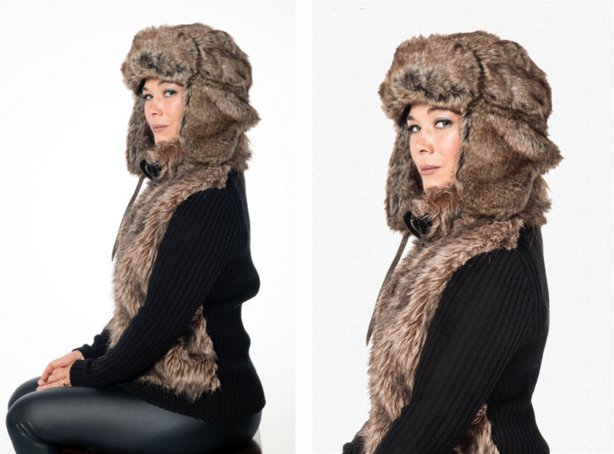
Crop and edit model images to bring the focus to your product.
In this retouching example on the right, notice how the back of her sweater has been evened out so it is less distracting as well as how the closer crop brings the focus to the hat. More before and after retouching examples here.
The contrast and sharpness also has been increased.
Model faces distract from your hats’ product images. Learn how to edit them out with this DIY…
If you shot with a mannequin you should now have two images that need to be stitched together.
Our invisible mannequin blog tutorial will give you the basics on using the technique, or you can follow a complete step by step guide with hat examples.
The invisible mannequin technique shows your hat on its own, three dimensionally.
We Can Help
Pixelz is the easiest way to optimize your product images for the web. Low prices, a 24 hour or less turnaround guarantee, and powerful online tools make post-production a breeze. It only takes a couple clicks to add invisible mannequin on to an order.
Notice how the back of her sweater has been evened out so it is less distracting as well as how the closer crop brings the focus to the hat. The contrast and sharpness has been increased, as well.
Consistent, clean, uncluttered images of your hat will improve sales.
Now you should be ready to post your image on your online store of choice and are guaranteed to have beautiful, compelling product photos to sell your hat.
By the end of your shoot and post-production, you should have images of your hat that look seamless and cohesive. Now add your images to your online store of choice, and enjoy the reward of increased sales that come from beautiful, compelling product images!